2. Setup and Installation
UniSite-xpi User Manual
2-15
If you are using transparent mode, set the communication parameters on
the serial port on the host as described above. After you have powered up
the programmer, you can change the parameters on the programmer’s
Remote port to match the communication parameters of the host.
The programmer is now connected to your terminal. Skip to the section
titled “Install the Base.”
More About Cables
You will need one 25-pin RS-232C serial cable for each piece of
equipment you will connect to the programmer.
Normally, when you connect equipment to a programmer, you must
match Data Terminal Equipment (DTE) to Data Communications
Equipment (DCE).
The programmer is compatible with both types of equipment and
automatically configures the Terminal and Remote ports to be compatible
with the equipment connected to it.
For more information, see Appendix B, “Making Your Own Cable.”
5. Install the Base
A Base is installed in a module that requires a Base (not all modules
require a Base). The Base serves as the interface between the device and
the programmer. Some Bases (such as the PLCC Base) are designed to be
used with MatchBook device carriers. The MatchBook device carrier
holds a device in place on the Base (MatchBooks are described on
page 2-31). Some bases (such as the PPI Base) use device adapters.
Follow the instructions in this section if the module installed on
UniSite-xpi requires a base. For additional information, refer to
Appendix A, “Using Modules,” and to “Install Devices” on page 2-30.
Installing a Base
Follow the procedure below to install a Base in the programmer.
Note: You can install and remove a Base with the power on as long as you are
not performing a device operation.
1.
Position the programmer so that the front points toward you.
2.
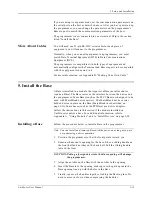
Examine the module opening for the base. It has a sliding handle on
the front half and notches on the back half. Pull the sliding handle
toward the front.
CAUTION: Poking a foreign object into the Base opening will damage
the programmer.
3.
Align the notches on the Base with the notches in the opening.
4.
Insert the Base into the opening, making sure the guide pins in the
Base opening line up with the holes in the Base.
5.
Finally, squeeze the handles together, locking the Base in place. Do
not use excessive force when compressing the handles.
Summary of Contents for UniSite-xpi
Page 2: ...981 0014 UniSite Programming System User Manual Also Covering Legacy UniSite Programmers ...
Page 72: ...2 Setup and Installation 2 42 UniSite xpi User Manual ...
Page 134: ...3 Getting Started 3 62 UniSite xpi User Manual ...
Page 238: ...5 Computer Remote Control 5 10 UniSite xpi User Manual ...
Page 296: ...6 Translation Formats 6 58 UniSite xpi User Manual ...
Page 402: ...Keep Current Subscription Service 6 Keep Current ...


