A. Using Modules
UniSite-xpi User Manual
A-13
3.
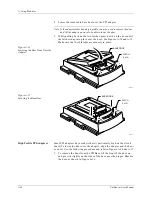
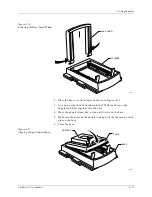
Finally, close the MatchBook and press the retaining latch forward
with your thumb until the latch snaps into place.
Installing a PGA
Device in a PGA
Base
The PGA Base can accommodate PGA packages up to 15 x 15 pin arrays.
The PGA Base contains a ZIF (zero insertion force) socket to hold the
PGA device and routes the signals from the compliant pins to the correct
socket pins. The PGA Base supports 28-, 44-, 68- 84-, and 88-pin PGAs.
Use the following procedure to insert a PGA device into the PGA Base.
Note: When you insert a PGA device into the PGA Base, pay particular
attention to the orientation and positioning of the device.
1.
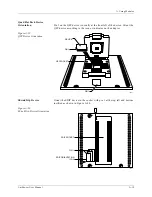
Install the PGA Base into PinSite. Unlock the PGA socket by lifting up
on the socket lever.
2.
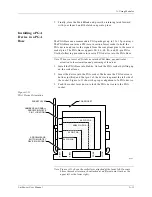
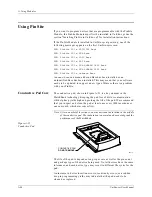
Insert the device into the PGA socket. Make sure the PGA device is
bottom justified and that pin 1 of the device is against the left side of
the socket. Figure A-11 shows the proper alignment of a PGA device.
3.
Push the socket lever down to lock the PGA device into the PGA
socket.
Note: Figure A-11 shows the socket lever attached at the lower left. On some
bases, the socket lever may be attached at a different point (such as the
upper left or the lower right).
Figure A-11
PGA Device Orientation
1566-5
FREE
LOCK
FREE
LOCK
ARROW MEANS
BOTTOM JUSTIFY
DEVICE IN SOCKET
NUMBERS AND SMALL
ARROWS INDICATE
PIN 1 LOCATIONS
68/84 PIN PGA
88 PIN PGA
44 PIN PGA
1
1
1
28 PIN PGA
1
SOCKET LEVER
PGA SOCKET
Summary of Contents for UniSite-xpi
Page 2: ...981 0014 UniSite Programming System User Manual Also Covering Legacy UniSite Programmers ...
Page 72: ...2 Setup and Installation 2 42 UniSite xpi User Manual ...
Page 134: ...3 Getting Started 3 62 UniSite xpi User Manual ...
Page 238: ...5 Computer Remote Control 5 10 UniSite xpi User Manual ...
Page 296: ...6 Translation Formats 6 58 UniSite xpi User Manual ...
Page 402: ...Keep Current Subscription Service 6 Keep Current ...


