DREAMWEAVER CS3
User Guide
152
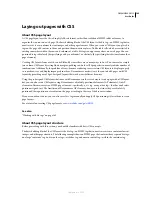
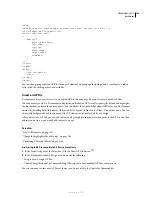
<head>
<meta http-equiv="Content-Type" content="text/html; charset=iso-8859-1" />
<title>Sample AP Div Page</title>
<style type="text/css">
<!--
#apDiv1 {
position:absolute;
left:62px;
top:67px;
width:421px;
height:188px;
z-index:1;
}
-->
</style>
</head>
<body>
<div id="apDiv1">
</div>
</body>
</html>
You can change properties for AP Divs (or any AP element) on your page, including x and y coordinates, z-index
(also called the stacking order), and visibility.
Insert an AP Div
Dreamweaver lets you easily create and position AP Divs on your page. You can also create nested AP Divs.
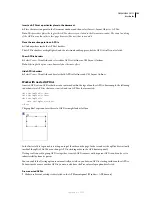
When you insert an AP Div, Dreamweaver displays an outline of the AP Div in Design view by default, and highlights
the block when you move the pointer over it. You can disable the visual aid that shows AP Div (or any AP element)
outlines by disabling both AP Element Outlines and CSS Layout Outlines in the View > Visual Aids menu. You can
also enable backgrounds and the box model for AP elements as a visual aid while you design.
After you create an AP Div, you can add content to it by simply placing your insertion point in the AP Div, and then
adding content just as you would add content to a page.
See also
“Select AP elements” on page 157
“Change the highlight color of div tags” on page 164
“Visualizing CSS layout blocks” on page 164
Draw a single AP Div or multiple AP Divs consecutively
1
In the Layout category of the Insert bar, click the Draw AP Div button
.
2
In the Document window’s Design view, do one of the following:
•
Drag to draw a single AP Div.
•
Control-drag (Windows) or Command-drag (Macintosh) to draw multiple AP Divs consecutively.
You can continue to draw new AP Divs as long as you do not release the Control or Command key.
September 4, 2007

