1-(40)
Basic Operations
Section 1-6
1-6-3
STEP 3: Setting Measurement Methods
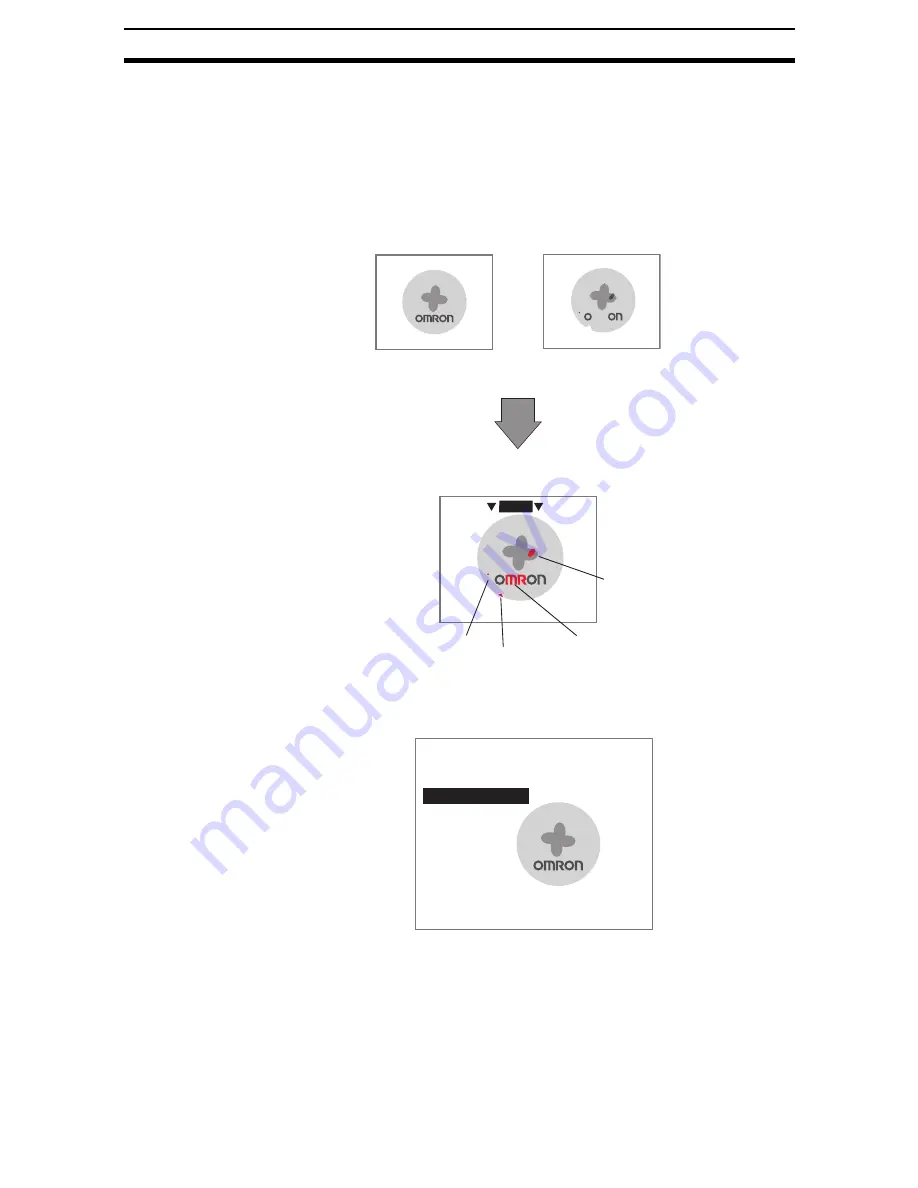
This section describes how to inspect for defects using the Fine Matching pro-
cessing item.
The registered image for an acceptable product and the input image are over-
laid (matched) and the differences are detected. This enables small defects in
the pattern and writing on the measurement object to be detected with a high
level of accuracy.
Use the following procedure to set Fine Matching for unit 1.
1.
Move the cursor to unit 1 and press the ENT Key.
NG
0.Scn 0
MON
OK Image
(registered)
Image to be
inspected
Images overlaid
Defects are displayed using the NG
color. Defects are judged by the area of
difference from the OK image.
Minute defect
Edge defect
Printing error
Pattern defect
0.Scn 0=SET=
ENT:Set SFT+ESC:Edit
0.Camera image
1.
Содержание F250-UME
Страница 2: ...80 SSOLFDWLRQ 6RIWZDUH 2SHUDWLRQ 0DQXDO 5HYLVHG HFHPEHU...
Страница 3: ...iii...
Страница 337: ...2 15 4 EC Defect Section 2 15 4 Press the ENT Key The settings will be registered and the screen in 1 will return...
Страница 531: ...2 23 4 ECM Search Section 2 23 4 Press the ENT Key The settings will be registered and the screen in 1 will return...
Страница 748: ...2 49 5 Display Line Display Box Display Circle and Display Cursor Section 2 49...
Страница 798: ...4 44 Memory Card Operations Section 4 6...
Страница 998: ...7 18 Menu Hierarchy Section 7 6...


