2-14-(8)
Density Defects
Section 2-14
STEP 2: Drawing Measurement Regions
Draw a figure in the section to be inspected.
CHECK
Do not include areas with marks and patterns in the measurement region. It
will not be possible to distinguish them from surface detects, and measure-
ment will not be performed properly.
CHECK
Position detection can be performed using algorithms for detecting defects.
When a measurement region is drawn, measurement is performed for the dis-
played image and the results are registered as the reference values (X and Y
coordinates of the position where the defect was found). This position
becomes the reference position, so be sure to place the measurement object
in the correct position before drawing the measurement region.
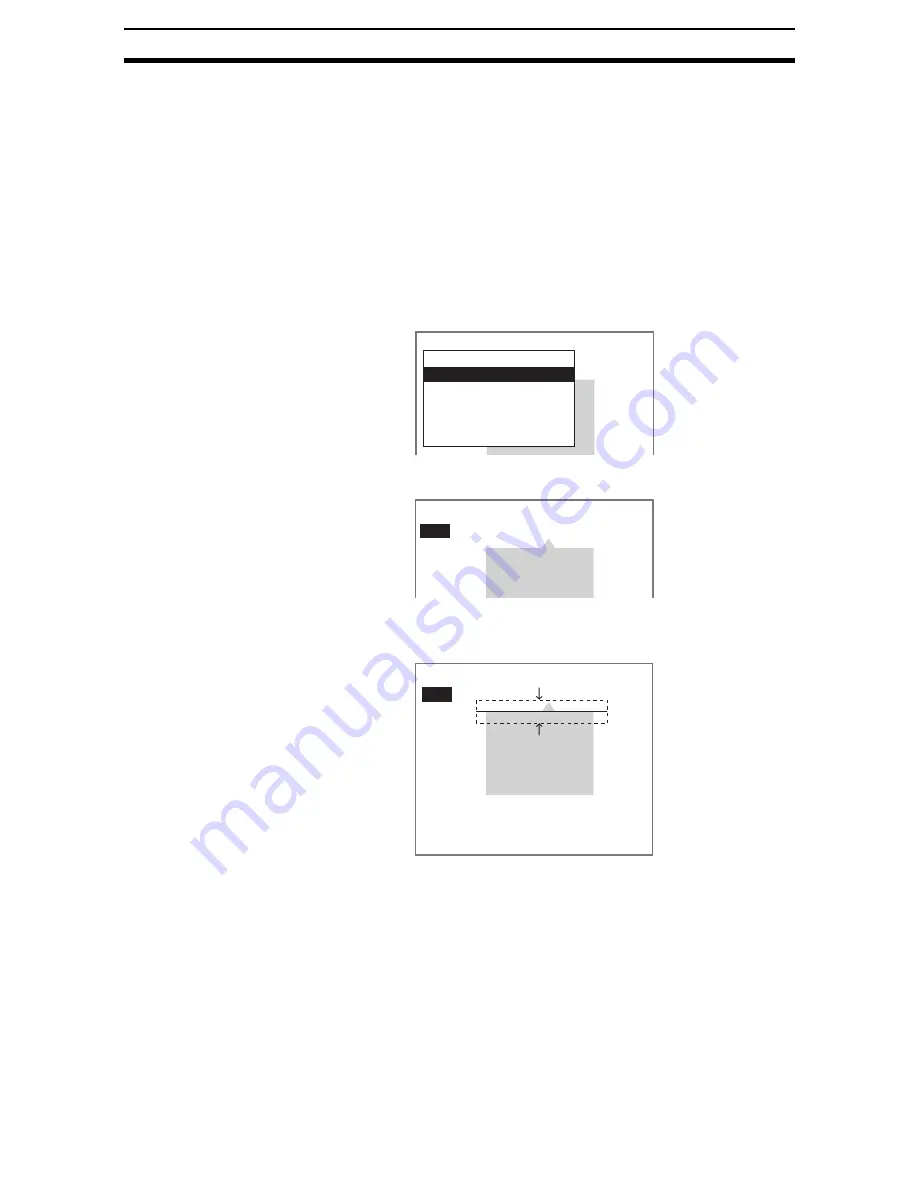
1.
Select Inspected region.
The Inspected Region Settings Screen will be displayed.
2.
Select New.
A display cursor will appear.
3.
Draw a figure in the region to be measured.
CHECK
Up to 3 figures can be drawn to create a region if Defect (region) has been
selected.
4.
Select End.
The settings will be registered and the screen in (1.) will return.
The measurement region and the positions where defects were located will
be displayed. The defects will be indicated by a display cursor.
Region0(Defect(Line))
Measurement conditions
Inspected region
Reference registration
Judgement conditions
Detailed conditions
Clear
Inspected region
New
End
64
[0]
Inspected region
New
End
Содержание F250-UME
Страница 2: ...80 SSOLFDWLRQ 6RIWZDUH 2SHUDWLRQ 0DQXDO 5HYLVHG HFHPEHU...
Страница 3: ...iii...
Страница 337: ...2 15 4 EC Defect Section 2 15 4 Press the ENT Key The settings will be registered and the screen in 1 will return...
Страница 531: ...2 23 4 ECM Search Section 2 23 4 Press the ENT Key The settings will be registered and the screen in 1 will return...
Страница 748: ...2 49 5 Display Line Display Box Display Circle and Display Cursor Section 2 49...
Страница 798: ...4 44 Memory Card Operations Section 4 6...
Страница 998: ...7 18 Menu Hierarchy Section 7 6...


