2-6-(29)
EC Position Compensation
Section 2-6
2-6-3-4
Multi-points
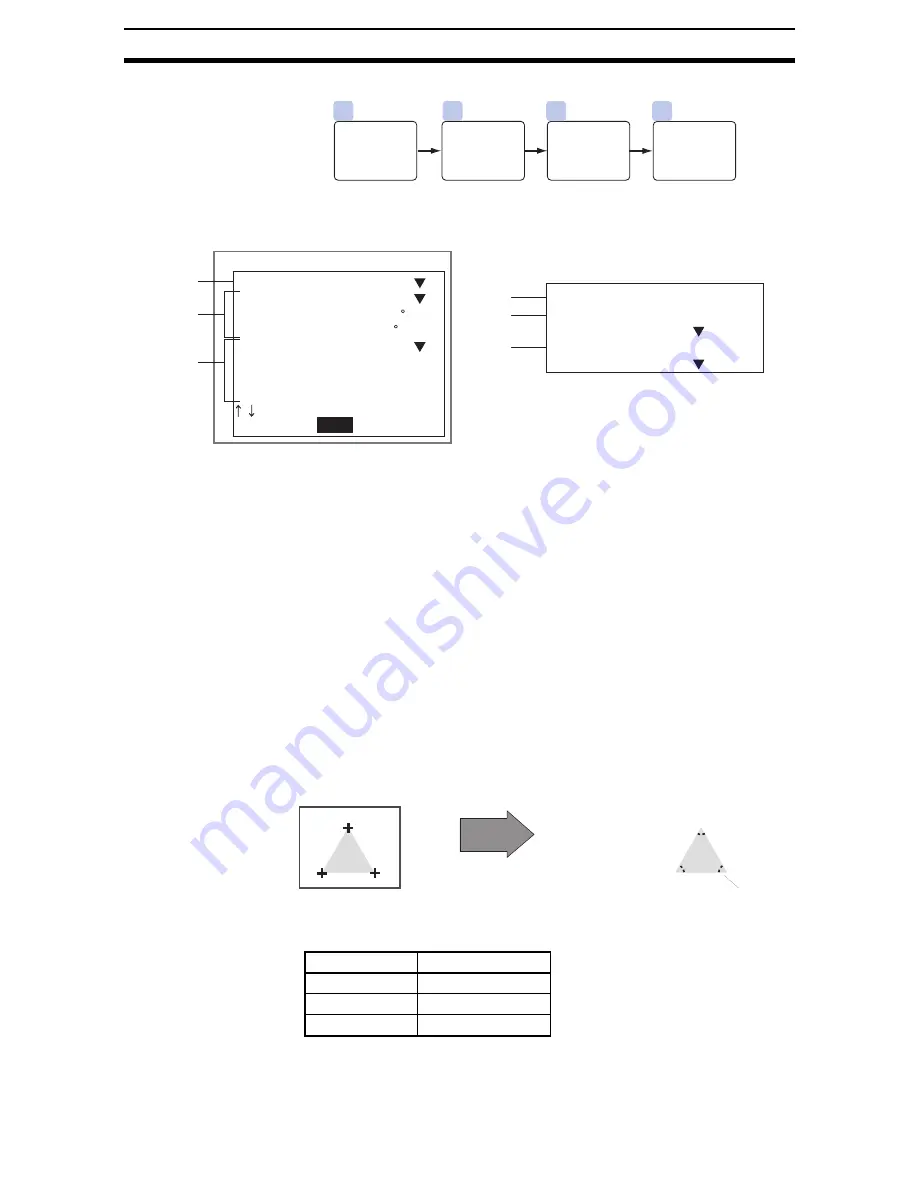
STEP 1: Setting Measurement Conditions
Set the conditions for searching for the positioning mark.
Note
1.
Select whether the positioning mark color will be white or black compared
to the background. (Black*, white)
The asterisk (*) indicates the default setting.
2.
Angles
Use the following settings to set the angle of intersection and thus find the
coordinates of only the desired intersection even though many lines exist
on the screen.
Specifying angle: Set to ON.
Range of angle: Angle of the section in the target color (If the target color
changes, change the angle setting too.)
Limits of angle:
Set the permissible range for the angle.
Example: When the range of the angle is set to 90
and
the limits of angle set to 10
, the cross point of lines that
intersect at between 80
and 100
will be found.
To find the coordinates of the cross point of lines regardless of their angle,
set Specifying angle to OFF. The settings for the angle will be ignored.
The asterisk (*) indicates the default setting.
2
3
1
4
Register
reference
position.
(As required)
Set condi-
tions for
obtaining
lines.
Set search
region.
Set mea-
surement
conditions.
End
Measurement conditions
Target color
Specifying angle
Range of angle
Limits of angle
Specifying length
Length 1
Limits of length 1
Length 2
:
:
:
:
:
:
:
:
Black
OFF
[ 90]
[10]
OFF
[100]
[ 80:120]%
[ 50]
Note 2
Note 1
Note 3
Limits of length 2
Sorting method
X Ascending order
Defined side of
θ
Midline of corner
:
:
:
[ 80:120]%
Note 4
Note 3
Note 5
Setting item
Selections
Specifying angle
ON, OFF*
Range of angle
0 to 359
Limits of angle
0 to 99 (10*)
60
°
Example: To extract the 3
cross points shown in the
following diagram
Set the Target color to black,
the Specifying angle to ON,
and the Range of angle to 60
.
Содержание F250-UME
Страница 2: ...80 SSOLFDWLRQ 6RIWZDUH 2SHUDWLRQ 0DQXDO 5HYLVHG HFHPEHU...
Страница 3: ...iii...
Страница 337: ...2 15 4 EC Defect Section 2 15 4 Press the ENT Key The settings will be registered and the screen in 1 will return...
Страница 531: ...2 23 4 ECM Search Section 2 23 4 Press the ENT Key The settings will be registered and the screen in 1 will return...
Страница 748: ...2 49 5 Display Line Display Box Display Circle and Display Cursor Section 2 49...
Страница 798: ...4 44 Memory Card Operations Section 4 6...
Страница 998: ...7 18 Menu Hierarchy Section 7 6...


