System Overview
2-81
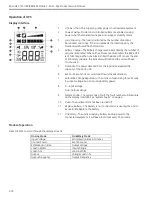
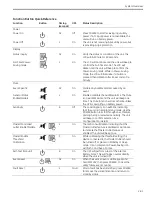
Function Button Quick-Reference
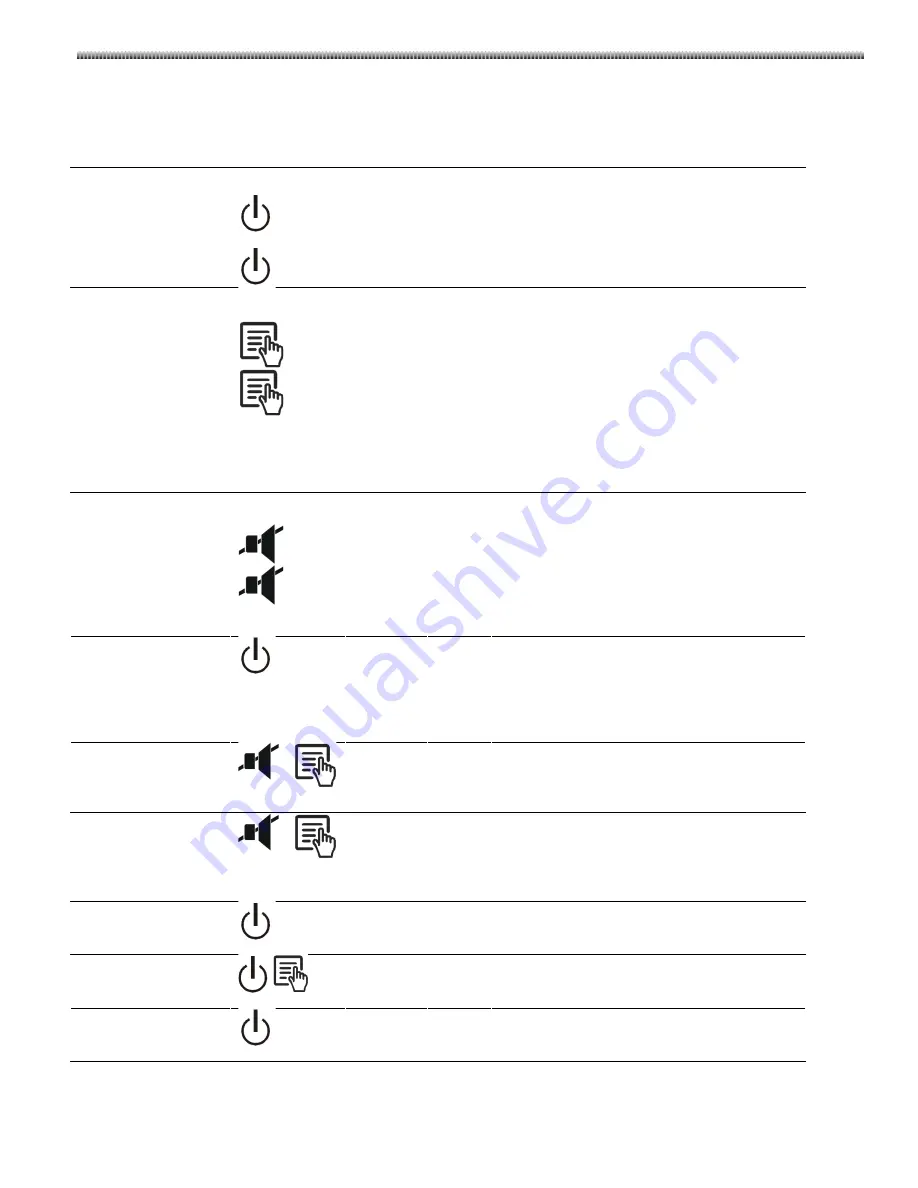
Function
Button
Timing
(seconds)
UPS
Status Description
Power
Power On
0.2
Off
Press POWER to start receiving input utility
power. If A/C input power is not available, the
unit will run on battery power.
Power Off
2
On
The unit is not receiving input utility power, but
is providing surge protection.
Display
Status Inquiry
0.2
On
Verify the status or condition of the unit. The
LCD will illuminate for 60 seconds.
Full-Time/Power-
Saving mode
2
On
The LCD will illuminate and the unit will beep to
confirm the Full-Time mode. The LCD will
darken and the unit will beep to confirm the
Power-Saving mode. While in Power-Saving
Mode, the LCD will illuminate if a button is
pressed, then darkens after 60 seconds of no
activity.
Mute
Event Specific
0.2
On
Disable any audible alarms caused by an
event.
General Status
Enable/Disable
2
On
Enable or disable the audible alarms. The Mute
icon will illuminate and the unit will beep one
time. The Mute function will not activate unless
the UPS is operating on battery power.
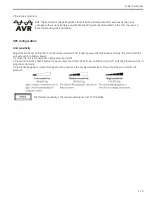
Sensitivity
6
Off
The Load Capacity icon will blink, indicating
that the unit is in programming mode. Use the
POWER button to scroll through Low, Medium,
and High, stop at selected sensitivity. The unit
will beep to confirm selection. See
Configuration for details.
Master/Controlled
outlet Enable/Disable
2
On
The leaf icon will darken indicating that the
Master Outlet feature is disabled or illuminate
to indicate the Master Outlet feature is
enabled. The unit will beep once.
Master/Enable
Threshold
Calibration
6
On
While calibrating the threshold setting, the
device connected to the Master Outlet should
be turned off or placed in Standby or Sleep
mode. Upon completion, Power-Saving icon
will flash 3 and beep 3 times.
Self-Test (manual)
6
On
The UPS will perform a test of the internal
battery. Note: This will happen automatically
when the unit is turned ON.
Event Reset
0.2
On
When the Event screen is visible, press and
hold DISPLAY, then press POWER, to clear the
utility failure event counter.
Fault Reset
2
Fault
After a fault has been identified, press POWER
to remove the visual indication and return to
standby status.
Summary of Contents for Brivo OEC 715
Page 2: ......
Page 19: ...Chapter1 Introduction and Safety...
Page 41: ...Introduction and Safety 23 46 54 20 18 26...
Page 55: ...Chapter2 System Overview...
Page 137: ...Chapter3 Installation...
Page 212: ...Chapter4 Calibration...
Page 275: ...Brivo OEC 715 785 865 Mobile C Arm X Ray Product Service Manual 4 64...
Page 284: ...Chapter5 Software...
Page 326: ...Software 5 43 2 Click on install to continue 3 Click Next to continue...
Page 335: ...Chapter6 Troubleshooting...
Page 408: ...Chapter7 Replacement...
Page 418: ...Replacement 7 11 166...
Page 488: ...Chapter8 Periodic Maintenance...
Page 502: ...Periodic Maintenance 8 15...
Page 505: ...Chapter9 Technical Reference...
Page 521: ...Technical Reference 9 17 Vertical configuration 1 5m Vertical configuration 1m...
Page 526: ...11 Appendix System Schematics...

