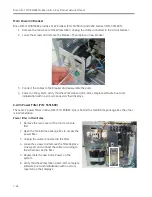
Brivo OEC 715/785/865 Mobile C-Arm X-Ray Product Service Manual
7-60
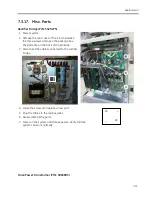
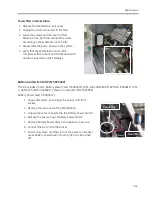
WKS Power on Button (5085810)
1.
Power off system, and unplug the power cord form
socket.
2.
Remove the rear and side covers of the Workstation.
3.
Unplug the connector to connect WKS power on
button.
4.
Release the secure ring and lock handle of WKS
power on button to Remove WKS Power Switch.
5.
Replace a new one and connect the connector.
6.
Assemble the Workstation front cover.
7.
Connect the AC cord to the socket. Verify that Power
on Button is available.
8.
Assemble all other Workstation covers.
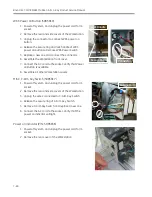
MISC, C-Arm Key Switch (5085817)
1.
Power off system, and unplug the power cord form
socket.
2.
Remove the rear and side covers of the Workstation.
3.
Unplug the wires connected to C-Arm Key Switch.
4.
Release the secure ring of C-Arm Key Switch.
5.
Remove C-Arm Key Switch and replace a new one.
6.
Connect the AC cord to the socket. Verify that the
power on indicator will light.
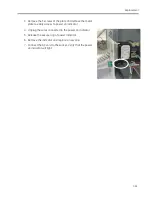
Power on Indicator (P/N: 5085836)
1.
Power off system, and unplug the power cord form
socket.
2.
Remove the rear cover of the Workstation.
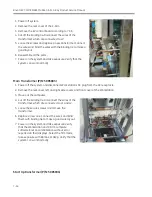
Lock Handle
Secure Ring
Secure Ring
Connector
Summary of Contents for Brivo OEC 715
Page 2: ......
Page 19: ...Chapter1 Introduction and Safety...
Page 41: ...Introduction and Safety 23 46 54 20 18 26...
Page 55: ...Chapter2 System Overview...
Page 137: ...Chapter3 Installation...
Page 212: ...Chapter4 Calibration...
Page 275: ...Brivo OEC 715 785 865 Mobile C Arm X Ray Product Service Manual 4 64...
Page 284: ...Chapter5 Software...
Page 326: ...Software 5 43 2 Click on install to continue 3 Click Next to continue...
Page 335: ...Chapter6 Troubleshooting...
Page 408: ...Chapter7 Replacement...
Page 418: ...Replacement 7 11 166...
Page 488: ...Chapter8 Periodic Maintenance...
Page 502: ...Periodic Maintenance 8 15...
Page 505: ...Chapter9 Technical Reference...
Page 521: ...Technical Reference 9 17 Vertical configuration 1 5m Vertical configuration 1m...
Page 526: ...11 Appendix System Schematics...

