Installation
3-39
CAUTION
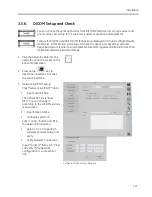
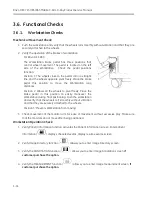
CD/DVD check:
CD/DVD is an option. This procedure is just performed on the system with this option.
1.
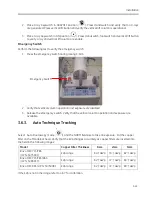
Place a blank CD or DVD in the in the CD/DVD drive and wait for the green LED on the front of the
drive to turn off.
2.
Press the Image Directory key (
)
on the keyboard to open the Image Directory. Make sure
the Image Directory has some saved images. Otherwise, then save some images by taking test
shots.
3.
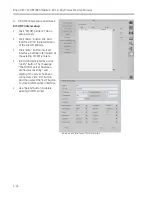
Select the “Export” button on the “Image Directory” screen. The “Export screen lists the available
print and storage devices.
Select CD/DVD and click the “OK” button to confirm your selection.
4.
Click “Option…” button. Select “Include Viewer” in copy option and click “OK” button.
5.
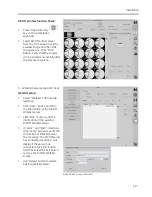
Select one or more images from the Image Directory.
6.
Click “Export” button on the Image Directory screen to copy the queued image.
7.
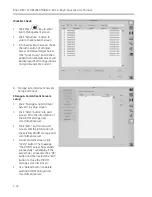
Insert the CD/DVD to other computer. The media viewer will run automatically. Use the viewer to
confirm that the image was written to the CD/DVD successfully.
3.6.2.
C-Arm Checks
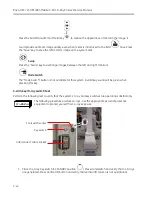
Mechanical Movement Check:
Perform the following mechanical inspections and checks.
Wigwag Movement Check:
1.
Release the Wigwag brake.
2.
Move the mechanics through the entire operational range. Verify Wigwag for ease of movement
without excessive play.
3.
Verify that locking the Wigwag brake prevents Wigwag motion.
Horizontal Movement Check:
1.
Unlock Horizontal brake and fully extend and retract the Horizontal Cross-Arm.
2.
Verify that the Cross-Arm moves smoothly and quietly through the bearing block without
excessive play.
3.
Place the Cross-arm brake in the lock position.
4.
Verify that the cross-arm does not move.
Make sure cross arm is fully retracted and brake is set before moving C-Arm. Equipment
damage or personal injury may otherwise result.
C-Arm Orbital Rotation Check:
When you release the orbital movement brake, place your other hand on the C-Arm so
that you have control of the C-Arm’s movement.
CAUTION
Summary of Contents for Brivo OEC 715
Page 2: ......
Page 19: ...Chapter1 Introduction and Safety...
Page 41: ...Introduction and Safety 23 46 54 20 18 26...
Page 55: ...Chapter2 System Overview...
Page 137: ...Chapter3 Installation...
Page 212: ...Chapter4 Calibration...
Page 275: ...Brivo OEC 715 785 865 Mobile C Arm X Ray Product Service Manual 4 64...
Page 284: ...Chapter5 Software...
Page 326: ...Software 5 43 2 Click on install to continue 3 Click Next to continue...
Page 335: ...Chapter6 Troubleshooting...
Page 408: ...Chapter7 Replacement...
Page 418: ...Replacement 7 11 166...
Page 488: ...Chapter8 Periodic Maintenance...
Page 502: ...Periodic Maintenance 8 15...
Page 505: ...Chapter9 Technical Reference...
Page 521: ...Technical Reference 9 17 Vertical configuration 1 5m Vertical configuration 1m...
Page 526: ...11 Appendix System Schematics...

