


Chapter 46 Syslog Setup
OLT2406 User’s Guide
382
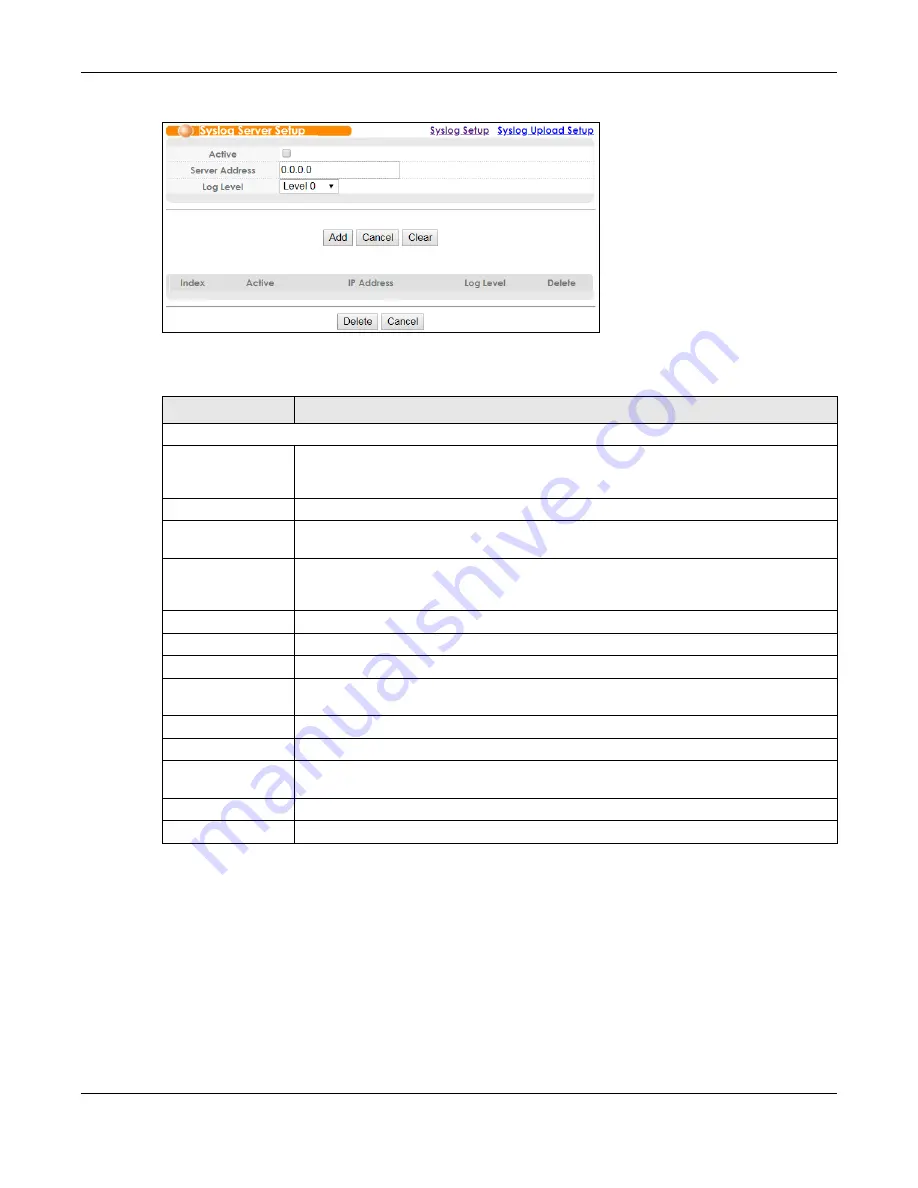
Figure 239
Management > Syslog > Syslog Server Setup
The following table describes the labels in this screen.
46.4 Syslog Upload Setup
Click
Management
>
Syslog > Syslog Upload Setup
in the navigation panel to display this screen. Use this
screen to set up the time when the file with log messages will be uploaded to an external syslog server.
You can also set up the login information on an external syslog server.
Table 182 Management > Syslog > Syslog Server Setup
LABEL
DESCRIPTION
Syslog Server Setup
Active
Select this check box to have the OLT send logs to this syslog server immediately when these
logs are generated. Clear the check box if you want to create a syslog server entry but not
have the device send logs to it (you can edit the entry later).
Server Address
Enter the IPv4 address of the syslog server.
Log Level
Select the severity level(s) of the logs that you want the device to send to this syslog server.
The lower the number, the more critical the logs are.
Add
Click
Add
to save your changes to the OLT’s run-time memory. The OLT loses these changes
if it is turned off or loses power, so use the
Save
link on the top navigation panel to save your
changes to the non-volatile memory when you are done configuring.
Cancel
Click
Cancel
to begin configuring this screen afresh.
Clear
Click
Clear
to return the fields to the factory defaults.
Index
This is the index number of a syslog server entry. Click this number to edit the entry.
Active
This field displays
Yes
if the device is to send logs to the syslog server.
No
displays if the
device is not to send logs to the syslog server.
IP Address
This field displays the IP address of the syslog server.
Log Level
This field displays the severity level of the logs that the device is to send to this syslog server.
Delete
Select an entry’s check box to select a specific entry. Otherwise, select the check box in the
table heading row to select all entries.
Delete
Click
Delete
to remove the selected entry(ies).
Cancel
Click
Cancel
to begin configuring this screen afresh.
Summary of Contents for OLT2406
Page 4: ...Document Conventions OLT2406 User s Guide 4 Desktop Laptop Switch IP Phone Smart T V...
Page 32: ...Table of Contents OLT2406 User s Guide 32 Index 758...
Page 33: ...33 PART I Introduction and Hardware Installation...
Page 63: ...63 PART II Web Configurator...
Page 179: ...Chapter 21 Classifier OLT2406 User s Guide 179 Figure 112 Classifier Example...
Page 182: ...Chapter 22 Policy Rule OLT2406 User s Guide 182 Figure 113 Advanced Application Policy Rule...
Page 186: ...Chapter 22 Policy Rule OLT2406 User s Guide 186 Figure 114 Policy Example...
Page 248: ...Chapter 28 Loop Guard OLT2406 User s Guide 248 Figure 151 Advanced Application Loop Guard...
Page 393: ...393 PART III CLI Commands...
Page 581: ...Chapter 78 VoIP OLT2406 User s Guide 581...
Page 725: ...725 PART IV Troubleshooting Specifications Appendices and Index...


