User Guide for FibeAir® IP-20 All-Outdoor Products, CeraOS 10.5
Page 403 of 825
Ceragon Proprietary and Confidential
10 Click
Apply
to save your settings.
11 Click
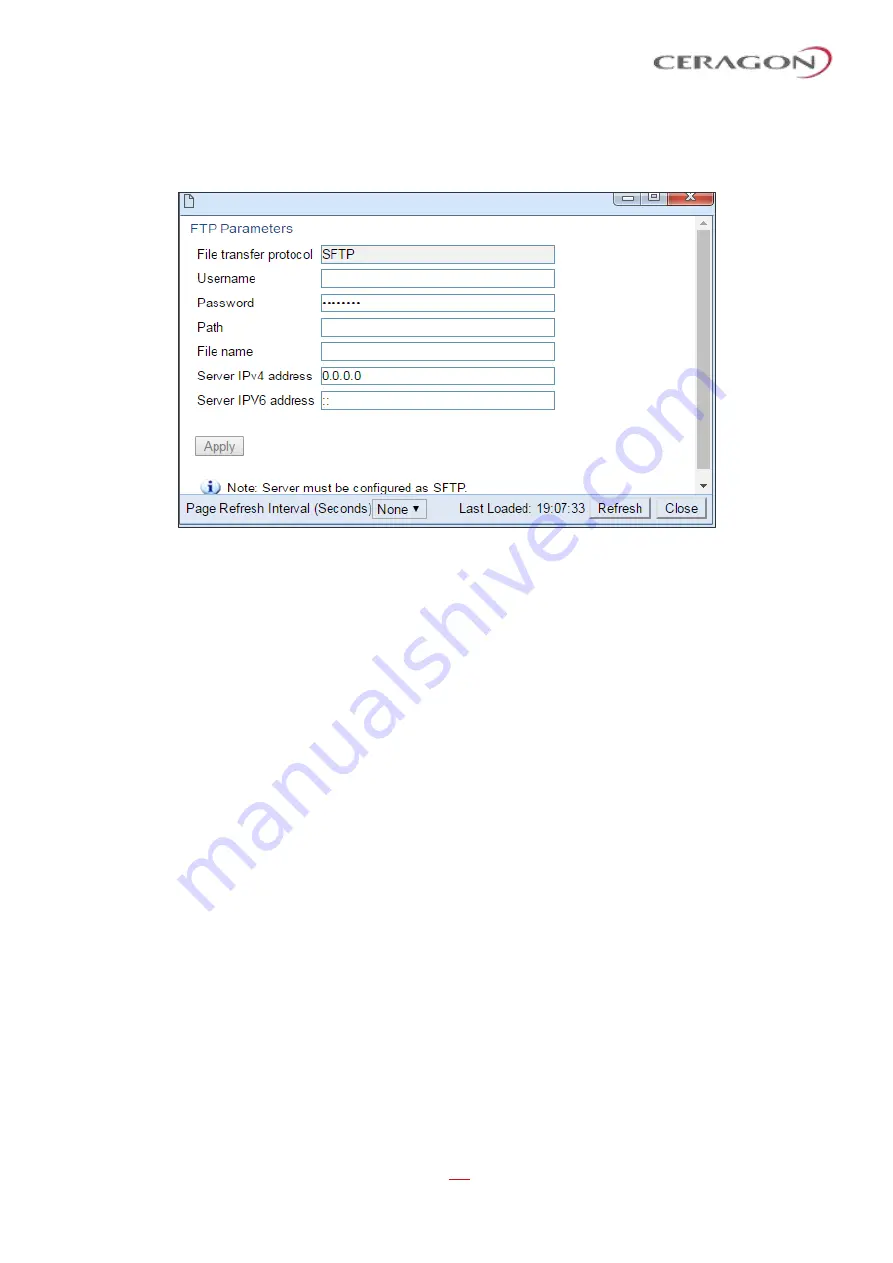
FTP Parameters
to display the FTP Parameters page.
Figure 316: FTP Parameters Page (Security Certificate Request)
12 In the
Username
field, enter the user name you configured in the SFTP server.
13 In the
Password
field, enter the password you configured in the SFTP server. If
you did not configure a password for your SFTP user, simply leave this field
blank.
14 In the
Path
field, enter the directory path to which you are uploading the CSR.
Enter the path relative to the SFTP user's home directory, not the absolute
path. If the location is the home directory, it should be left empty. If the
location is a sub-folder under the home directory, specify the folder name. If
the shared folder is "C:\", this parameter can be left empty or populated with
"//".
15 In the
File Name
field, enter the name you want to give to the exported CSR.
16 If the IP address family is configured to be IPv4, enter the IPv4 address of the
PC or laptop you are using as the SFTP server in the
Server IP address
field.
Defining the IP Protocol Version for Initiating Communications
17 If the IP address family is configured to be IPv6, enter the IPv6 address of the
PC or laptop you are using as the SFTP server in the
Server IPv6 address
field.
Defining the IP Protocol Version for Initiating Communications
18 Click
Apply
, then
Close
, to save the FTP parameters and return to the Security
Log Upload page.
19 Click
Generate & Upload
. The file is generated and uploaded.
The
Creation/Upload status
field displays the status of any pending CSR
generation and upload. Possible values are:
•
Ready
–
The default value, which appears when CSR generation and upload is
in progress.
•
File-in-transfer
–
The upload operation is in progress.
•
Success
–
The file has been successfully uploaded.


