User Guide for FibeAir® IP-20 All-Outdoor Products, CeraOS 10.5
Page 313 of 825
Ceragon Proprietary and Confidential
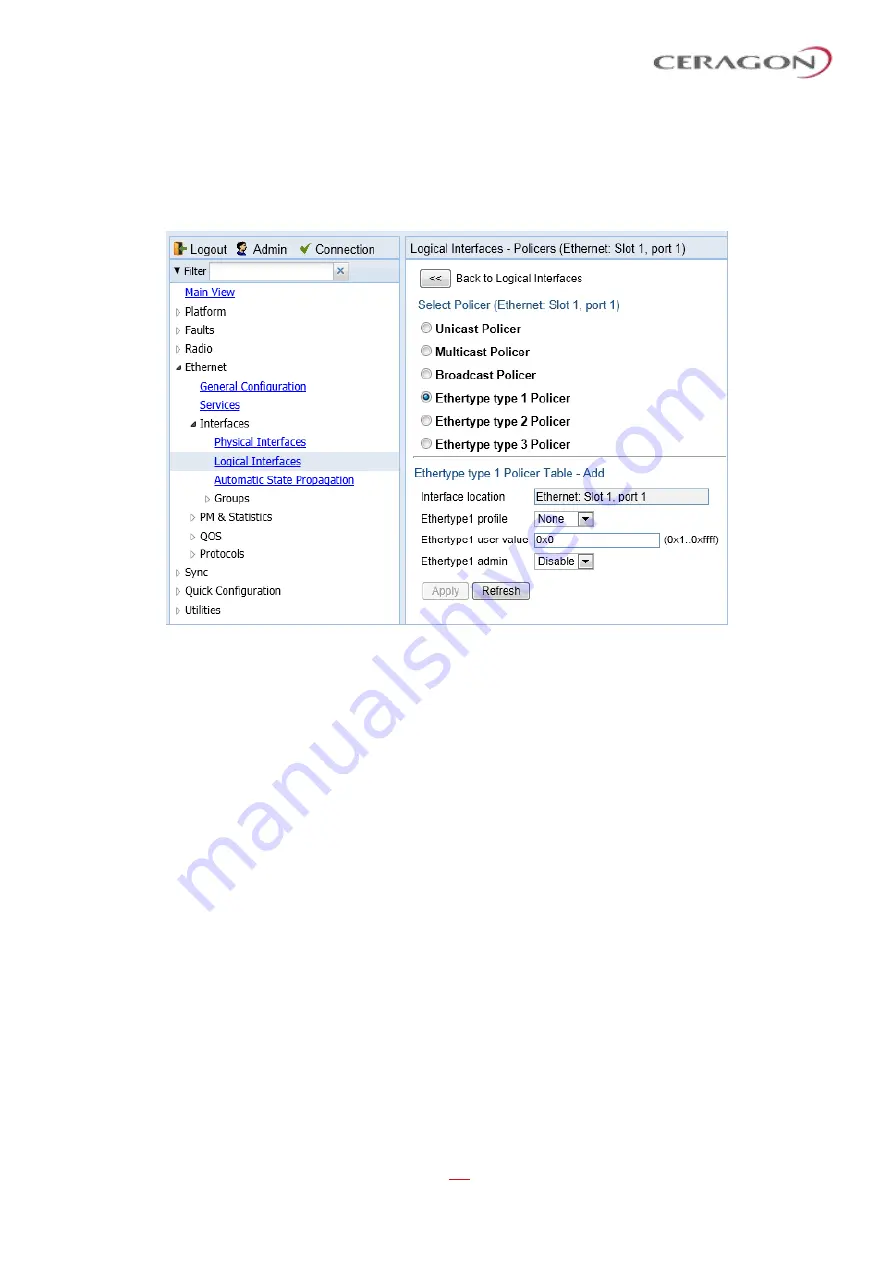
2 Select the interface in the Ethernet Logical Port Configuration Table and click
Policers
. The Policers page opens. By default, the Policers page opens to the
Unicast Policer table (
3 Select
Ethertype type 1 Policer
. The Ethertype type 1 Policer table appears.
Figure 236: Logical Interfaces
–
Policers Page
–
Ethertype Policer
4 In the
Ethertype 1 profile
field, select a profile from the policer profiles
defined in the system. The
Ethertype 1 profile
drop-down list includes the ID
and description of all defined profiles.
5 In the
Ethertype 1 user value
field, enter the Ethertype value to which you
want to apply this policer. The field length is 4 nibbles (for example, 0x0806 -
ARP).
6 In the
Ethertype 1 admin
field, select
Enable
to enable policing on the logical
interface for the specified ethertype, or
Disable
to disable policing on the
logical interface for the specified ethertype.
7 Click
Apply
.
8 To assign policers to additional Ethertypes, select
Ethertype type 2 Policer
and
Ethertype type 3 Policer
and repeat the steps above.
7.3.4
Configuring the Ingress and Egress Byte Compensation
You can define the ingress and egress byte compensation value per logical
interface. The policer attached to the interface uses these values to compensate
for Layer 1 non-effective traffic bytes.
To define the ingress byte compensation value for a logical interface:
1 Select
Ethernet > Interfaces > Logical Interfaces
. The Logical Interfaces page
opens (


