User Guide for FibeAir® IP-20 All-Outdoor Products, CeraOS 10.5
Page 387 of 825
Ceragon Proprietary and Confidential
Step 3
–
Creating a Network Policy
Create a network policy for each of the three groups you created:
Radius_Advanced, Radius_Normal, Radius_Viewer. That is, follow the instructions
in this section, for each of the three groups.
To create a network policy:
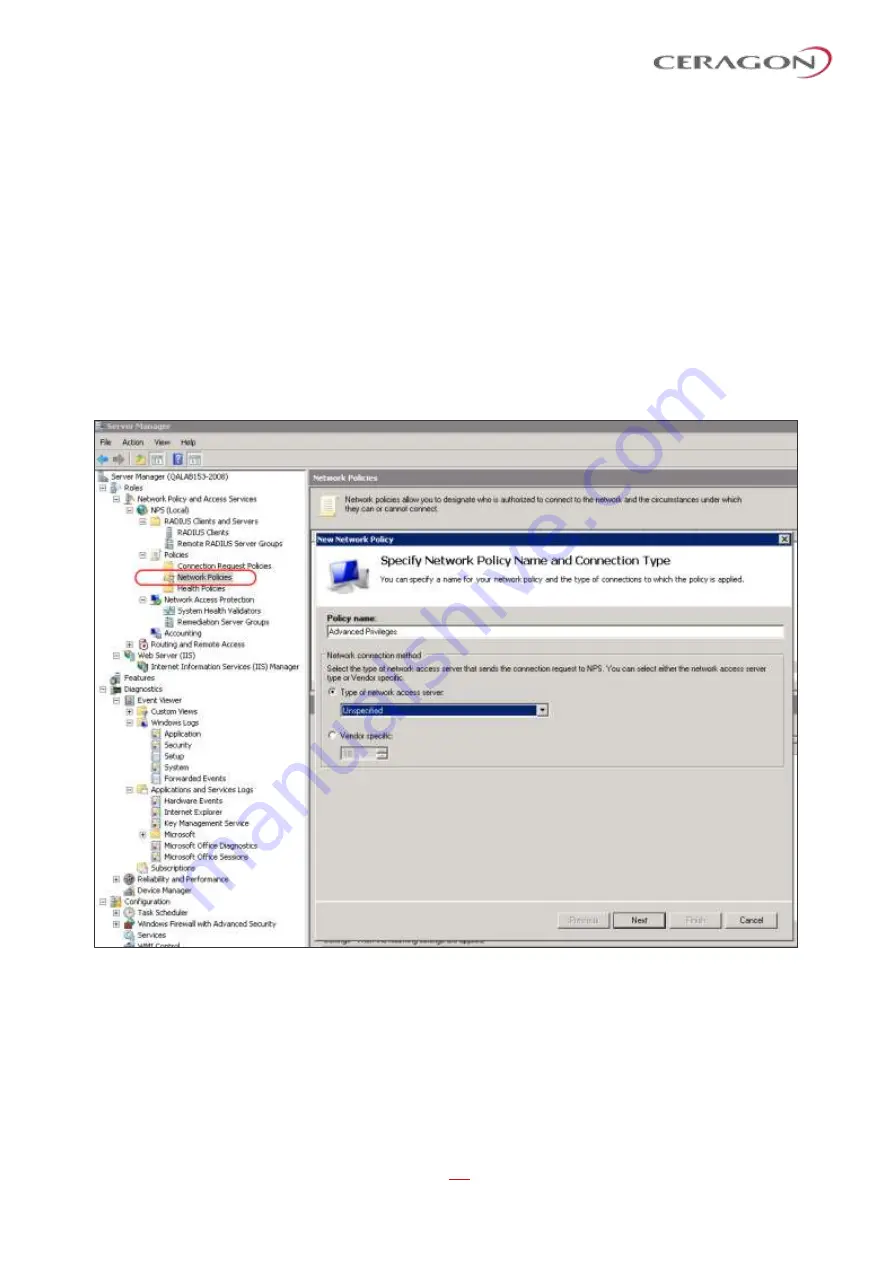
1 In the Server Manager, navigate to Roles > Network Policy and Access Service
> NPS (Local) > Policies > Network Policies.
2 Right-click
Network Policies
, and select
New
. The New Network Policy wizard
appears.
3 In the specify Network Policy Name and Connection Type, give the policy a
descriptive name, indicating whether it is a policy for the Advanced, the
Normal or the Viewer group.
Figure 301: Create Network Policy
–
Specify Name and Connection Type
4 Click
Next
.
5 In the Specify Conditions window, click
Add.
6 In the Select Condition window that appears, select the
User Groups
condition
and click
Add
.


