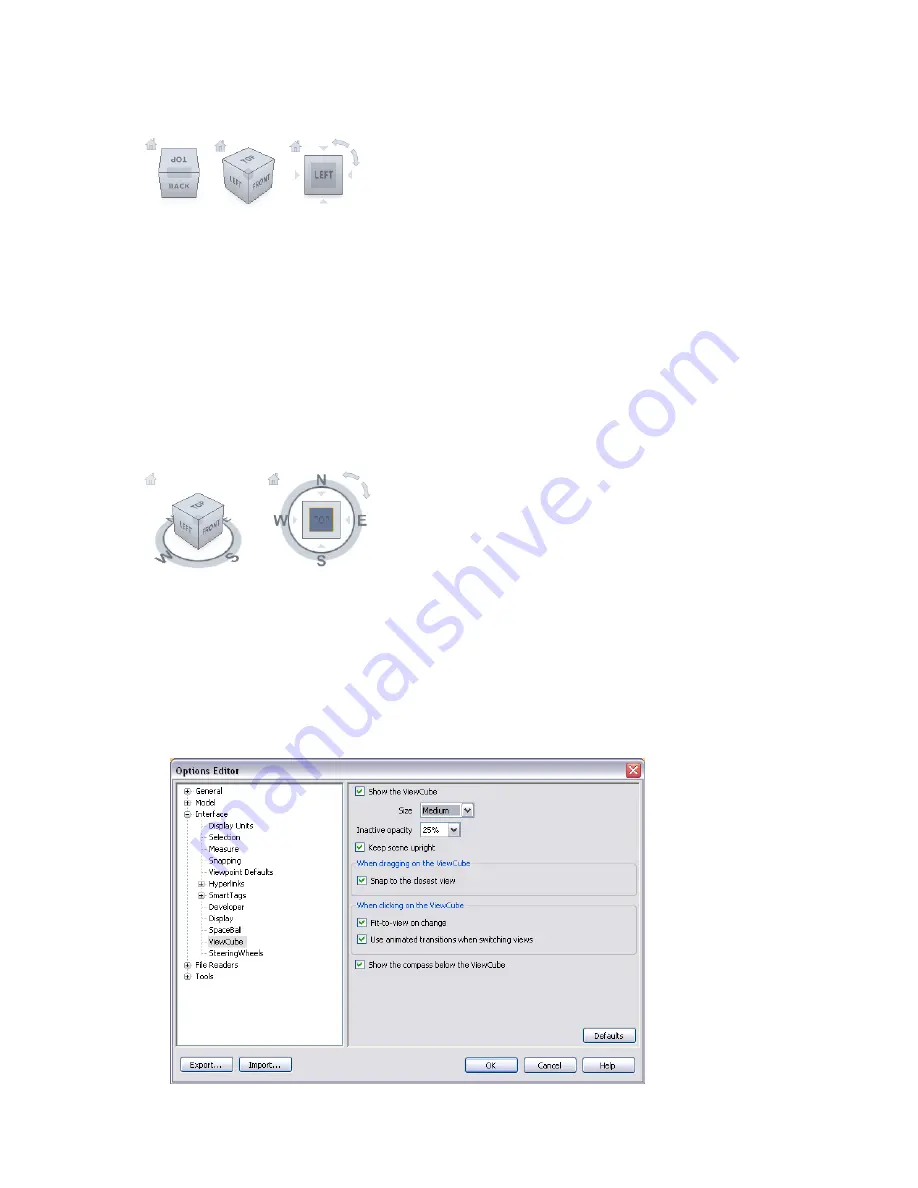
When you display the ViewCube, it is shown in the top- right corner of the Scene Area over the model in an
inactive state. While the ViewCube tool is inactive, it provides visual feedback about the current viewpoint of
the model as view changes occur. When the cursor is positioned over the ViewCube tool, it becomes active; you
can switch to one of the available preset views, roll the current view, or change to the Home view of the model.
Control the Appearance of the ViewCube
The ViewCube tool is displayed in one of two states: inactive and active. When the ViewCube tool is inactive,
it appears partially transparent by default so that it does not obscure the view of the model. When active, it is
opaque and may obscure the view of the objects in the current view of the model.
In addition to controlling the opacity level of the ViewCube when it is inactive, you can also control its size,
and the display of the compass. The settings used to control the appearance of the ViewCube are located in the
Options Editor.
Use the Compass
The compass is displayed below the ViewCube tool and indicates which direction North is defined for the model.
You can click a cardinal direction letter on the compass to rotate the model, or you can click and drag one of
the cardinal direction letters or the compass ring to interactively rotate the model around the center of the view.
To display or hide the ViewCube
■
Click View
➤
Head-Up Display
➤
ViewCube.
To control the size of the ViewCube
1
Right-click the ViewCube tool, and click ViewCube Options.
2
In the Options Editor, the ViewCube page under the Interface node, select an option from the Size drop-down
list.
ViewCube | 153
Summary of Contents for 507B1-90A211-1301 - NavisWorks Manage 2010
Page 1: ...Autodesk Navisworks Manage 2010 User Guide March 2009 ...
Page 12: ...xii Contents ...
Page 14: ...2 Part 1 Welcome to Autodesk Navisworks Manage 2010 ...
Page 64: ...52 Chapter 3 Installation ...
Page 97: ...Get a Whole Project View 85 ...
Page 98: ...86 Part 2 Get a Whole Project View ...
Page 136: ...124 Chapter 5 Work with Files ...
Page 178: ...To toggle ViewCube Click View Head Up Display ViewCube 166 Chapter 6 Explore Your Model ...
Page 262: ...250 Chapter 9 Use Viewpoints and Sectioning Modes ...
Page 270: ...258 Chapter 11 Work Within a Team ...
Page 282: ...270 Chapter 12 Share Data ...
Page 346: ...334 Chapter 14 Create Photorealistic Visualizations ...
Page 460: ...448 Chapter 17 Autodesk Navisworks Reference ...
Page 466: ...454 Glossary ...


