Use Presenter Texture Space
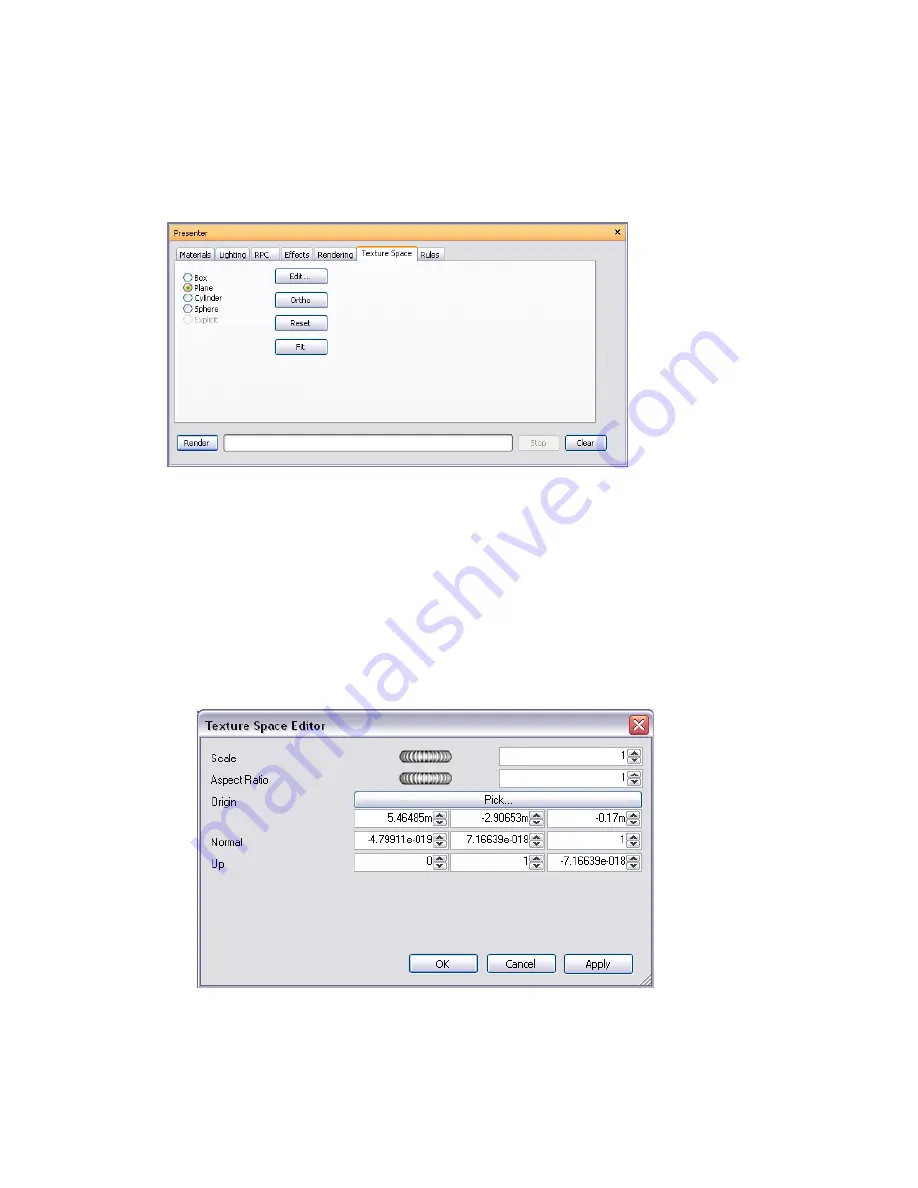
Texture space describes the way in which a texture is applied to an item. For example, applying a cylindrical
texture space to a pipe will cause textures on the pipe to be rendered more naturally. An item's texture space
may have been assigned from the original CAD application and brought through from the native CAD file, or
set up within Presenter with the options of Box, Plane, Cylinder, or Sphere. The Explicit option allows a
user-defined texture space to be applied and will be available if the item had a texture space applied to it in the
original CAD application. Each texture space option applies some imaginary bounding geometry around the
item and "shrink-wraps" the texture as best it can to the geometry underneath this bounding geometry.
If you've applied a texture to an item, Presenter will attempt to work out the best fit from the four texture spaces
available. If this isn't what you intended, then you can then edit the texture space.
To edit texture space
1
Select the item (see “
Interactive Geometry Selection
” on page 179 for more information) and go to the Texture
Space tab in the Presenter window to choose another texture space.
Alternatively, right-click an item which has a texture applied to it and click a new texture space on the
Presenter
➤
Texture Space shortcut menu.
2
You can fine-tune an item's texture space further by clicking the Edit button on the Texture Space tab of
the Presenter window. The relevant Texture Space Editor will appear.
Either the plane texture space editor:
Or the cylindrical texture space editor:
328 | Chapter 14 Create Photorealistic Visualizations
Summary of Contents for 507B1-90A211-1301 - NavisWorks Manage 2010
Page 1: ...Autodesk Navisworks Manage 2010 User Guide March 2009 ...
Page 12: ...xii Contents ...
Page 14: ...2 Part 1 Welcome to Autodesk Navisworks Manage 2010 ...
Page 64: ...52 Chapter 3 Installation ...
Page 97: ...Get a Whole Project View 85 ...
Page 98: ...86 Part 2 Get a Whole Project View ...
Page 136: ...124 Chapter 5 Work with Files ...
Page 178: ...To toggle ViewCube Click View Head Up Display ViewCube 166 Chapter 6 Explore Your Model ...
Page 262: ...250 Chapter 9 Use Viewpoints and Sectioning Modes ...
Page 270: ...258 Chapter 11 Work Within a Team ...
Page 282: ...270 Chapter 12 Share Data ...
Page 346: ...334 Chapter 14 Create Photorealistic Visualizations ...
Page 460: ...448 Chapter 17 Autodesk Navisworks Reference ...
Page 466: ...454 Glossary ...


