TIP
You can also zoom in and out with mouse wheel while hovering over the timeline.
Another way of changing the timescale is to use the Zoom box. For example, type in '1/4', and press Enter to
quarter the visible area. The value you enter is halved when you zoom in, and doubled when you zoom out. You
can return to the default timescale by clearing the box, and pressing Enter.
Keyframes
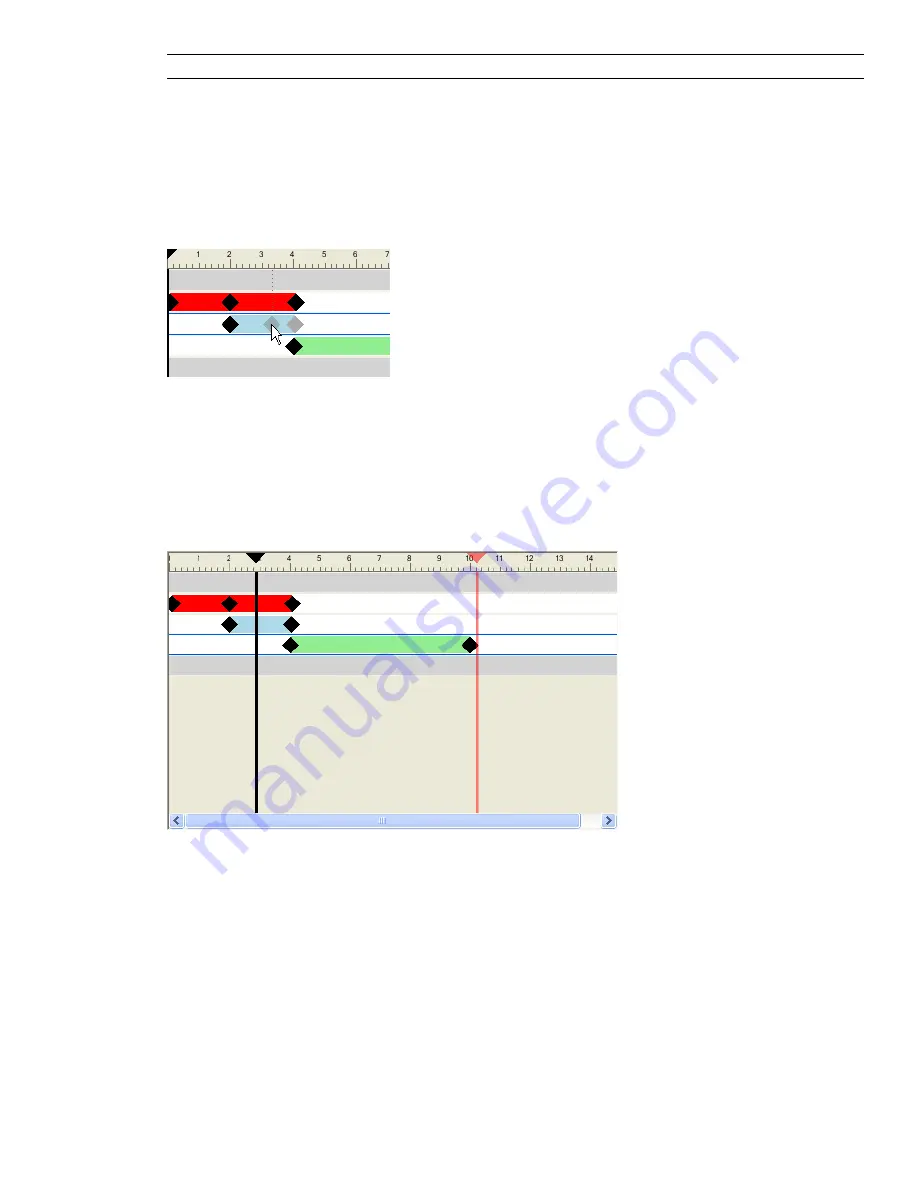
The keyframes are shown as black diamonds in the timelines.
You can change the time when a keyframe occurs by dragging the black diamond left or right in the timeline
view. As you drag a keyframe, it changes the color from black to a lighter grey.
Left-clicking a keyframe moves the time slider to that position.
Right-clicking a keyframe opens a shortcut menu.
Animation Bars
The colored animation bars are used to visualise the keyframes in a timeline, and cannot be edited. Each animation
type is shown in a different color, and the animation bars for the scenes are grey. Typically, the animation bar
ends with the last keyframe. If an animation bar carries on in a faded color after the last keyframe, this indicates
that the animation will play indefinitely (e.g., loop animation).
Sliders
You can use two sliders in the timeline view:
Time Slider
The black vertical line is the time slider, representing the current position in the playback. This can
be adjusted by either using the VCR controls on the toolbar or by dragging the slider left or right in the timeline
view, or by selecting a timeline in the timeline view and using the left and right cursor keys. As the time slider
is moved, the model in the Scene Area updates to reflect movements caused by keyframes in the current scene
as if the animation were playing back.
End Slider
The red vertical line is the end slider, representing the end point of the current active scene. It is
hidden if you selected the Infinite check box for the current scene in the tree view. By default, the end slider is
set to the last keyframe in the scene and can’t be moved. You can switch on manual control of the end slider in
a scene by right-clicking it, and selecting the Manually Position Endbar option from the shortcut menu. To
manually adjust the slider, drag it left or right. This end marker will be used as the animation end point when
scenes are set to loop or ping-pong.
276 | Chapter 13 Animate Objects
Summary of Contents for 507B1-90A211-1301 - NavisWorks Manage 2010
Page 1: ...Autodesk Navisworks Manage 2010 User Guide March 2009 ...
Page 12: ...xii Contents ...
Page 14: ...2 Part 1 Welcome to Autodesk Navisworks Manage 2010 ...
Page 64: ...52 Chapter 3 Installation ...
Page 97: ...Get a Whole Project View 85 ...
Page 98: ...86 Part 2 Get a Whole Project View ...
Page 136: ...124 Chapter 5 Work with Files ...
Page 178: ...To toggle ViewCube Click View Head Up Display ViewCube 166 Chapter 6 Explore Your Model ...
Page 262: ...250 Chapter 9 Use Viewpoints and Sectioning Modes ...
Page 270: ...258 Chapter 11 Work Within a Team ...
Page 282: ...270 Chapter 12 Share Data ...
Page 346: ...334 Chapter 14 Create Photorealistic Visualizations ...
Page 460: ...448 Chapter 17 Autodesk Navisworks Reference ...
Page 466: ...454 Glossary ...


