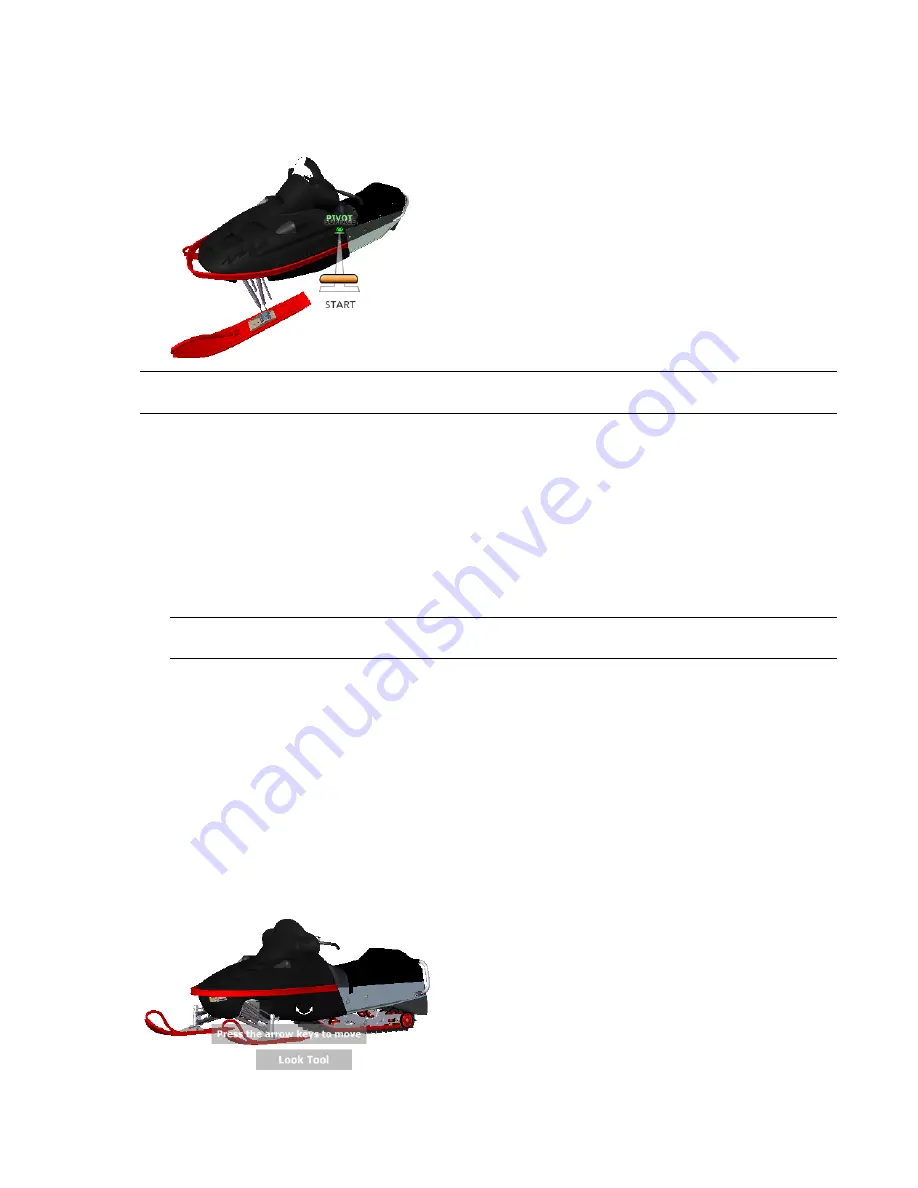
Forward Tool
You use the Forward tool to change the magnification of the model by increasing or decreasing the distance
between the current point of view and the pivot point. The distance that you can move forward or backward is
limited by the position of the pivot point.
NOTE
In orthographic views, the Forward tool is limited to the distance between the current position and the pivot
point. In perspective views, it is not limited, so you can move the cursor through the pivot point.
To adjust the distance between the current point of view and the pivot point you use the Drag Distance indicator.
The Drag Distance indicator has two marks on it that show the start and destination distances from the current
point of view. The current traveled distance is shown by the orange position indicator. Slide the indicator forward
or backwards to decrease or increase the distance towards the pivot point.
To reorient a view by moving towards or away from the model
1
Display the big Tour Building wheel.
2
Click and hold down the Forward wedge.
The Drag Distance indicator is displayed.
NOTE
If you click the Forward wedge once, the model moves forward 50% of the distance between the current
location and the pivot point.
3
Drag the cursor up or down to change the distance from which you view the model.
4
Release the button on your pointing device to return to the wheel.
Look Tool
With the Look tool, you can rotate the current view vertically and horizontally. When rotating the view, your
line of sight rotates about the current eye position, like turning your head. The Look tool can be compared to
you standing in a fixed location, and looking up or down while turning your head left or right.
When using the Look tool, you adjust the view of the model by dragging the cursor. As you drag, the cursor
changes to the Look cursor and the model rotates around the location of the current view.
SteeringWheels | 141
Summary of Contents for 507B1-90A211-1301 - NavisWorks Manage 2010
Page 1: ...Autodesk Navisworks Manage 2010 User Guide March 2009 ...
Page 12: ...xii Contents ...
Page 14: ...2 Part 1 Welcome to Autodesk Navisworks Manage 2010 ...
Page 64: ...52 Chapter 3 Installation ...
Page 97: ...Get a Whole Project View 85 ...
Page 98: ...86 Part 2 Get a Whole Project View ...
Page 136: ...124 Chapter 5 Work with Files ...
Page 178: ...To toggle ViewCube Click View Head Up Display ViewCube 166 Chapter 6 Explore Your Model ...
Page 262: ...250 Chapter 9 Use Viewpoints and Sectioning Modes ...
Page 270: ...258 Chapter 11 Work Within a Team ...
Page 282: ...270 Chapter 12 Share Data ...
Page 346: ...334 Chapter 14 Create Photorealistic Visualizations ...
Page 460: ...448 Chapter 17 Autodesk Navisworks Reference ...
Page 466: ...454 Glossary ...


