■
Use a solid color shader set as density shader for simulation of density variations in the medium.
■
Decrease the Error Bound parameter, if image appears spotty outside shadow areas.
■
Increase the Min LOD parameter, if areas with volumetric shadows appear spotty.
■
For fast previews, set the Error Bound parameter high, and the Min LOD parameter small.
■
For best results, set the Fall Off option to Inverse Square Law, and turn on Auto Exposure.
Image-based Lighting
Image-based lighting, simply put, is where an image is used to light a scene. In the real world, every object is lit
not only by light sources like the sun, lamps etc., but also by everything around. Standing in the middle of a
street, a person will be lit by the sun, the blue sky, the brown buildings and the grey floor. Emulating this form
of lighting clearly has the potential to create incredibly realistic images.
Images used in this lighting method are a special kind of image, called a High Dynamic Range Image or HDRI.
This type of image has the capability of lighting a scene with incredible accuracy. In Presenter, an HDRI is
wrapped around the scene as a sphere, and color and brightness from the HDRI are cast onto the 3D model to
light it.
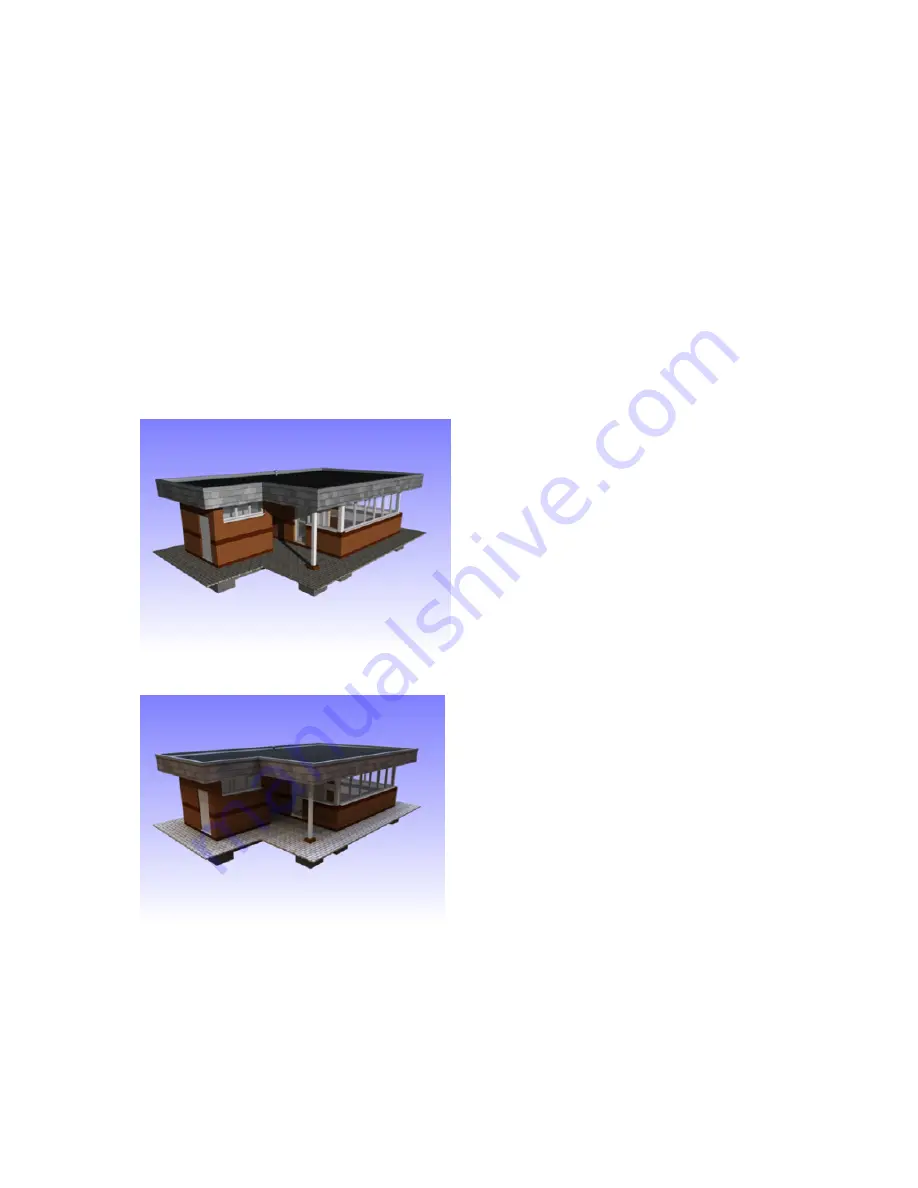
A model lit with normal lights
The same model lit with image-based lighting
You can see the difference this form of lighting can make to rendered images. And the enormous advantage here
is that it is much easier to set up than traditional lighting.
To set up image-based lighting
1
Open the Presenter window, and click the Lighting tab.
2
Click the Recommended folder in the left-hand pane of the Lighting tab.
Advanced Lighting | 317
Summary of Contents for 507B1-90A211-1301 - NavisWorks Manage 2010
Page 1: ...Autodesk Navisworks Manage 2010 User Guide March 2009 ...
Page 12: ...xii Contents ...
Page 14: ...2 Part 1 Welcome to Autodesk Navisworks Manage 2010 ...
Page 64: ...52 Chapter 3 Installation ...
Page 97: ...Get a Whole Project View 85 ...
Page 98: ...86 Part 2 Get a Whole Project View ...
Page 136: ...124 Chapter 5 Work with Files ...
Page 178: ...To toggle ViewCube Click View Head Up Display ViewCube 166 Chapter 6 Explore Your Model ...
Page 262: ...250 Chapter 9 Use Viewpoints and Sectioning Modes ...
Page 270: ...258 Chapter 11 Work Within a Team ...
Page 282: ...270 Chapter 12 Share Data ...
Page 346: ...334 Chapter 14 Create Photorealistic Visualizations ...
Page 460: ...448 Chapter 17 Autodesk Navisworks Reference ...
Page 466: ...454 Glossary ...


