To toggle collision
➤
In walk or fly navigation mode, click Collision
on the Navigation Tools toolbar.
Menu: Viewpoint
➤
Navigation Tools
➤
Collision
Command entry: CTRL + D
Third Person View
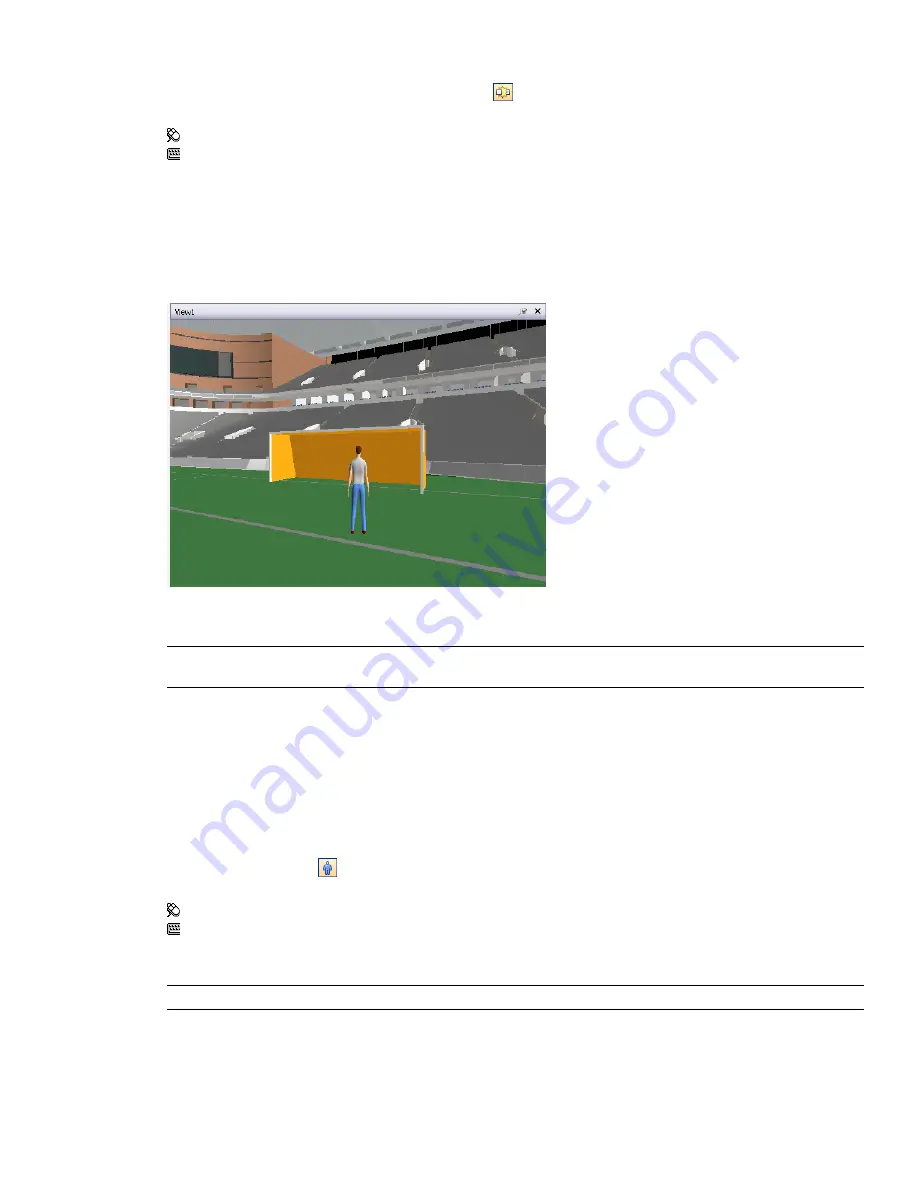
This function allows you to navigate scene from a third person perspective.
When third person is activated, you will be able to see an avatar which is a representation of yourself within the
3D model. Whilst navigating you will be controlling the avatar's interaction with the current scene.
Using third person in connection with collision and gravity makes this a very powerful function, allowing you
to visualize exactly how a person would interact with the intended design.
NOTE
When you use third person with SteeringWheels, the avatar is only shown with the Walk and Pan tools, to
prevent the screen clatter.
You can customize settings, such as avatar selection, dimention, and positioning, for the current viewpoint or
as a global option.
When third person view is turned on, rendering prioritization is changed so that objects around the camera or
avatar are displayed with much higher detail than normal. The size of the region of high detail is based on
collision volume radius, speed of movement (needing to see what is about to be walked into) and the distance
of the camera behind the avatar (in order to see what the avatar is interacting with).
To toggle third person view
➤
Click Third Person
on the Navigation Tools toolbar.
Menu: Viewpoint
➤
Navigation Tools
➤
Third Person
Command entry: CTRL + T
To add and use a custom avatar
IMPORTANT
Autodesk does not recommend or support usage of the custom avatars.
1
Open the file you want to use as your avatar (.dwg, .skp etc.) in Autodesk Navisworks.
2
Click File
➤
Save As.
3
In the Save As dialog box, select .nwd in the Save as Type box.
164 | Chapter 6 Explore Your Model
Summary of Contents for 507B1-90A211-1301 - NavisWorks Manage 2010
Page 1: ...Autodesk Navisworks Manage 2010 User Guide March 2009 ...
Page 12: ...xii Contents ...
Page 14: ...2 Part 1 Welcome to Autodesk Navisworks Manage 2010 ...
Page 64: ...52 Chapter 3 Installation ...
Page 97: ...Get a Whole Project View 85 ...
Page 98: ...86 Part 2 Get a Whole Project View ...
Page 136: ...124 Chapter 5 Work with Files ...
Page 178: ...To toggle ViewCube Click View Head Up Display ViewCube 166 Chapter 6 Explore Your Model ...
Page 262: ...250 Chapter 9 Use Viewpoints and Sectioning Modes ...
Page 270: ...258 Chapter 11 Work Within a Team ...
Page 282: ...270 Chapter 12 Share Data ...
Page 346: ...334 Chapter 14 Create Photorealistic Visualizations ...
Page 460: ...448 Chapter 17 Autodesk Navisworks Reference ...
Page 466: ...454 Glossary ...


