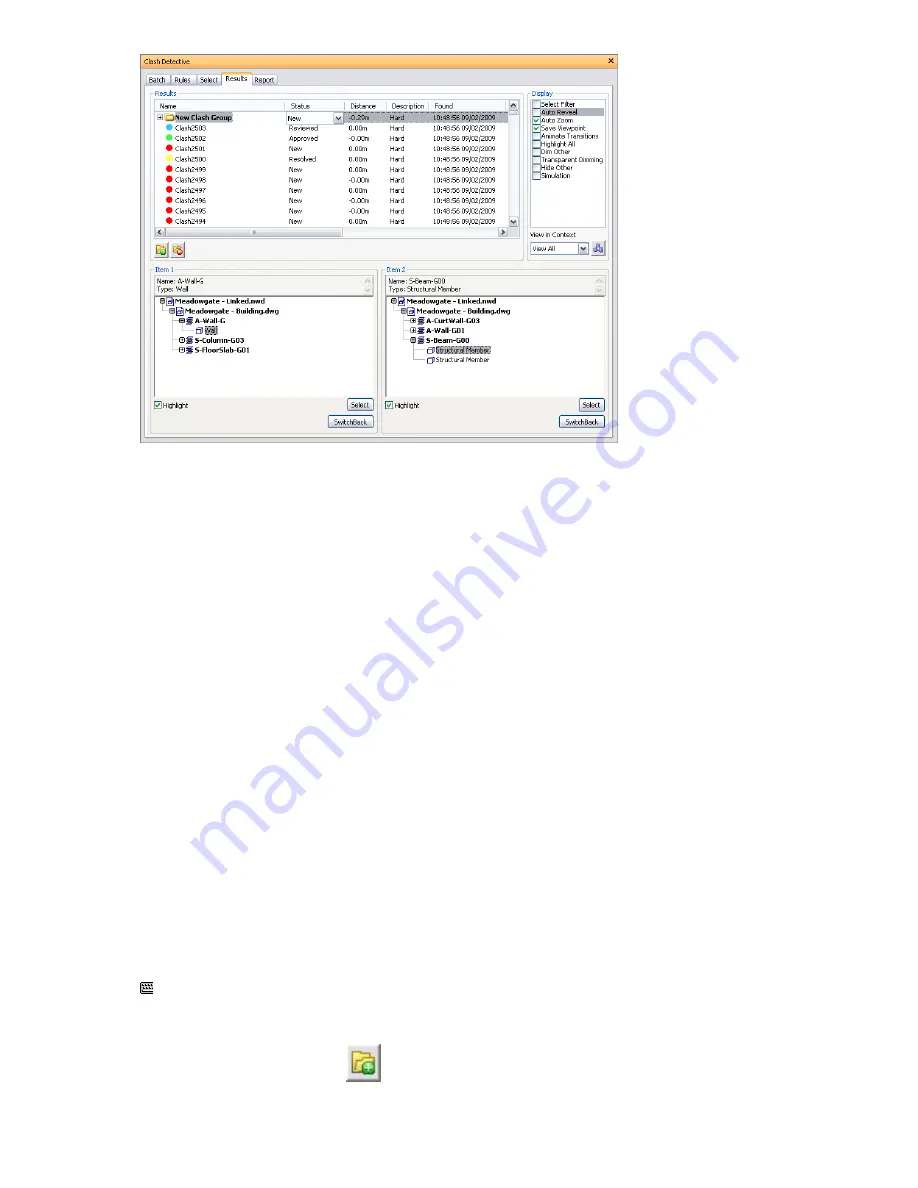
If you run a time-based, soft, or time-based soft clash test, the start time/date of any clashes are recorded next
to the appropriate clash under the Start and End columns, together with the event name (an animation scene
or a TimeLiner task) in the Event column. If multiple clashes are found on a particular date, each individual
clash is listed with identical simulation information.
The Item 1 and Item 2 panes show the Smart Tag properties relating to each item in the clash, and also the path
through the standard Selection Tree from the root to the geometry of the item.
Clicking on a clash highlights the two objects involved in the clash in the Scene Area. By default, the center of
the clash is the center of the view, which is zoomed in so that the parts of objects involved in clash fill the view.
You can use the options in the Display and the View in Context areas to control how the clash results are shown.
When your clash results contain multiple clashes which are associated with a single design issue, consider
manually grouping them together. Organizing clashes into folders and subfolders can simplify keeping track of
design issues.
Finally, selecting an item on the Item 1 or Item 2 pane, and then clicking on the SwitchBack button sends the
current view and currently selected object back to the originating CAD package. This makes it very simple to
show clashes in Autodesk Navisworks, take them back to the CAD package, alter the design, and then reload
them in Autodesk Navisworks for a very fast design review turnaround.
Manage Clash Results
You can manage clash results individually. You can also create and manage clash groups. Created groups are
represented in the Results View as folders.
To rename an ungrouped clash
1
On the Results tab, right-click the clash in the Results View, and click Rename.
2
Type the new name, and press Enter.
Command entry: F2
To create a clash group
1
Click the New Clash Group
button on the Results tab. A new folder called Clash Group X is added
above the currently selected clash (or at the top of the list if nothing is selected).
Manage Clash Results | 391
Summary of Contents for 507B1-90A211-1301 - NavisWorks Manage 2010
Page 1: ...Autodesk Navisworks Manage 2010 User Guide March 2009 ...
Page 12: ...xii Contents ...
Page 14: ...2 Part 1 Welcome to Autodesk Navisworks Manage 2010 ...
Page 64: ...52 Chapter 3 Installation ...
Page 97: ...Get a Whole Project View 85 ...
Page 98: ...86 Part 2 Get a Whole Project View ...
Page 136: ...124 Chapter 5 Work with Files ...
Page 178: ...To toggle ViewCube Click View Head Up Display ViewCube 166 Chapter 6 Explore Your Model ...
Page 262: ...250 Chapter 9 Use Viewpoints and Sectioning Modes ...
Page 270: ...258 Chapter 11 Work Within a Team ...
Page 282: ...270 Chapter 12 Share Data ...
Page 346: ...334 Chapter 14 Create Photorealistic Visualizations ...
Page 460: ...448 Chapter 17 Autodesk Navisworks Reference ...
Page 466: ...454 Glossary ...


