■
Specified Selection Sets - any items found clashing that are contained within two specified Selection Sets are
not reported in the results.
■
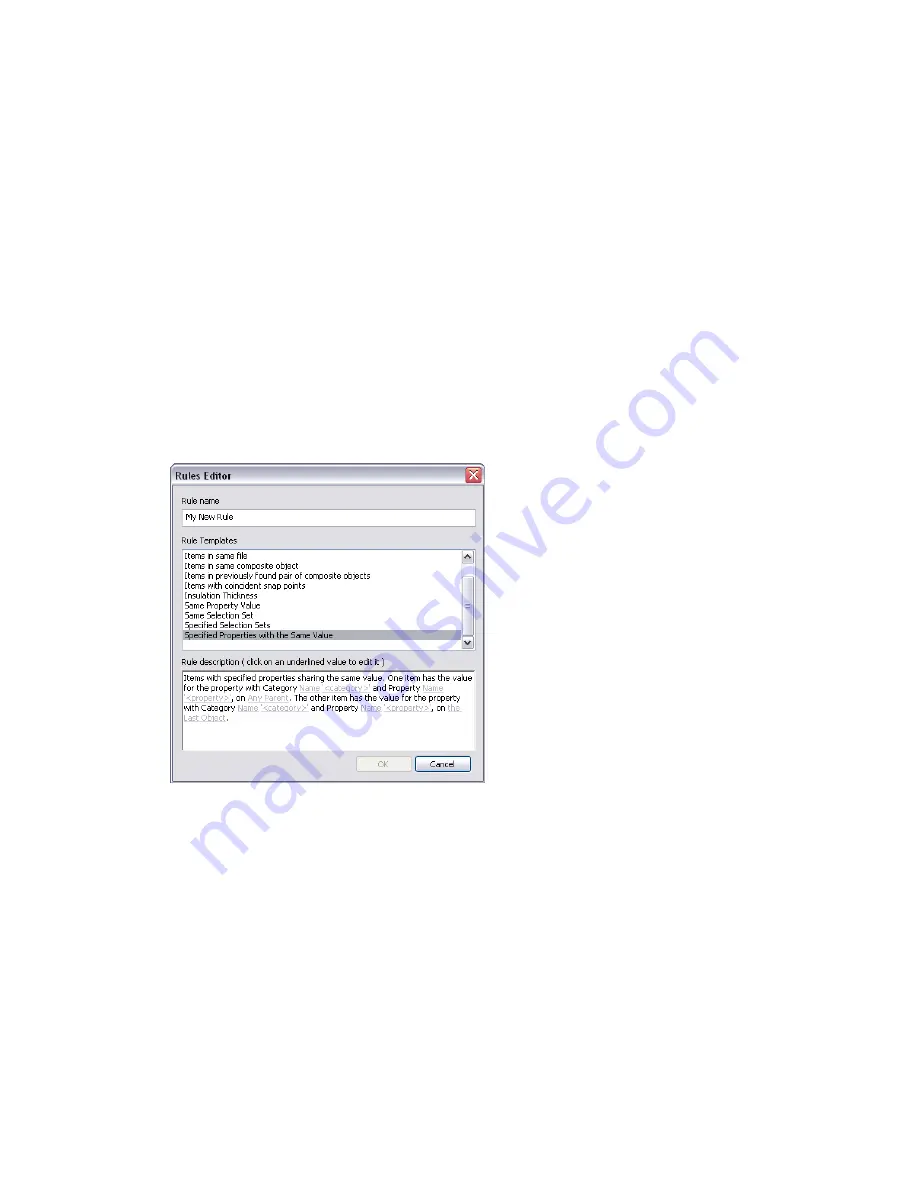
Specified Properties with the Same Value - any items found clashing that share the same value, but on two
different properties are not reported in the results. This is a new rule template. This rule also enables you to
look for the property on any parent object. For example, the gasket at the end of a pipe is registered as a clash
with the nozzle of pump. These items should be connected. The gasket itself does not have any property
attached directly to it to identify that it should be attached to the nozzle of the pump; however the parent
object of the gasket does. If you use this template, the clash test ignores clashes between these two items.
To use clash rules
1
If the Clash Detective window is not already open, click Tools
➤
Clash Detective.
2
Click the Batch tab, and select the test you want to configure in the Tests Area.
3
Click the Rules tab, and select the check boxes for all exception rules that you want to apply to your test.
To add a custom clash rule
1
If the Clash Detective window is not already open, click Tools
➤
Clash Detective.
2
On the Rules tab, click the New button.
3
In the Rules Editor dialog box, enter a new name for your rule.
4
In the Rule Templates list, click the template you want to use.
5
In the Rule Description box, click each of the underlined values to define your custom rule. The customizable
values available with the built-in templates are:
■
Name. Use the name of the category or property as it is displayed in the interface (recommended). You
can also choose Internal Name which is that accessed via the API (for advanced use only).
■
'<category>'. Choose from the available list, which category the property you wish to define is in. Only
the categories that are contained in the scene are available in the drop down list.
■
'<property>'. Choose from the available list, which property you want to define. Again, only the properties
in the scene within the chosen category will be available.
■
Any Parent
. Search for the defined property on the specified selection. Any Parent is the default option,
though you can also choose a Model, a Layer, the Last Object, or the Geometry
■
the Last Object. Search for the defined property on the specified selection. The Last Object is the default
option, though you can also choose Any Parent, a Model, a Layer, or the Geometry.
Clash Rules | 385
Summary of Contents for 507B1-90A211-1301 - NavisWorks Manage 2010
Page 1: ...Autodesk Navisworks Manage 2010 User Guide March 2009 ...
Page 12: ...xii Contents ...
Page 14: ...2 Part 1 Welcome to Autodesk Navisworks Manage 2010 ...
Page 64: ...52 Chapter 3 Installation ...
Page 97: ...Get a Whole Project View 85 ...
Page 98: ...86 Part 2 Get a Whole Project View ...
Page 136: ...124 Chapter 5 Work with Files ...
Page 178: ...To toggle ViewCube Click View Head Up Display ViewCube 166 Chapter 6 Explore Your Model ...
Page 262: ...250 Chapter 9 Use Viewpoints and Sectioning Modes ...
Page 270: ...258 Chapter 11 Work Within a Team ...
Page 282: ...270 Chapter 12 Share Data ...
Page 346: ...334 Chapter 14 Create Photorealistic Visualizations ...
Page 460: ...448 Chapter 17 Autodesk Navisworks Reference ...
Page 466: ...454 Glossary ...


