


Chapter 5: Introduction to SRC Components
80
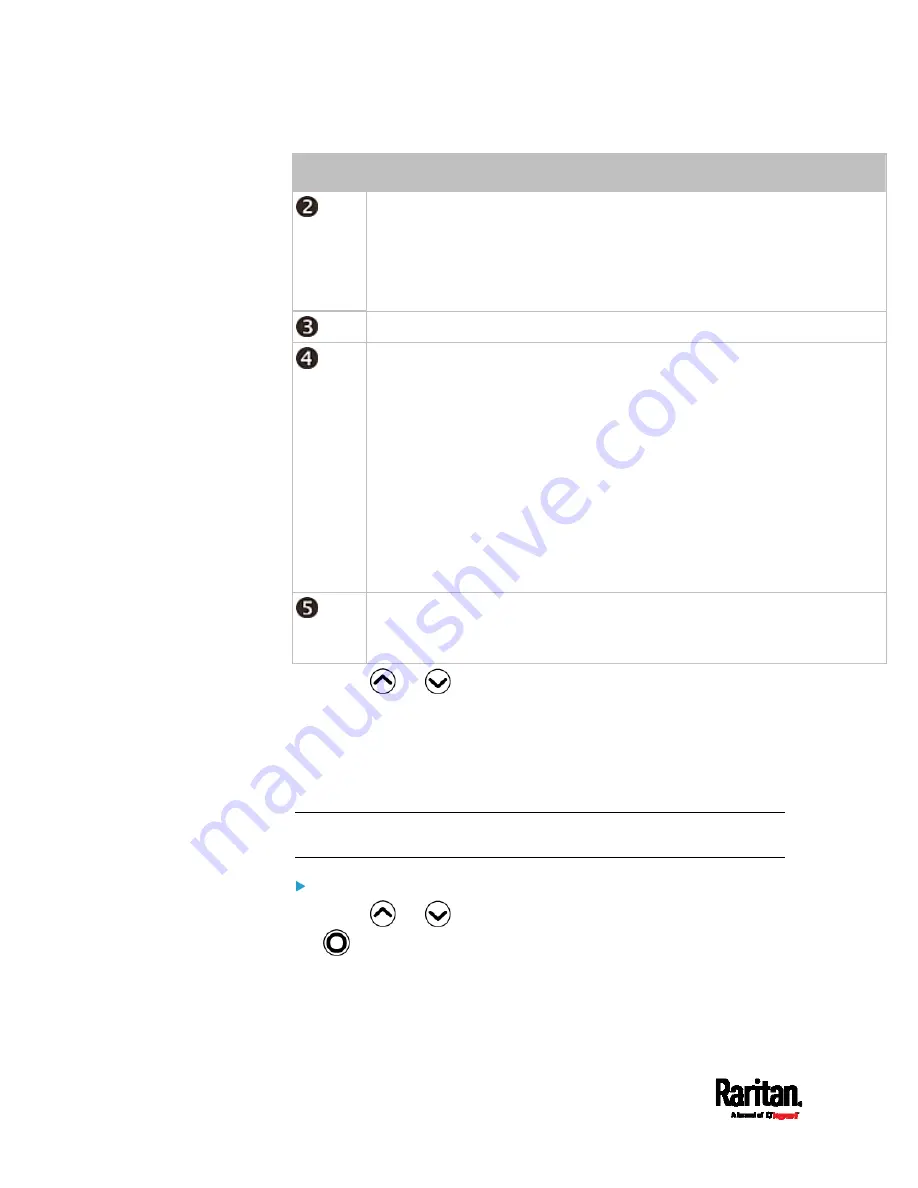
Number Description
The time the alarm occurred.
If the alarm occurred at least two times, then more information is shown.
Number of alarms
The first occurrence time
The last occurrence time
Alerted sensor names.
Sensor readings and/or states.
A numeric sensor shows both the reading and state. A state sensor or
actuator shows the state only.
Available states are listed below. For further information, see
Sensor/Actuator States
(on page 125).
Alarmed
Lower Critical = below lower critical
Lower Warning = below lower warning
Upper Warning = above upper warning
Upper Critical = above upper critical
Open (only available for Raritan PDUs with overcurrent protectors)
The 'Details' command appears for alarms only.
If your Alert List comprises alerted sensors only, then 'Details' is not
shown.
3.
Press
or
to view additional pages. When there are
multiple pages, page numbers appear in the top-right corner of the
display.
SRC
The "SRC" menu command shows the internal beeper state.
Tip: The internal beeper state information is also available in the SRC
web interface. See
SRC
(on page 113).
To view or configure SRC information:
1.
Press
or
to select "SRC" in the Main Menu, and press
.
2.
The internal beeper state is shown: Active or Off.
In the Active state, the reason of turning on the beeper is
indicated, and the top/bottom bars turn red.
Содержание Raritan SRC-0100
Страница 42: ...Chapter 3 Initial Installation and Configuration 30 Number Device role Master device Slave 1 Slave 2 Slave 3...
Страница 113: ...Chapter 6 Using the Web Interface 101 4 To return to the main menu and the Dashboard page click on the top left corner...
Страница 114: ...Chapter 6 Using the Web Interface 102...
Страница 128: ...Chapter 6 Using the Web Interface 116 Go to an individual sensor s or actuator s data setup page by clicking its name...
Страница 290: ...Chapter 6 Using the Web Interface 278 If wanted you can customize the subject and content of this email in this action...
Страница 291: ...Chapter 6 Using the Web Interface 279...
Страница 301: ...Chapter 6 Using the Web Interface 289 6 Click Create to finish the creation...
Страница 311: ...Chapter 6 Using the Web Interface 299...
Страница 312: ...Chapter 6 Using the Web Interface 300 Continued...
Страница 625: ...Appendix H RADIUS Configuration Illustration 613 Note If your SRC uses PAP then select PAP...
Страница 626: ...Appendix H RADIUS Configuration Illustration 614 10 Select Standard to the left of the dialog and then click Add...
Страница 627: ...Appendix H RADIUS Configuration Illustration 615 11 Select Filter Id from the list of attributes and click Add...
Страница 630: ...Appendix H RADIUS Configuration Illustration 618 14 The new attribute is added Click OK...
Страница 631: ...Appendix H RADIUS Configuration Illustration 619 15 Click Next to continue...
Страница 661: ...Appendix I Additional SRC Information 649...


