


Chapter 6: Using the Web Interface
310
Writing or Loading a Lua Script
You can enter or load up to 4 scripts to the SRC.
Tip: If you can no longer enter or load a new script after reaching the
upper limit, you can either delete any existing script or simply
modify/replace an existing script's codes. See
Modifying or Deleting a
Script
(on page 314).
To write or load a Lua script:
1.
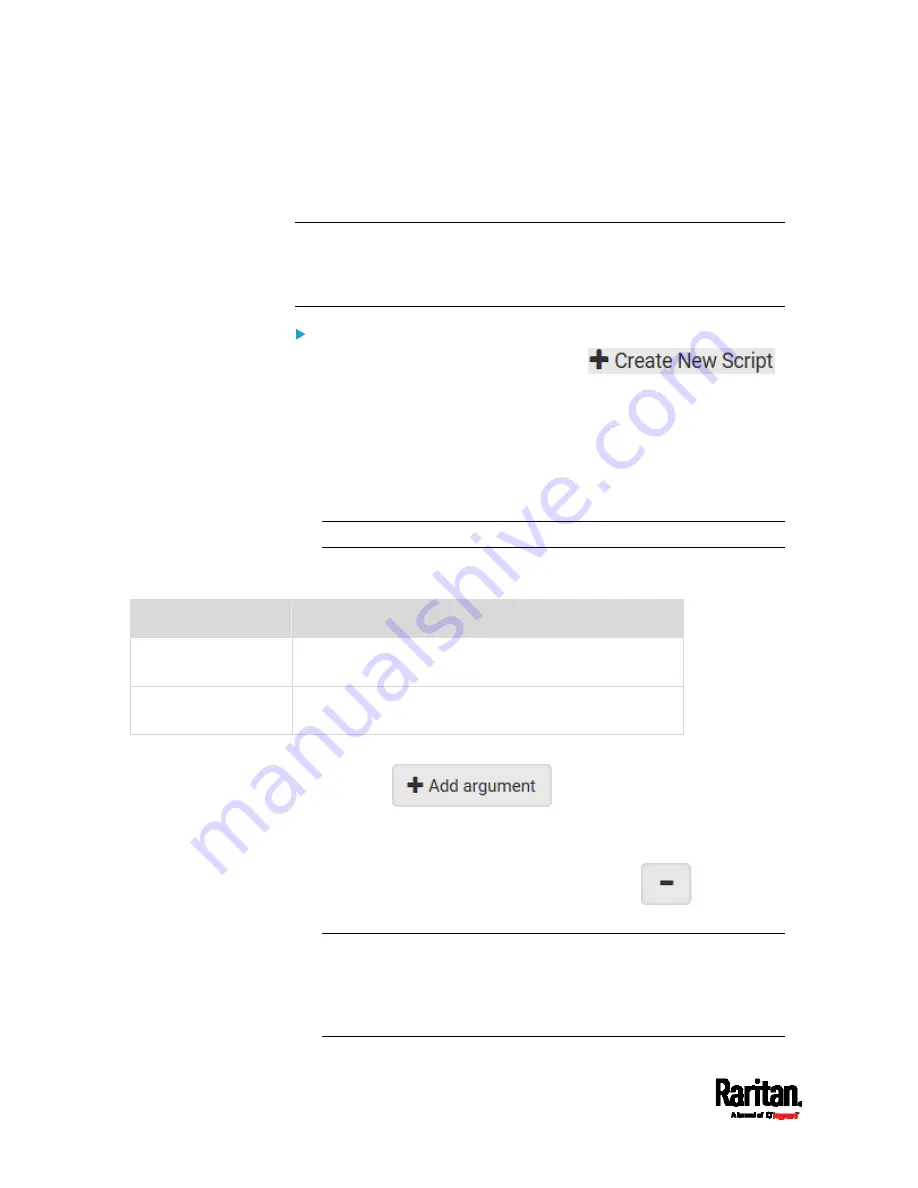
Choose Device Settings > Lua Scripts >
.
2.
Type a name for this script. Its length ranges between 1 to 63
characters.
The name must contain the following characters only.
Alphanumeric characters
Underscore (_)
Minus (-)
Note: Spaces are NOT permitted.
3.
Determine whether and when to automatically execute the loaded
script.
Checkbox
Behavior when selected
Start automatically at
system boot
Whenever the SRC reboots, the script is automatically
executed.
Restart after
termination
The script is automatically executed each time after 10
seconds since the script execution finishes.
4.
(Optional) Determine the arguments that will be executed by default.
a.
Click
.
b.
Type the key and value.
c.
Repeat the same steps to enter more arguments as needed.
To remove any existing argument, click
adjacent to
it.
Note: The above default arguments will be overridden by new
arguments specified with the "Start with Arguments" command or
with any Lua-script-related event rule. See
Manually Starting or
Stopping a Script
(on page 311) or
Start or Stop a Lua Script
(on
page 271).
Содержание Raritan SRC-0100
Страница 42: ...Chapter 3 Initial Installation and Configuration 30 Number Device role Master device Slave 1 Slave 2 Slave 3...
Страница 113: ...Chapter 6 Using the Web Interface 101 4 To return to the main menu and the Dashboard page click on the top left corner...
Страница 114: ...Chapter 6 Using the Web Interface 102...
Страница 128: ...Chapter 6 Using the Web Interface 116 Go to an individual sensor s or actuator s data setup page by clicking its name...
Страница 290: ...Chapter 6 Using the Web Interface 278 If wanted you can customize the subject and content of this email in this action...
Страница 291: ...Chapter 6 Using the Web Interface 279...
Страница 301: ...Chapter 6 Using the Web Interface 289 6 Click Create to finish the creation...
Страница 311: ...Chapter 6 Using the Web Interface 299...
Страница 312: ...Chapter 6 Using the Web Interface 300 Continued...
Страница 625: ...Appendix H RADIUS Configuration Illustration 613 Note If your SRC uses PAP then select PAP...
Страница 626: ...Appendix H RADIUS Configuration Illustration 614 10 Select Standard to the left of the dialog and then click Add...
Страница 627: ...Appendix H RADIUS Configuration Illustration 615 11 Select Filter Id from the list of attributes and click Add...
Страница 630: ...Appendix H RADIUS Configuration Illustration 618 14 The new attribute is added Click OK...
Страница 631: ...Appendix H RADIUS Configuration Illustration 619 15 Click Next to continue...
Страница 661: ...Appendix I Additional SRC Information 649...


