


Chapter 6: Using the Web Interface
261
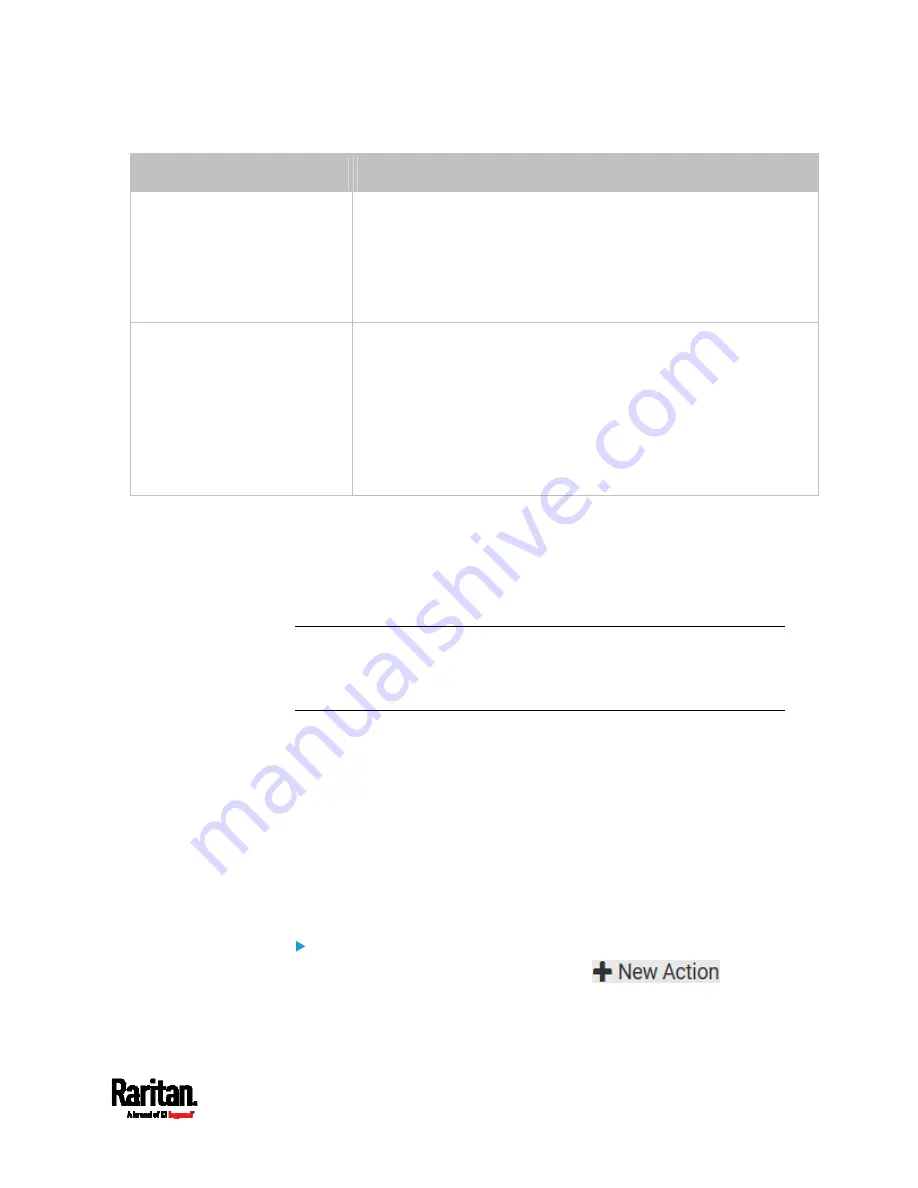
Folder name options
Definition
Serial number / Webcam name
/ Formatted timestamp
Three folders will be created.
Definitions of the parent folder and first subfolder are the same
as the first row.
The final subfolder's name is the time when the recording event
occurs, which is a format comprising year, month, date, hour,
minute, second and timezone.
Serial number / Webcam name
/ Rule name / Formatted
timestamp
Four folders will be created.
Definitions of the parent folder and first subfolder are the same
as the first row.
The second subfolder's name is the name of event rule that
triggers this recording action.
The final subfolder's name is the time when the recording event
occurs, which is a format comprising year, month, date, hour,
minute, second and timezone.
No matter which timestamp you choose, the timestamp is based on
the time you have configured on the SRC. See
Setting the Date and
Time
(on page 233).
To find the serial number of your SRC, see
Device Information
(on
page 318). To change the webcam's name, see
Configuring
Webcams and Viewing Live Images
(on page 344).
Tip: If you choose "Timestamp" as the final subfolder's name and do not
understand the occurrence time indicated by the timestamp, you can
always easily convert it to a readable formatted time by googling Unix
timestamp converter.
Request LHX/SHX Maximum Cooling
If Schroff LHX/SHX Support is enabled, the LHX/SHX-related actions will
be available. See
Miscellaneous
(on page 314).
The 'Request LHX/SHX maximum cooling' action applies the maximum
cooling to the SHX-30 device only. The LHX-20 and LHX-40 devices do not
support this feature.
In the maximum cooling mode, an SHX-30 device runs at 100% fan speed
and the cold water valve is open 100%.
Operation:
1.
Choose Device Settings > Event Rules >
.
2.
Select 'Request LHX/SHX maximum cooling' from the Action list.
Содержание Raritan SRC-0100
Страница 42: ...Chapter 3 Initial Installation and Configuration 30 Number Device role Master device Slave 1 Slave 2 Slave 3...
Страница 113: ...Chapter 6 Using the Web Interface 101 4 To return to the main menu and the Dashboard page click on the top left corner...
Страница 114: ...Chapter 6 Using the Web Interface 102...
Страница 128: ...Chapter 6 Using the Web Interface 116 Go to an individual sensor s or actuator s data setup page by clicking its name...
Страница 290: ...Chapter 6 Using the Web Interface 278 If wanted you can customize the subject and content of this email in this action...
Страница 291: ...Chapter 6 Using the Web Interface 279...
Страница 301: ...Chapter 6 Using the Web Interface 289 6 Click Create to finish the creation...
Страница 311: ...Chapter 6 Using the Web Interface 299...
Страница 312: ...Chapter 6 Using the Web Interface 300 Continued...
Страница 625: ...Appendix H RADIUS Configuration Illustration 613 Note If your SRC uses PAP then select PAP...
Страница 626: ...Appendix H RADIUS Configuration Illustration 614 10 Select Standard to the left of the dialog and then click Add...
Страница 627: ...Appendix H RADIUS Configuration Illustration 615 11 Select Filter Id from the list of attributes and click Add...
Страница 630: ...Appendix H RADIUS Configuration Illustration 618 14 The new attribute is added Click OK...
Страница 631: ...Appendix H RADIUS Configuration Illustration 619 15 Click Next to continue...
Страница 661: ...Appendix I Additional SRC Information 649...


