


6. Remove the board installed in step 1 and return the settings back to the original values.
■ Preparation
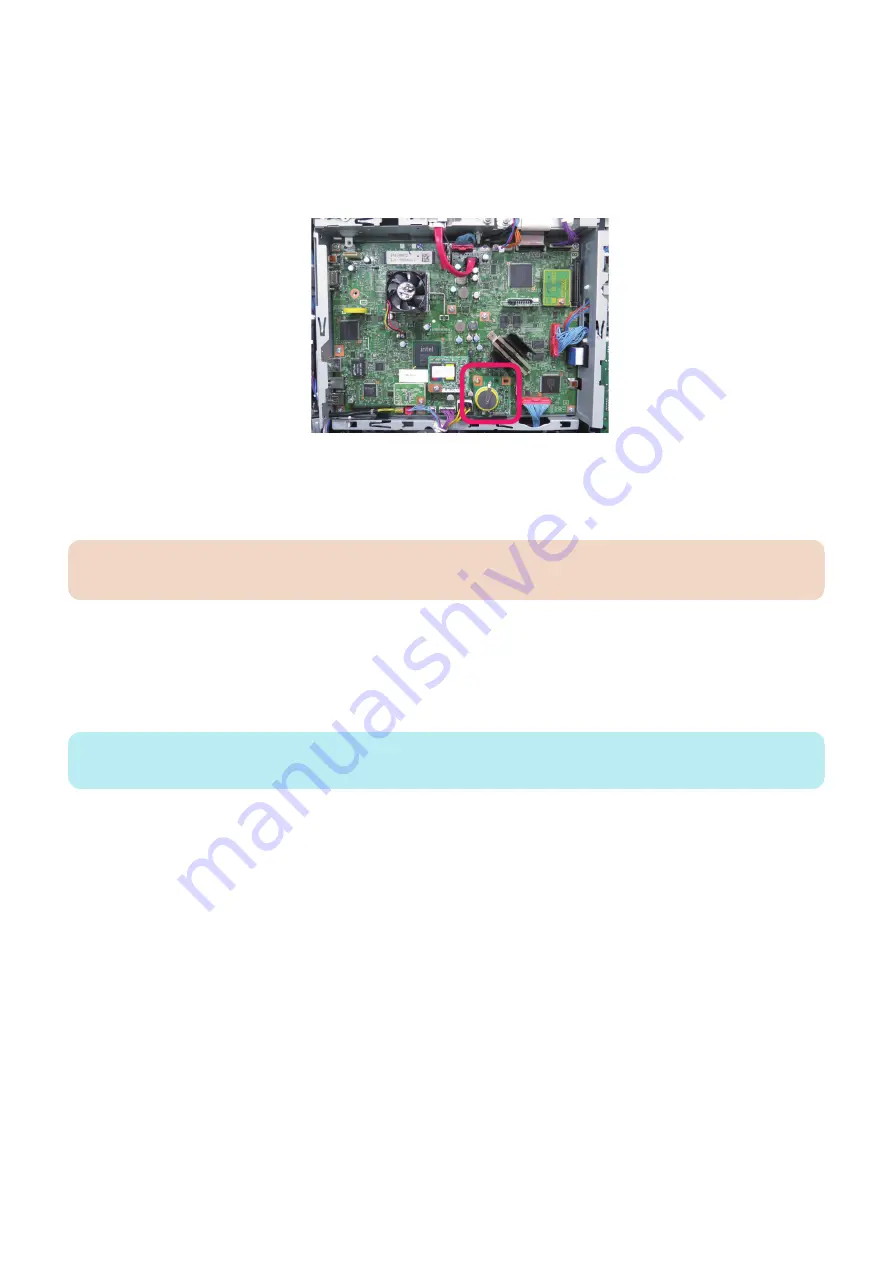
Follow the procedure shown below to make preparations for collecting debug logs.
1. Refer to
“Flow of Determining the Procedure for Collecting Logs” on page 434
and when it is judged that DEBUG
SRAM PCB ASS'Y Board is required, install the board.
2. Refer to
“Flow of Determining the Procedure for Collecting Logs” on page 434
and when it is judged that collection
of the key operation logs is required, enable [Store Key Operation Log] by following the procedure shown below.
1. Select [Settings/Registration] > [Management Settings] > [Device Management] > [Store Key Operation Log].
2. Select [ON] and press [OK] to start saving key operation logs.
CAUTION:
When collecting the key operation logs, be sure to obtain user's permission in advance.
3. Refer to
“Flow of Determining the Procedure for Collecting Logs” on page 434
and when it is judged that collection
of the network packet logs is required, enable the network packet log collection function by following the procedure
shown below and start the function.
1. Enter a license in the following menu to enable network packet capture.
[Settings/Registration] > [Management Settings] > [License/Other] > [Register License]
NOTE:
To register a license, it is necessary to request the Support Dept. of the sales company to issue a license.
2. Enable the setting (ON) in the following menu.
[Settings/Registration] > [Preferences] > [Network] > [Store Network Packet Log]
3. Set "1" in the following service mode (Lv.2).
Service mode > COPIER > TEST > NET-CAP > CAPOFFON
4. Refer to
“Initial setting of the network packet log collection function” on page 438
, and configure the required option
settings.
5. Set "0" or "1" in the following service mode (Lv.2) to start capture of network packets.
Service mode > COPIER > TEST > NET-CAP > STT-STP
• 0 : Not automatically collect at startup (factory default setting)
• 1 : Automatically collects at startup
6. Execute the following service mode (Lv.2) to check the status of the capture.
Service mode > COPIER > TEST > NET-CAP > CAPSTATE
The following types of status are displayed.
• RUNNING: Packets are being captured.
• STOP: Packet capturing is stopped.
• HDDFULL: The maximum amount of 1 GB of packets has been captured.
4. When an instruction to change the automatic log settings is given by the Support Dept. of the sales company, change
the settings by referring to
“Automatic Log Settings” on page 438
6. Troubleshooting
437
Summary of Contents for imageRUNNER ADVANCE C3330 Series
Page 1: ...Revision 7 0 imageRUNNER ADVANCE C3330 C3325 C3320 Series Service Manual ...
Page 18: ...Product Overview 1 Product Lineup 7 Features 11 Specifications 17 Parts Name 26 ...
Page 518: ...Error Jam Alarm 7 Overview 507 Error Code 511 Jam Code 617 Alarm Code 624 ...
Page 1020: ...9 Installation 1008 ...
Page 1022: ...2 Perform steps 3 to 5 in each cassette 9 Installation 1010 ...
Page 1024: ...5 6 Checking the Contents Cassette Feeding Unit 1x 3x 2x 1x 9 Installation 1012 ...
Page 1027: ...3 4 NOTE The removed cover will be used in step 6 5 2x 2x 9 Installation 1015 ...
Page 1046: ...When the Kit Is Not Used 1 2 Close the Cassette 2 When the Kit Is Used 1 9 Installation 1034 ...
Page 1068: ... Removing the Covers 1 2x 2 1x 9 Installation 1056 ...
Page 1070: ...3 1x 1x 9 Installation 1058 ...
Page 1083: ...6 7 TP M4x8 2x 2x 9 Installation 1071 ...
Page 1084: ...When Installing the USB Keyboard 1 Cap Cover Wire Saddle 9 Installation 1072 ...
Page 1129: ...9 2x 10 2x 11 9 Installation 1117 ...
Page 1135: ...Remove the covers 1 ws 2x 2 1x 9 Installation 1123 ...
Page 1140: ...2 2x 3 Connect the power plug to the outlet 4 Turn ON the power switch 9 Installation 1128 ...
Page 1176: ... A 2x Installing the Covers 1 1x 2 2x 9 Installation 1164 ...
Page 1190: ...14 Install the Cable Guide to the HDD Frame 4 Hooks 1 Boss 9 Installation 1178 ...


