


2. With nothing entered, click the [Log in] to display the area for specifying a switch license file for password
initialization.
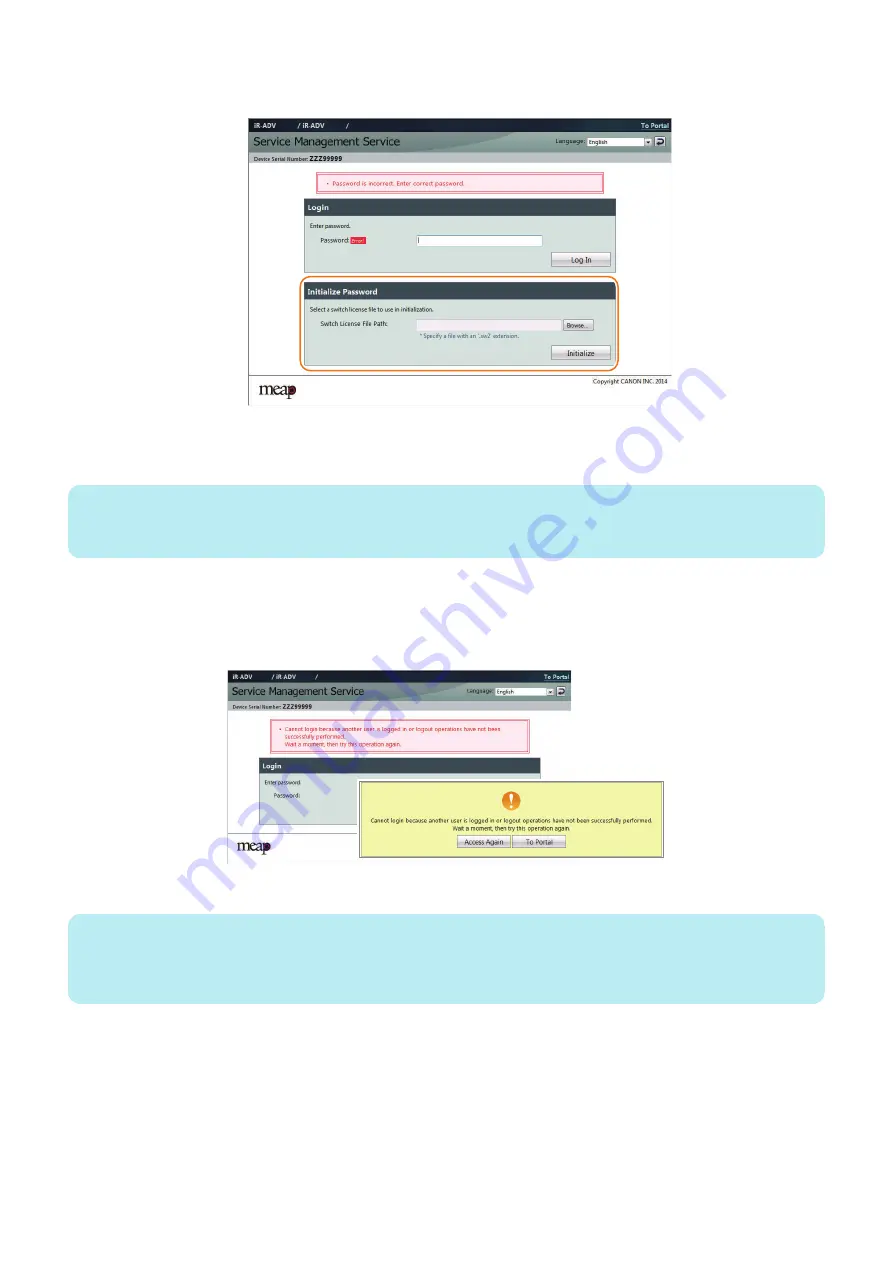
3. Click the [Browse] and specify the switch license file.
4. Click the [Initialize] to display an initialization confirmation page, and click the [OK].
NOTE:
• The default password is "MeapSmsLogin." (The password is case-sensitive.)
• If you click [Cancel], the Login page opens without initializing the password.
● If login is not possible due to exclusive control
Since access to SMS is under exclusive control, you cannot log in if another user has already logged into the SMS of the same
device.
An example of the exclusive control message
If you cannot log in due to exclusive control, you need to ask the other user to log out before you can try again.
NOTE:
If you close the browser without logging out, the session remains active. In that case, you cannot log in again.
If this problem occurs, you can wait for 5 minutes so that the session is disconnected. Or, you can restart the device to force the
session to disconnect.
● If [Key and Certificate Settings] is not set
If [Key and Certificate Settings] is not set correctly, you cannot access the URL for SMS (https://<device's IP address>:8443/
sms/). In that case, perform the following procedure.
1. Go to http://<device's IP address>:8000/sms/, and check to see that "HTTP 500 Internal Server Error" appears.
2. Technology
181
Summary of Contents for imageRUNNER ADVANCE C3330 Series
Page 1: ...Revision 7 0 imageRUNNER ADVANCE C3330 C3325 C3320 Series Service Manual ...
Page 18: ...Product Overview 1 Product Lineup 7 Features 11 Specifications 17 Parts Name 26 ...
Page 518: ...Error Jam Alarm 7 Overview 507 Error Code 511 Jam Code 617 Alarm Code 624 ...
Page 1020: ...9 Installation 1008 ...
Page 1022: ...2 Perform steps 3 to 5 in each cassette 9 Installation 1010 ...
Page 1024: ...5 6 Checking the Contents Cassette Feeding Unit 1x 3x 2x 1x 9 Installation 1012 ...
Page 1027: ...3 4 NOTE The removed cover will be used in step 6 5 2x 2x 9 Installation 1015 ...
Page 1046: ...When the Kit Is Not Used 1 2 Close the Cassette 2 When the Kit Is Used 1 9 Installation 1034 ...
Page 1068: ... Removing the Covers 1 2x 2 1x 9 Installation 1056 ...
Page 1070: ...3 1x 1x 9 Installation 1058 ...
Page 1083: ...6 7 TP M4x8 2x 2x 9 Installation 1071 ...
Page 1084: ...When Installing the USB Keyboard 1 Cap Cover Wire Saddle 9 Installation 1072 ...
Page 1129: ...9 2x 10 2x 11 9 Installation 1117 ...
Page 1135: ...Remove the covers 1 ws 2x 2 1x 9 Installation 1123 ...
Page 1140: ...2 2x 3 Connect the power plug to the outlet 4 Turn ON the power switch 9 Installation 1128 ...
Page 1176: ... A 2x Installing the Covers 1 1x 2 2x 9 Installation 1164 ...
Page 1190: ...14 Install the Cable Guide to the HDD Frame 4 Hooks 1 Boss 9 Installation 1178 ...


