1-39
BEFORE USING THE MACHINE
Contents
FINISHER
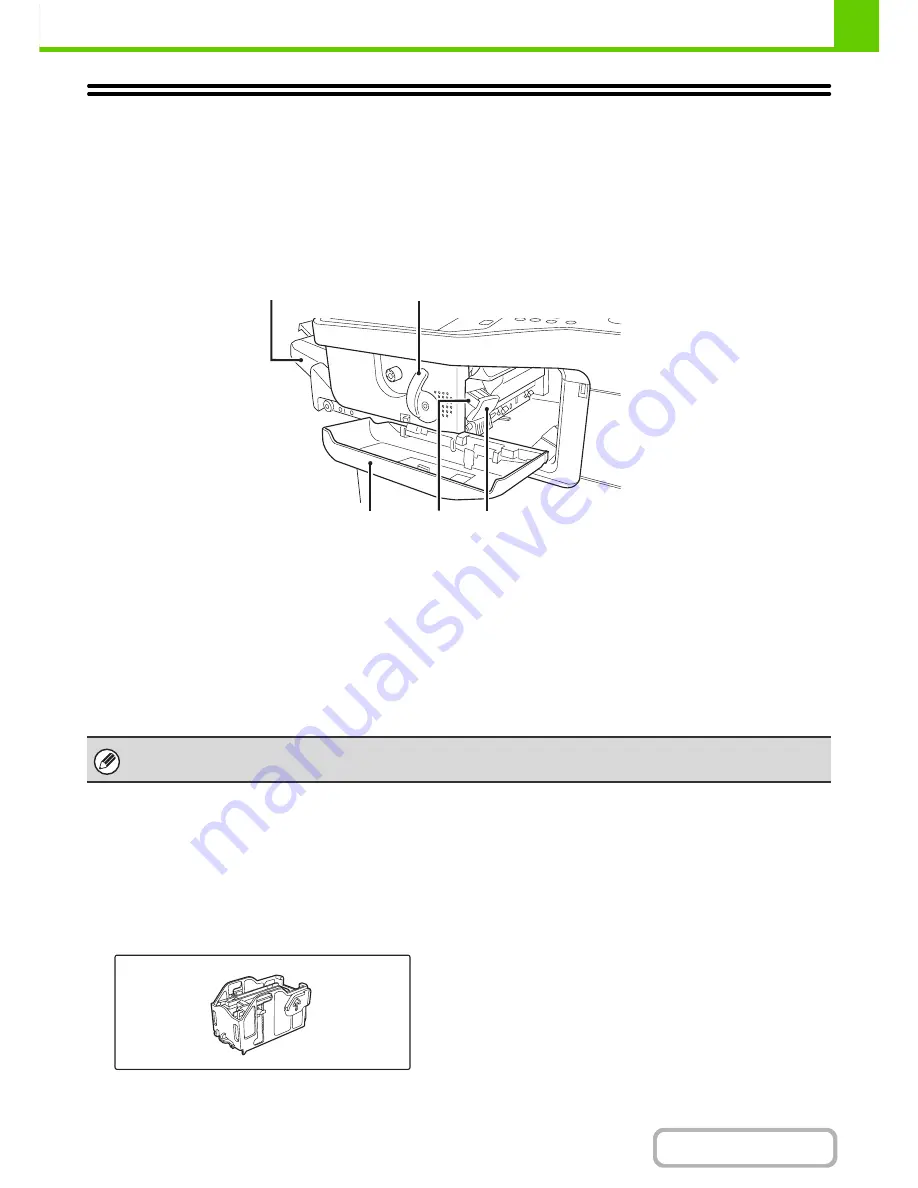
The finisher is equipped with the offset function, which offsets each set of output from the previous set.
In addition, each set of sorted output can be stapled.
PART NAMES
The following parts can be accessed when the finisher is open.
(1)
Output tray
Stapled and offset output is delivered to this tray.
The tray is slidable. Extend the tray for large output
(8-1/2" x 14", 8-1/2" x 13", 8-1/2" x 13-1/2", and
8-1/2" x 13-2/5" sizes).
(2)
Lever
Use this to move the finisher in order to remove a paper
misfeed, replace staples, or remove a staple jam.
(3)
Front cover
Open this cover to remove a paper misfeed, replace
staples, or remove a staple jam.
(4)
Staple case
This holds the staple cartridge. Pull the case out to
replace the staple cartridge or remove a staple jam.
(5)
Staple case release lever
Use this to remove the staple case.
SUPPLIES
The finisher requires the following staple cartridge:
Staple cartridge
(approx. 5000 staples per cartridge x 3 cartridges)
MX-SCX1
(1)
(5)
(4)
(2)
(3)
Use caution when you turn on the power and when printing is taking place, as the tray may move up and down.
Содержание MX-B401
Страница 4: ...Reduce copy mistakes Print one set of copies for proofing ...
Страница 6: ...Make a copy on this type of paper Envelopes and other special media Transparency film ...
Страница 8: ...Assemble output into a pamphlet Create a pamphlet Staple output Create a blank margin for punching ...
Страница 11: ...Conserve Print on both sides of the paper Print multiple pages on one side of the paper ...
Страница 34: ...Search for a file abc Search for a file using a keyword Search by checking the contents of files ...
Страница 35: ...Organize my files Delete a file Delete all files Periodically delete files Change the folder ...
Страница 203: ...3 18 PRINTER Contents 4 Click the Print button Printing begins ...
Страница 209: ...3 24 PRINTER Contents 1 Select Printer Features 2 Select Advanced 3 Select the Print Mode Macintosh 1 2 3 ...
Страница 770: ...11 REPLACING SUPPLIES AND MAINTENANCE 1 Open the front cover 2 Pull the toner cartridge toward you ...
Страница 772: ...13 REPLACING SUPPLIES AND MAINTENANCE 5 Insert the new toner cartridge horizontally and push it firmly in ...
Страница 835: ......
Страница 836: ......


