5-23
SCANNER/INTERNET FAX
Contents
Storing a destination from a global address book in the machine's
address book
A destination address obtained from a global address book can be stored as a destination (one-touch key) in the
address book of the machine.
Touch the [Detail] key in the search results screen of the global address book (the screen of step 3 above) to display
information on the selected destination. Touch the [Register] key in the detailed information screen and then touch the
item to be used (the [E-mail] key or the [Internet Fax] key). The following screens will appear.
E-mail address registration screen
Internet fax address registration screen
The information stored in the global address book is automatically entered. (The settings can be changed if needed. For
detailed information on each item, see "
Address Control
" (page 7-16) in "7. SYSTEM SETTINGS".) However, configure
the items below manually. To complete the storing procedure, touch the [Exit] key.
• [Initial] key:
Touch this key to enter the initials that determine where the destination will appear in the
alphabetical index and the order of one-touch key display. Enter up to 10 characters for the initials.
• [Index] key:
Touch this key to select the custom index in which the address will appear. You can also select
whether or not the destination will be included on the [Freq.] tab of the address book.
• [File Format] key:
Set the format for Scan to E-mail. Default format settings have already been configured; however,
selecting format settings when you store a destination saves you the trouble of selecting the
settings each time you transmit to that destination.
• [Compression] key: Touch this key to set the compression mode when sending an Internet fax.
• [I-Fax Report] key: Touch this key to request a reception report when sending an Internet fax.
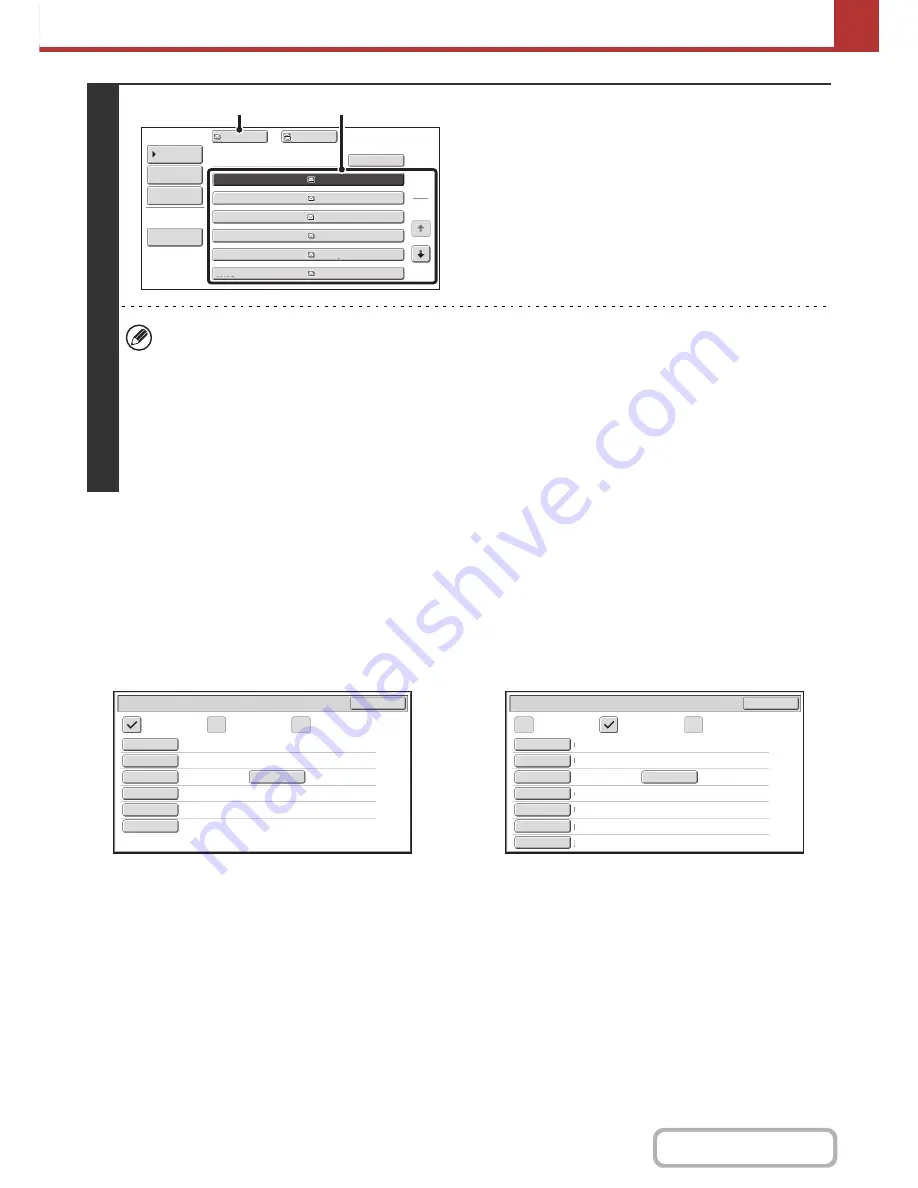
3
Select the destination.
(1) Touch the key of the desired destination.
If no names are found that match the search characters, a
message will appear. Touch the [OK] key to close the
message and touch the [Search Again] key to search
again.
(2) Touch the [To] key.
This enters the selected destination.
If you wish to enter another destination, repeat (1) and (2)
of this step.
• If 30 or more matches are found, a message will appear in the screen. Touch the [OK] key to close the message. Up
to 300 matches can appear. If no names are found that match the search letters, touch the [Search Again] key to
search again using more search letters.
•
To check the information stored in a destination...
Touch the key of the destination and then touch the [Detail] key. The information stored for the selected destination
will appear. Check the information and then touch the [OK] key to return to the search results screen.
•
If a screen for selecting the item to be used appears...
If the selected destination includes a fax number, telephone number, or other contact information in addition to the
e-mail address or Internet fax address, you will need to select which item you wish to use. Touch the [E-mail] key or
the [Internet Fax] key to retrieve the address for Scan to E-mail or Internet fax transmission.
1
2
XXX EEE
XXX FFF
XXX DDD
XXX CCC
XXX BBB
XXX AAA
Address Book
Search Again
Address Re
v
iew
Condition
Settings
To
Cc
Detail
XXX
(2)
(1)
E
-
Internet Fax
Fax
Direct Address / Indi
v
idual
Exit
Search Number
Name
Initial
Index
Address
Key Name
File Format
001
AAA AAA
AAA AAA
Color/Grayscale
:
PDF/Medium
:
PDF/MMR(G4)
B/W
A
User 1
E
-
Internet Fax
Fax
Direct Address / Indi
v
idual
Exit
Search Number
Name
Initial
Address
Key Name
Compression
I
-
Fax Report
001
AAA AAA
A
User 1
AAA AAA
MH (G3)
Off
Index
Содержание MX-B401
Страница 4: ...Reduce copy mistakes Print one set of copies for proofing ...
Страница 6: ...Make a copy on this type of paper Envelopes and other special media Transparency film ...
Страница 8: ...Assemble output into a pamphlet Create a pamphlet Staple output Create a blank margin for punching ...
Страница 11: ...Conserve Print on both sides of the paper Print multiple pages on one side of the paper ...
Страница 34: ...Search for a file abc Search for a file using a keyword Search by checking the contents of files ...
Страница 35: ...Organize my files Delete a file Delete all files Periodically delete files Change the folder ...
Страница 203: ...3 18 PRINTER Contents 4 Click the Print button Printing begins ...
Страница 209: ...3 24 PRINTER Contents 1 Select Printer Features 2 Select Advanced 3 Select the Print Mode Macintosh 1 2 3 ...
Страница 770: ...11 REPLACING SUPPLIES AND MAINTENANCE 1 Open the front cover 2 Pull the toner cartridge toward you ...
Страница 772: ...13 REPLACING SUPPLIES AND MAINTENANCE 5 Insert the new toner cartridge horizontally and push it firmly in ...
Страница 835: ......
Страница 836: ......


