Patient Data Management 10-13
Send Exam
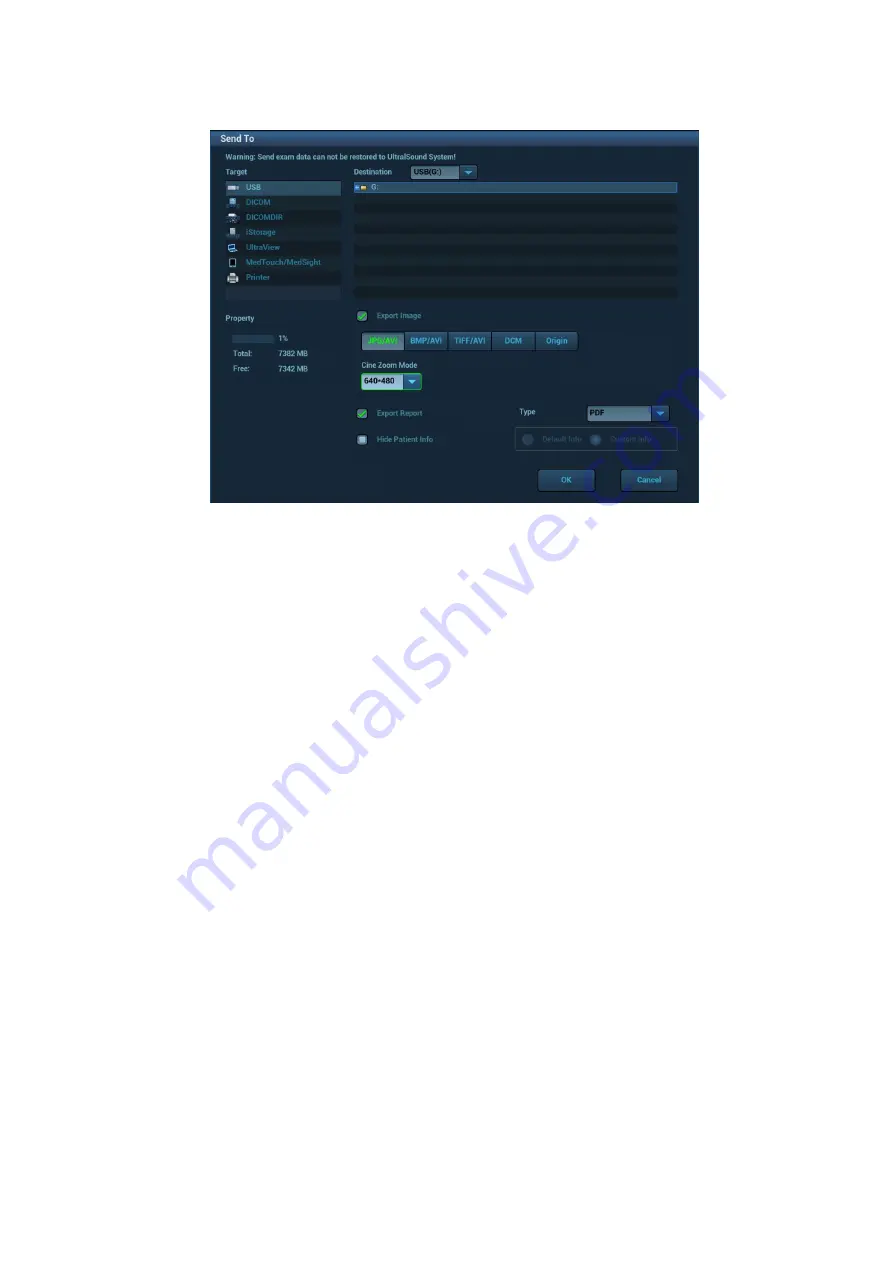
The system supports sending data to external memory devices, print or iStorage. You can use this
function to export the exam data to external devices (in PC data or DICOMDIR data format) and then
import to PC or restore to the ultrasound system to review the data.
1. Select the patient record, click [Send Exam] in the menu to send exam data or images of the
selected record.
Press <Ctrl> or <Shift> with <Set> on the control panel to select more than one exam or image
at one time.
2. Select from the destination:
DICOM: select the storage/print server to store or print DICOM.
DICOM format: use DICOMDIR format as the backup; you can change the cine
compression mode, and JPEG compression mode.
USB disk or disc: send the exam to USB disk or disc.
The report format is selectable.
Format transfer is available when sending images to USB devices or disk.
Print: send the image to the video/graph printer.
MedTouch/MedSight: send the exam to MedTouch/MedSight.
New Exam
After you select a patient data or exam in the iStation screen, click [New Exam] to enter the Patient
Info screen, where you can select the exam mode and click [OK] to begin a new exam.
Select All/Deselect All
Click [Select All] to select all the patient data listed.Then the button changes into [Deselect All], you
can cancel all the selections by clicking [Deselect All].
Activate an Exam
After you select an exam, which has been performed within 24 hours, click [Activate Exam] to
activate the exam and load the basic patient information and measurement data to continue the
exam.
If you want to select a patient data in an external memory database to start a new exam or recover
the exam, you have to first allow the system to load the patient data to the system’s patient
database.


