DREAMWEAVER CS3
User Guide
635
3
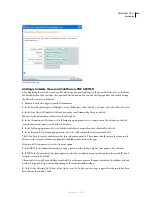
In the Insert Into Table pop-up menu, select the database table into which the record should be inserted.
4
In the After Inserting, Go To box, enter the page to open after the record is inserted into the table or click Browse
to browse to the file.
5
In the Get Values From pop-up menu, select the HTML form used to enter the data.
Dreamweaver automatically selects the first form on your page.
6
Specify a database column to insert the record in, select the form object that will insert the record from the Value
pop-up menu, and then select a data type for the form object from the Submit As pop-up menu.
The data type is the kind of data the column in your database table is expecting (text, numeric, Boolean option
values).
Repeat the procedure for each form object in your form.
7
Click OK.
Dreamweaver adds a server behavior to the page that lets users insert records in a database table by filling out the
HTML form and clicking the Submit button.
To edit the server behavior, open the Server Behaviors panel (Window > Server Behaviors) and double-click the
Insert Record behavior.
Add a server behavior to insert records in a database table (ASP.NET)
1
In the Server Behaviors panel (Window > Server Behaviors), click the Plus (+) button and select Insert Record
from the pop-up menu.
2
Select a form from the Submit Values From pop-up menu.
3
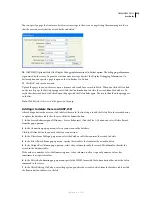
In the Connection pop-up menu, select a connection to the database.
Click the Define button if you need to define a connection.
4
In the Insert Into Table pop-up menu, select the database table to insert the record in.
5
Specify a database column to insert the record in, select the form object that will insert the record from the Value
pop-up menu, and then select a data type for the form object from the Submit As pop-up menu.
The data type is the kind of data the column in your database table is expecting (text, numeric, Boolean option
values).
Repeat the procedure for each form object in your form.
6
In the On Success, Go To box, enter the location of a page to display after the server behavior runs successfully or
click the Browse button to browse to the location.
7
In the On Failure, Go To box, enter the location of a page to display if the server behavior fails or click the Browse
button to browse to the location.
8
Select the Display Debugging Information On Failure option if you want debugging information when the server
behavior fails.
When you select this option, Dreamweaver ignores the On Failure, Go To option.
Use the debugging option during development and use the On Failure, Go To option when your site is live.
9
Click OK.
September 4, 2007

