DREAMWEAVER CS3
User Guide
486
•
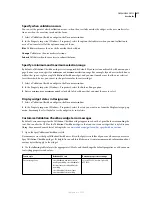
In Code view, type the code for one or more elements directly. Use this format:
{dataset-name::element-
name}
, as in
{ds1::category}
. or
{dsProducts::desc}
. If you are only using one data set in your file, or if you
are using data elements from the same data set that you defined for the region, you can omit the data set name and
simply write
{category}
or
{desc}
.
Regardless of which method you use to define the contents of your region, the following lines of code are added to
your HTML code:
<div spry:region="ds1">{name}{category}</div>
<div spry:region="ds2">{ds1::name}{ds1::descheader}</div>
Create a Spry repeat list region
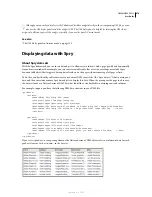
You can add repeat lists to display your data as an ordered list, an unordered (bulleted) list, a definition list, or a drop-
down list.
1
Select Insert > Spry > Spry Repeat List.
You can also click the Spry Repeat List button in the Spry category in the Insert bar.
2
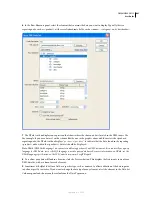
Select the container tag you want to use: UL, OL, DL, or SELECT. The other options vary depending on which
container you choose. If you choose SELECT, you must define the following fields:
•
Display Column: This is what users see when they view the page in their browsers.
•
Value Column: This is the actual value sent to the background server.
For example, you can create a list of states and show users Alabama and Alaska, but send AL or AL to the server. You
can also use the SELECT as a navigational tool and show product names such as “Adobe Dreamweaver” and “Adobe
Acrobat” to users, but send URLs such as “support/products/dreamweaver.html” and
“support/products/acrobat.html” to the server.
3
Choose your Spry data set from the menu.
4
Choose the columns you want to display.
5
Click OK to display a repeat list region on your page. In Code View, you can see that HTML <ul>, <ol>, <dl> or
FORM select tags are inserted into your file.
Note:
If you try to insert a repeat list region but you haven’t created a region, Dreamweaver prompts you to add one
before inserting the table. All Spry data objects must be contained within regions.
Adding Spry effects
Spry effects overview
Spry effects
are visual enhancements that you can apply to almost any element on an HTML page using JavaScript.
Effects are often used to highlight information, create animated transitions, or alter a page element visually for a
duration of time. You can apply effects to HTML elements without needing additional custom tags.
Note:
To apply an effect to an element, it must be currently selected or it must have an ID. If, for example, you are
applying highlighting to a
div
tag that is not currently selected, the div must have a valid ID value. If the element doesn’t
already, you will need to add one to the HTML code.
September 4, 2007

