Disk Drive Backplane Replacement
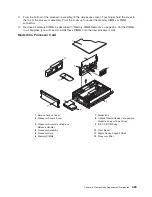
To replace the disk drive backplane, do the following:
1. Using the six supplied retaining screws, secure the backplane to the disk drive cage.
2. Carefully place the disk drive cage assembly into the system.
3.
Slide the disk drive cage assembly toward the front of the system.
4.
Ensure the six screw holes located on the cage assembly correctly align with the mating screw holes
located on the system chassis.
5. Insert and finger-tighten the six retaining screws. After all screws have been started, finish tightening
them.
6. Reconnect all power and signal cables to the disk drive backplane.
7. Replace the PCI adapter cooling fan stabilizing cage by installing the two tabs located on the bottom
edge of the cage into their mating slots located on the chassis. Secure the cage to the chassis with a
retaining screw.
8. Replace the PCI adapter cooling fans as described in “Hot-Swap Fan Assembly Replacement” on
page 464.
9. Replace all hot-plug disk drives as described in “Hot-Plug Disk Drive Replacement” on page 473.
10. Replace the media device support shelf.
11. Replace all previously removed media drives, ensuring that the media drives are returned to the same
media bay from which they were removed. Refer to “Media Replacement” on page 469, if necessary.
12. Before handling any card, board, or memory DIMM, be sure to use your electrostatic discharge strap
to minimize static-electric discharge. Refer to “Handling Static-Sensitive Devices” on page 423.
13. Replace the PCI riser card as described in “PCI Riser Card Replacement” on page 478.
14. Replace the PCI adapters as described in “Adding or Replacing a Non-Hot-Pluggable PCI Adapter” on
page 448.
15. Reconnect all adapter cables, located at the rear of the system unit.
16. Reconnect the power source to the system.
17. Replace the front bezel as described in “Front Bezel Replacement (Model 6C4)” on page 442 or
“Front Bezel Replacement (Model 6E4)” on page 443.
18. Power on the system as described in “Starting the System without an HMC Attached” on page 425.
19. Replace the service access cover as described in “Covers” on page 431.
20. If you are servicing a Model 6C4, place the system drawer into the operating position as described in
“Returning the Model 6C4 to the Operating Position” on page 430.
21. If you are servicing a Model 6C4, close the front and rear rack doors.
22. If you are servicing a Model 6E4, close the bezel door.
Chapter 9. Removal and Replacement Procedures
483
Summary of Contents for @Server pSeries 630 6C4
Page 1: ...pSeries 630 Model 6C4 and Model 6E4 Service Guide SA38 0604 03 ERserver...
Page 2: ......
Page 3: ...pSeries 630 Model 6C4 and Model 6E4 Service Guide SA38 0604 03 ERserver...
Page 16: ...xiv Eserver pSeries 630 Model 6C4 and Model 6E4 Service Guide...
Page 18: ...xvi Eserver pSeries 630 Model 6C4 and Model 6E4 Service Guide...
Page 382: ...362 Eserver pSeries 630 Model 6C4 and Model 6E4 Service Guide...
Page 440: ...420 Eserver pSeries 630 Model 6C4 and Model 6E4 Service Guide...
Page 538: ...System Parts continued 518 Eserver pSeries 630 Model 6C4 and Model 6E4 Service Guide...
Page 541: ...Chapter 10 Parts Information 521...
Page 562: ...542 Eserver pSeries 630 Model 6C4 and Model 6E4 Service Guide...
Page 568: ...548 Eserver pSeries 630 Model 6C4 and Model 6E4 Service Guide...
Page 576: ...556 Eserver pSeries 630 Model 6C4 and Model 6E4 Service Guide...
Page 580: ...560 Eserver pSeries 630 Model 6C4 and Model 6E4 Service Guide...
Page 616: ...596 Eserver pSeries 630 Model 6C4 and Model 6E4 Service Guide...
Page 646: ...626 Eserver pSeries 630 Model 6C4 and Model 6E4 Service Guide...
Page 649: ......


