Pro Tools Reference Guide
922
Rolling Through Automation Punch
Points in Latch Prime
After you prime controls for writing automation
while the transport is stopped, you can set
Pro Tools to automatically punch in at that
point after issuing a back and play command, or
after rolling back and locking to time code.
To set Pro Tools to automatically punch in
automation writing on a track:
1
Locate the cursor where you want to punch in
automation.
2
Prime controls for writing while the transport
is stopped. (See “Priming Controls for Writing
Automation in Latch Mode” on page 920.)
3
In the Automation window, click the
AutoJoin
button.
4
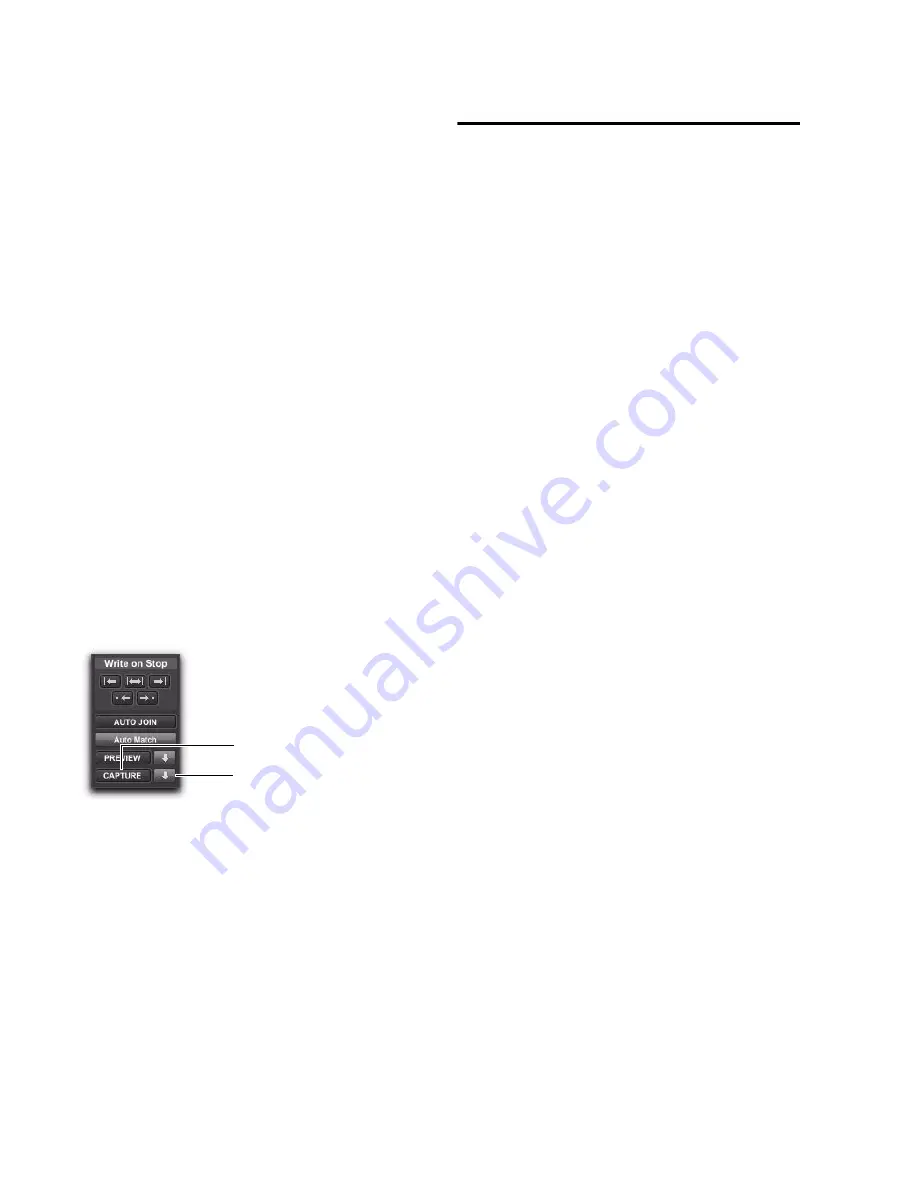
In the Automation window, click the
Capture
button and then click the
Punch Capture
button.
The AutoJoin marker (a vertical red line) appears
on-screen at the punch point.
5
Issue a Back and Play command, roll back the
external machine to before the punch in point,
or enable pre-roll.
6
Start playback. When the transport reaches
the punch-in point, automation writing begins.
Enabling and Suspending
Automation
From the Automation window, you can enable
or suspend writing for the following types of au-
tomation across all tracks:
• Volume
• Volume trim
• Pan
• Mute
• Plug-in
• Send level
• Send level trim
• Send pan
• Send mute
Automation can be suspended or enabled dur-
ing playback (without having to stop the Trans-
port).
Suspending Automation on All Tracks
To suspend automation on all tracks:
1
Choose
Window > Automation
.
2
Do one of the following:
• To suspend writing of all automation on all
tracks, click the
Suspend
button.
– or –
• To suspend writing of a specific type of au-
tomation on all tracks, click the button for
that automation type (volume, mute, pan,
plug-in, send level, send mute, or send
pan).
Capture and Punch Capture buttons in the Automation
window
Punch Capture button
Capture button
Summary of Contents for Digidesign Pro Tools 8.0
Page 1: ...Reference Guide Pro Tools 8 0 ...
Page 18: ...Pro Tools Reference Guide xviii ...
Page 19: ...1 Part I Introduction ...
Page 20: ...2 ...
Page 24: ...Pro Tools Reference Guide 6 ...
Page 40: ...Pro Tools Reference Guide 22 ...
Page 45: ...27 Part II System Configuration ...
Page 46: ...28 ...
Page 58: ...Pro Tools Reference Guide 40 ...
Page 76: ...Pro Tools Reference Guide 58 ...
Page 118: ...Pro Tools Reference Guide 100 ...
Page 127: ...109 Part III Sessions Tracks ...
Page 128: ...110 ...
Page 144: ...Pro Tools Reference Guide 126 ...
Page 170: ...Pro Tools Reference Guide 152 ...
Page 228: ...Pro Tools Reference Guide 210 ...
Page 292: ...Pro Tools Reference Guide 274 ...
Page 343: ...325 Part IV Playback and Recording ...
Page 344: ...326 ...
Page 386: ...Pro Tools Reference Guide 368 ...
Page 442: ...Pro Tools Reference Guide 424 ...
Page 443: ...425 Part V Editing ...
Page 444: ...426 ...
Page 490: ...Pro Tools Reference Guide 472 ...
Page 528: ...Pro Tools Reference Guide 510 ...
Page 566: ...Pro Tools Reference Guide 548 ...
Page 590: ...Pro Tools Reference Guide 572 ...
Page 591: ...573 Part VI MIDI ...
Page 592: ...574 ...
Page 648: ...Pro Tools Reference Guide 630 ...
Page 670: ...Pro Tools Reference Guide 652 ...
Page 679: ...661 Part VII Arranging ...
Page 680: ...662 ...
Page 756: ...Pro Tools Reference Guide 738 ...
Page 769: ...751 Part VIII Processing ...
Page 770: ...752 ...
Page 780: ...Pro Tools Reference Guide 762 ...
Page 786: ...Pro Tools Reference Guide 768 Figure 3 Quantized audio events Warp markers in Warp view ...
Page 814: ...Pro Tools Reference Guide 796 ...
Page 842: ...Pro Tools Reference Guide 824 ...
Page 843: ...825 Part IX Mixing ...
Page 844: ...826 ...
Page 976: ...Pro Tools Reference Guide 958 ...
Page 991: ...973 Part X Surround ...
Page 992: ...974 ...
Page 1000: ...Pro Tools Reference Guide 982 ...
Page 1025: ...1007 Part XI Sync and Video ...
Page 1026: ...1008 ...
Page 1080: ...Pro Tools Reference Guide 1062 ...
Page 1111: ......


