Pro Tools Reference Guide
990
When to Use Sub-Paths
To help simplify large sessions, use sub-paths
to route
static
(or, stationary) elements directly
to the output channel or channels.
For example, film dialog is often mixed to the
center channel to anchor this essential sound el-
ement to the picture. Instead of assigning a six-
channel panner to dialog tracks and panning
the tracks to the center speaker only, you can
route the dialog track’s main output to a mono
(Center) sub-path.
Extending Stereo Mixing Conventions to
Surround Mixing
Stereo mixing sets the precedent for active and
static panning, and surround mixing can bene-
fit from the same basic principles.
Panning a sound back-and-forth between the
left and right speakers is best used as a special ef-
fect. In a typical music mix, the basic tracks are
placed in the stereo sound field and remain
there.
Surround mixes can become incoherent if too
many elements are continuously moving, For
special effects, some tracks can be panned
dy-
namically,
bouncing between speakers or sweep-
ing from one side to the other.
Example Paths and Signal
Routing for a Surround Mix
The examples that follow show how Auxiliary
Inputs, Master Faders, and other Pro Tools sig-
nal routing features can be used for stem mixes,
submixes, and similar project needs.
In these examples, music and effects are being
mixed for a trailer, in 5.1 surround. Separate
stem mixes (for music and for effects) are to be
mastered to 8-track MDM.
Example Multichannel Paths
Signal routing is the key element in any
Pro Tools surround session. Signal routing is
configured and defined in the I/O Setup dialog.
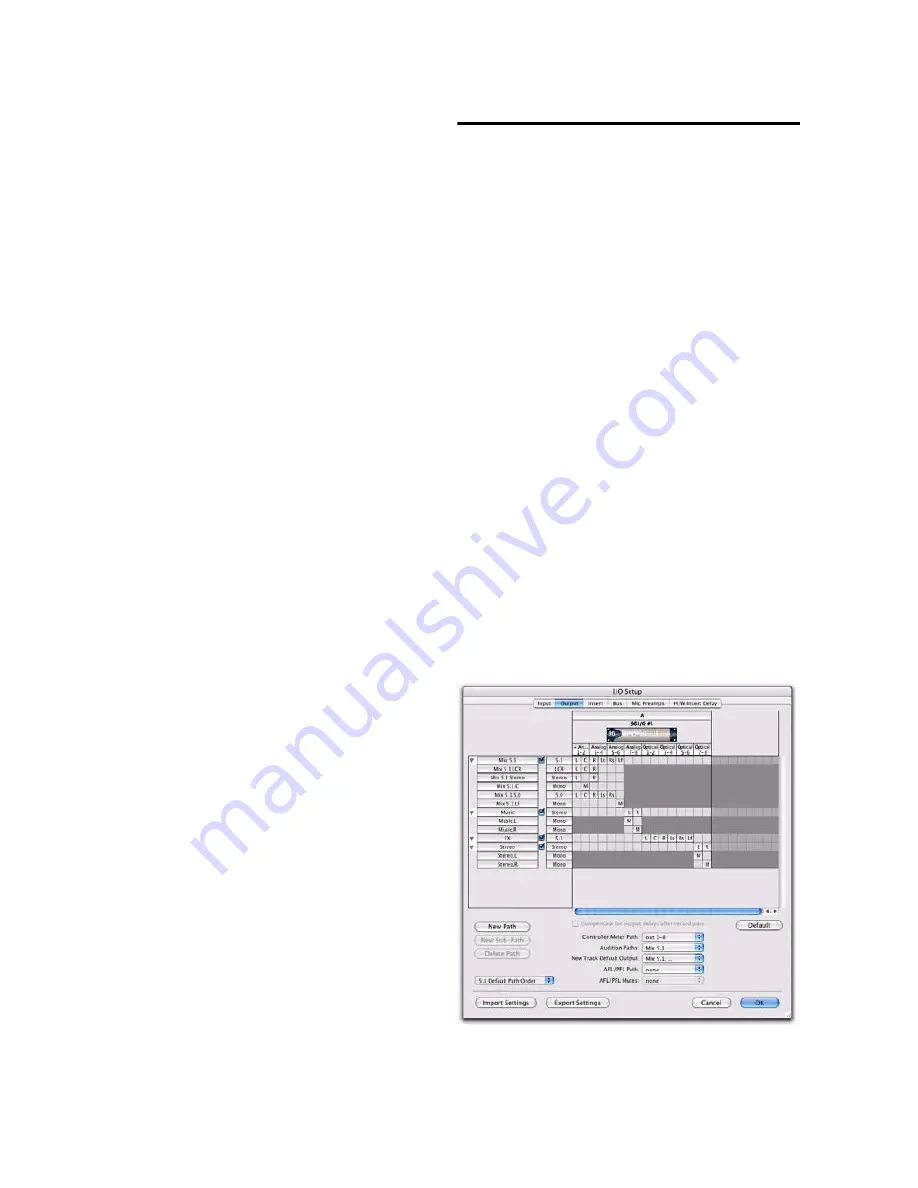
Example Output Paths
Figure 17 shows output paths defined in the I/O
Setup dialog of an example session that was cre-
ated on a Pro Tools|HD system with one 96 I/O
audio interface.
Figure 17. I/O Setup, example output paths
Summary of Contents for Digidesign Pro Tools 8.0
Page 1: ...Reference Guide Pro Tools 8 0 ...
Page 18: ...Pro Tools Reference Guide xviii ...
Page 19: ...1 Part I Introduction ...
Page 20: ...2 ...
Page 24: ...Pro Tools Reference Guide 6 ...
Page 40: ...Pro Tools Reference Guide 22 ...
Page 45: ...27 Part II System Configuration ...
Page 46: ...28 ...
Page 58: ...Pro Tools Reference Guide 40 ...
Page 76: ...Pro Tools Reference Guide 58 ...
Page 118: ...Pro Tools Reference Guide 100 ...
Page 127: ...109 Part III Sessions Tracks ...
Page 128: ...110 ...
Page 144: ...Pro Tools Reference Guide 126 ...
Page 170: ...Pro Tools Reference Guide 152 ...
Page 228: ...Pro Tools Reference Guide 210 ...
Page 292: ...Pro Tools Reference Guide 274 ...
Page 343: ...325 Part IV Playback and Recording ...
Page 344: ...326 ...
Page 386: ...Pro Tools Reference Guide 368 ...
Page 442: ...Pro Tools Reference Guide 424 ...
Page 443: ...425 Part V Editing ...
Page 444: ...426 ...
Page 490: ...Pro Tools Reference Guide 472 ...
Page 528: ...Pro Tools Reference Guide 510 ...
Page 566: ...Pro Tools Reference Guide 548 ...
Page 590: ...Pro Tools Reference Guide 572 ...
Page 591: ...573 Part VI MIDI ...
Page 592: ...574 ...
Page 648: ...Pro Tools Reference Guide 630 ...
Page 670: ...Pro Tools Reference Guide 652 ...
Page 679: ...661 Part VII Arranging ...
Page 680: ...662 ...
Page 756: ...Pro Tools Reference Guide 738 ...
Page 769: ...751 Part VIII Processing ...
Page 770: ...752 ...
Page 780: ...Pro Tools Reference Guide 762 ...
Page 786: ...Pro Tools Reference Guide 768 Figure 3 Quantized audio events Warp markers in Warp view ...
Page 814: ...Pro Tools Reference Guide 796 ...
Page 842: ...Pro Tools Reference Guide 824 ...
Page 843: ...825 Part IX Mixing ...
Page 844: ...826 ...
Page 976: ...Pro Tools Reference Guide 958 ...
Page 991: ...973 Part X Surround ...
Page 992: ...974 ...
Page 1000: ...Pro Tools Reference Guide 982 ...
Page 1025: ...1007 Part XI Sync and Video ...
Page 1026: ...1008 ...
Page 1080: ...Pro Tools Reference Guide 1062 ...
Page 1111: ......


