Pro Tools Reference Guide
722
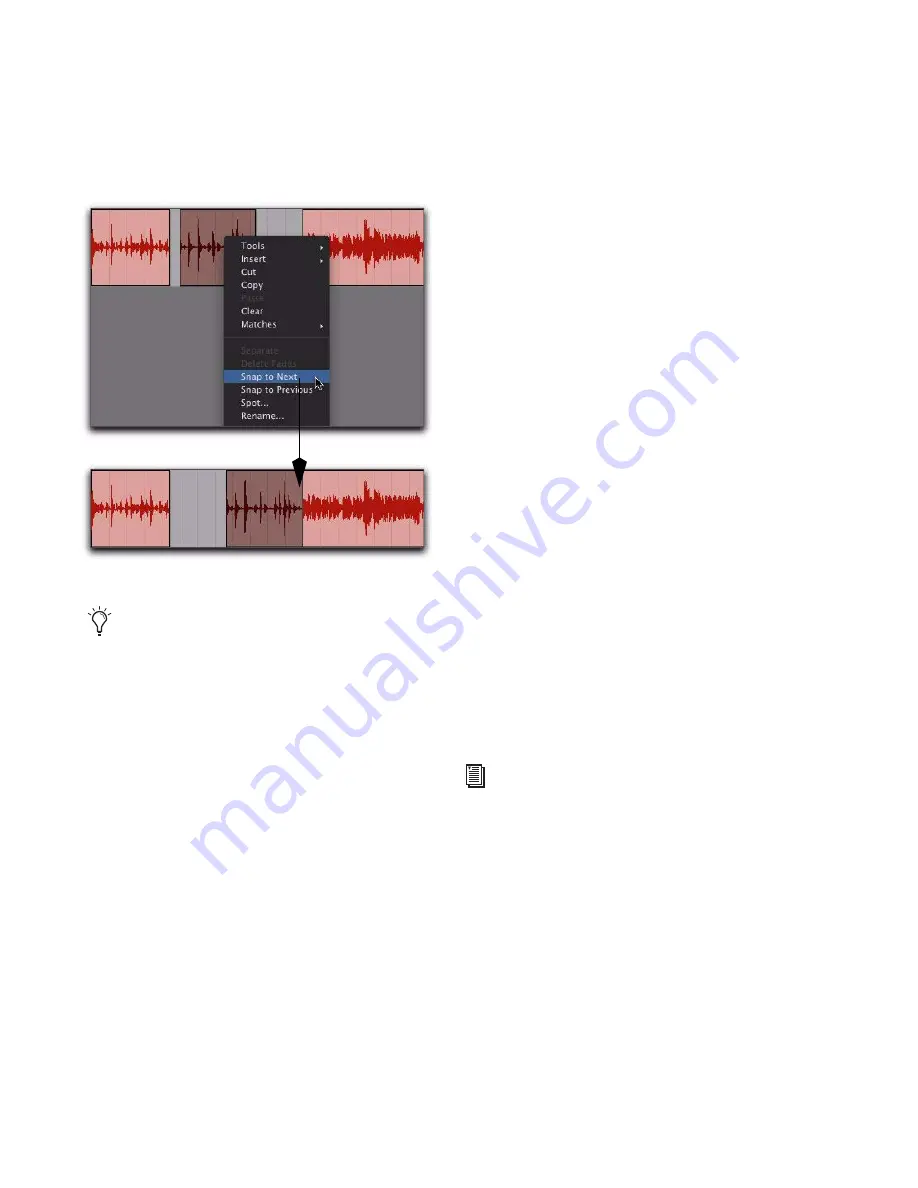
The selected region snaps to the following re-
gion on the track so that the two regions are
“butt-spliced.”
Slipping Regions
In Slip mode, regions can be moved with the
Time Grabber tool freely within a track, or onto
other tracks. In this mode, it is possible to place
a region so that there is space between it and
other regions in a track. When the track is
played back, this space is silent. It is also possible
to move a region so that it overlaps or com-
pletely covers another region.
To slip regions:
1
Enable Slip mode (see “Edit Modes” on
page 445).
2
Drag a region from the Region List to an
empty track.
3
Drag a second region from the Region List to
the same track, somewhere in the middle. The
second region is placed wherever you release it.
It does not snap to the first region as in Shuffle
mode.
4
Drag the regions to different locations within
the track to get a feel for moving them in Slip
mode. Try placing the second region so that it
slightly overlaps the first region. Play back the
results.
Spotting Regions
Spot mode is useful for sessions in which you
want to spot regions to precise locations based
on any of the Time Scales. This is useful when
performing post production tasks. In Spot mode
you can spot a region by specifying a SMPTE
frame (Pro Tools HD and Pro Tools LE with DV
Toolkit 2 only) or bar and beat location, by cap-
turing an incoming time code address, or by us-
ing the region’s time stamps.
Snapping a region to the next region in a track
You can also use the Snap To commands
with an Edit selection that includes multi-
ple regions on one or more tracks.
For even quicker spotting, if you are using
VITC, use the Auto-Spot Regions command
to spot a region to the current SMPTE frame
location with the Time Grabber tool. For
more information, see “Auto-Spotting Re-
gions” on page 1030.
Summary of Contents for Digidesign Pro Tools 8.0
Page 1: ...Reference Guide Pro Tools 8 0 ...
Page 18: ...Pro Tools Reference Guide xviii ...
Page 19: ...1 Part I Introduction ...
Page 20: ...2 ...
Page 24: ...Pro Tools Reference Guide 6 ...
Page 40: ...Pro Tools Reference Guide 22 ...
Page 45: ...27 Part II System Configuration ...
Page 46: ...28 ...
Page 58: ...Pro Tools Reference Guide 40 ...
Page 76: ...Pro Tools Reference Guide 58 ...
Page 118: ...Pro Tools Reference Guide 100 ...
Page 127: ...109 Part III Sessions Tracks ...
Page 128: ...110 ...
Page 144: ...Pro Tools Reference Guide 126 ...
Page 170: ...Pro Tools Reference Guide 152 ...
Page 228: ...Pro Tools Reference Guide 210 ...
Page 292: ...Pro Tools Reference Guide 274 ...
Page 343: ...325 Part IV Playback and Recording ...
Page 344: ...326 ...
Page 386: ...Pro Tools Reference Guide 368 ...
Page 442: ...Pro Tools Reference Guide 424 ...
Page 443: ...425 Part V Editing ...
Page 444: ...426 ...
Page 490: ...Pro Tools Reference Guide 472 ...
Page 528: ...Pro Tools Reference Guide 510 ...
Page 566: ...Pro Tools Reference Guide 548 ...
Page 590: ...Pro Tools Reference Guide 572 ...
Page 591: ...573 Part VI MIDI ...
Page 592: ...574 ...
Page 648: ...Pro Tools Reference Guide 630 ...
Page 670: ...Pro Tools Reference Guide 652 ...
Page 679: ...661 Part VII Arranging ...
Page 680: ...662 ...
Page 756: ...Pro Tools Reference Guide 738 ...
Page 769: ...751 Part VIII Processing ...
Page 770: ...752 ...
Page 780: ...Pro Tools Reference Guide 762 ...
Page 786: ...Pro Tools Reference Guide 768 Figure 3 Quantized audio events Warp markers in Warp view ...
Page 814: ...Pro Tools Reference Guide 796 ...
Page 842: ...Pro Tools Reference Guide 824 ...
Page 843: ...825 Part IX Mixing ...
Page 844: ...826 ...
Page 976: ...Pro Tools Reference Guide 958 ...
Page 991: ...973 Part X Surround ...
Page 992: ...974 ...
Page 1000: ...Pro Tools Reference Guide 982 ...
Page 1025: ...1007 Part XI Sync and Video ...
Page 1026: ...1008 ...
Page 1080: ...Pro Tools Reference Guide 1062 ...
Page 1111: ......


