Pro Tools Reference Guide
558
Editing Beat Triggers
Even though Beat Detective offers a great deal of
flexibility in how transients are detected, there
may be times when beat triggers must be de-
leted, moved, or manually inserted. Addition-
ally, triggers can be promoted so they are re-
tained at lower sensitivity settings.
Deleting Beat Triggers
False triggers, which do not represent an actual
beat or sub-beat in the source material, may ap-
pear when raising the
Sensitivity
to detect quiet
material. In these instances you can locate and
manually delete any false triggers.
To delete a beat trigger:
1
With the Beat Detective window open, select
any Grabber tool in the Edit window.
2
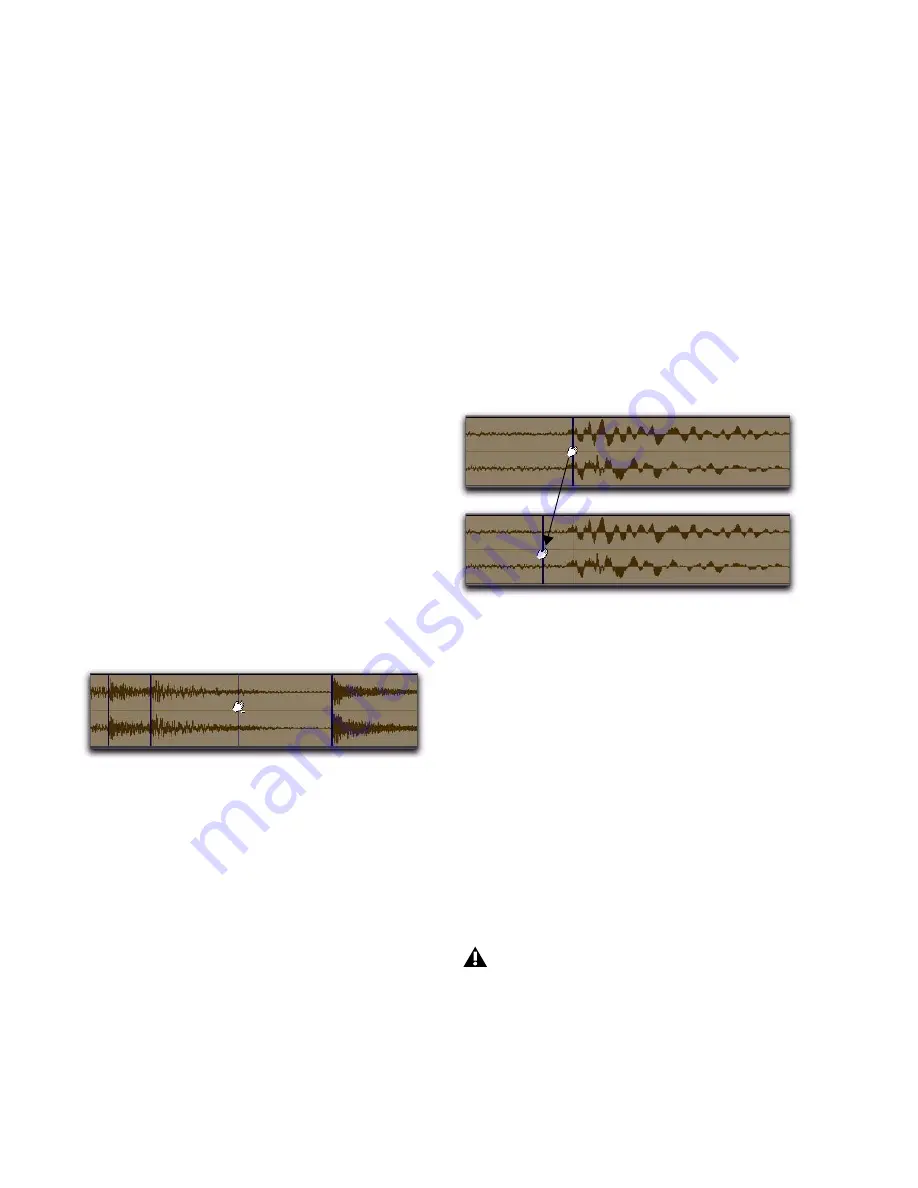
Locate the false trigger you want to delete.
Transients for false triggers usually have smaller
peaks than the other trigger points, and typi-
cally fall between the sub-beats.
3
Alt-click (Windows) or Option-click (Mac) the
trigger to delete it.
Moving Beat Triggers
You can adjust the placement of triggers to al-
low for the attack of their transients, or to com-
pensate for an individual transient that is
slightly ahead of or behind the beat.
To move a beat trigger:
1
With the Beat Detective window open, select
any Grabber tool in the Edit window.
2
Locate the beat trigger you want to move and
drag it left or right.
Inserting Beat Triggers
If an important beat or sub-beat is not detected,
because it is too quiet, you can manually insert a
beat trigger.
To insert a beat trigger:
1
With the Beat Detective window open, select
any Grabber tool in the Edit window.
2
Click in the selection where you want to insert
the new trigger. After inserting a beat trigger,
you can drag it left or right to adjust its place-
ment (see “Moving Beat Triggers” on page 558).
Deleting a beat trigger
Moving a beat trigger
If you click too close to an existing trigger,
the existing trigger will be moved to the new
location.
Summary of Contents for Digidesign Pro Tools 8.0
Page 1: ...Reference Guide Pro Tools 8 0 ...
Page 18: ...Pro Tools Reference Guide xviii ...
Page 19: ...1 Part I Introduction ...
Page 20: ...2 ...
Page 24: ...Pro Tools Reference Guide 6 ...
Page 40: ...Pro Tools Reference Guide 22 ...
Page 45: ...27 Part II System Configuration ...
Page 46: ...28 ...
Page 58: ...Pro Tools Reference Guide 40 ...
Page 76: ...Pro Tools Reference Guide 58 ...
Page 118: ...Pro Tools Reference Guide 100 ...
Page 127: ...109 Part III Sessions Tracks ...
Page 128: ...110 ...
Page 144: ...Pro Tools Reference Guide 126 ...
Page 170: ...Pro Tools Reference Guide 152 ...
Page 228: ...Pro Tools Reference Guide 210 ...
Page 292: ...Pro Tools Reference Guide 274 ...
Page 343: ...325 Part IV Playback and Recording ...
Page 344: ...326 ...
Page 386: ...Pro Tools Reference Guide 368 ...
Page 442: ...Pro Tools Reference Guide 424 ...
Page 443: ...425 Part V Editing ...
Page 444: ...426 ...
Page 490: ...Pro Tools Reference Guide 472 ...
Page 528: ...Pro Tools Reference Guide 510 ...
Page 566: ...Pro Tools Reference Guide 548 ...
Page 590: ...Pro Tools Reference Guide 572 ...
Page 591: ...573 Part VI MIDI ...
Page 592: ...574 ...
Page 648: ...Pro Tools Reference Guide 630 ...
Page 670: ...Pro Tools Reference Guide 652 ...
Page 679: ...661 Part VII Arranging ...
Page 680: ...662 ...
Page 756: ...Pro Tools Reference Guide 738 ...
Page 769: ...751 Part VIII Processing ...
Page 770: ...752 ...
Page 780: ...Pro Tools Reference Guide 762 ...
Page 786: ...Pro Tools Reference Guide 768 Figure 3 Quantized audio events Warp markers in Warp view ...
Page 814: ...Pro Tools Reference Guide 796 ...
Page 842: ...Pro Tools Reference Guide 824 ...
Page 843: ...825 Part IX Mixing ...
Page 844: ...826 ...
Page 976: ...Pro Tools Reference Guide 958 ...
Page 991: ...973 Part X Surround ...
Page 992: ...974 ...
Page 1000: ...Pro Tools Reference Guide 982 ...
Page 1025: ...1007 Part XI Sync and Video ...
Page 1026: ...1008 ...
Page 1080: ...Pro Tools Reference Guide 1062 ...
Page 1111: ......


