Pro Tools Reference Guide
414
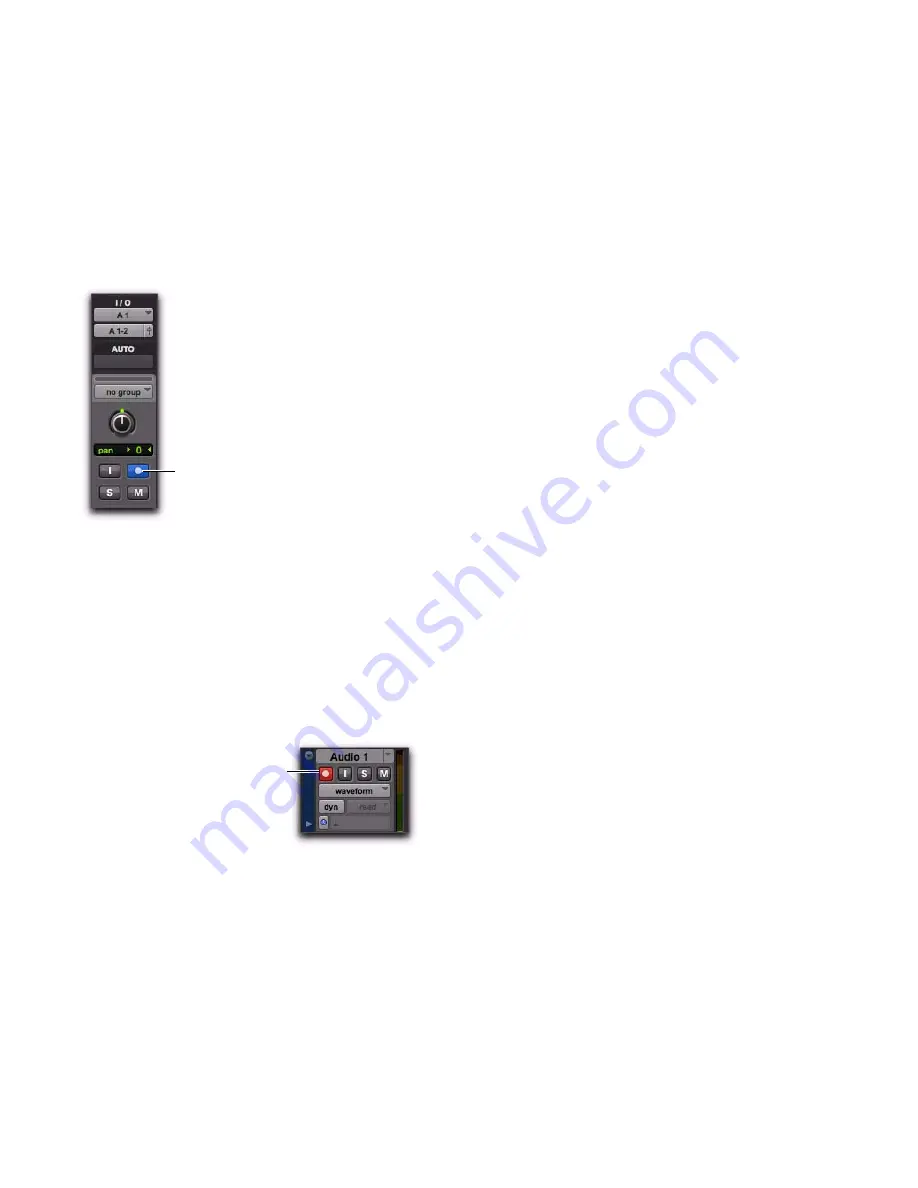
Track Record Status Display
Each track’s Record Enable button indicates its
TrackPunch and record enable status as follows:
• When a track is TrackPunch-enabled but not
record-enabled, its Record Enable button
lights solid blue.
• When a track is both TrackPunch-enabled and
record-enabled, its Record enable button
flashes blue and red.
• When a track is record-enabled only, its
Record Enable button flashes red.
• While a track is recording (in any mode), its
Record Enable button lights solid red.
Monitoring and Levels
To complete the setup for TrackPunch:
1
Configure monitoring for record-enabled
tracks by selecting a mode from the Track menu,
or using the TrackInput button, as appropriate.
Choices include:
•
Set Record Tracks to Auto Input
•
Set Record Tracks to Input Only
Selecting either monitoring mode only affects
tracks that are record-enabled.
2
Start playback and compare levels of the input
source with audio on disk. Click the TrackInput
button to toggle the track source. When lit
(green), the track is monitoring input. When
unlit (gray), the track is monitoring from disk
(see “Selecting Record Monitor Modes with
TrackInput Monitoring” on page 364).
3
When you are satisfied with your levels, you
are ready to start punch recording.
Using TrackPunch
After you have configured Pro Tools, tracks, and
levels, you can record with TrackPunch in sev-
eral ways.
Punching In on Individual Tracks
To punch in on individual tracks:
1
Make sure Pro Tools is in TrackPunch mode.
2
Start-click (Windows) or Control-click (Mac)
the Record Enable button for each track you
want to punch in, so that the track is Track-
Punch-enabled only. The track’s Record Enable
button should light solid blue.
3
Click Record in the Transport to enter the
TrackPunch Record Ready mode. The Record
button flashes blue and red.
TrackPunch status indication
Track Record status
Record Enable button
Red (not flashing) indicates recording
(all modes)
Summary of Contents for Digidesign Pro Tools 8.0
Page 1: ...Reference Guide Pro Tools 8 0 ...
Page 18: ...Pro Tools Reference Guide xviii ...
Page 19: ...1 Part I Introduction ...
Page 20: ...2 ...
Page 24: ...Pro Tools Reference Guide 6 ...
Page 40: ...Pro Tools Reference Guide 22 ...
Page 45: ...27 Part II System Configuration ...
Page 46: ...28 ...
Page 58: ...Pro Tools Reference Guide 40 ...
Page 76: ...Pro Tools Reference Guide 58 ...
Page 118: ...Pro Tools Reference Guide 100 ...
Page 127: ...109 Part III Sessions Tracks ...
Page 128: ...110 ...
Page 144: ...Pro Tools Reference Guide 126 ...
Page 170: ...Pro Tools Reference Guide 152 ...
Page 228: ...Pro Tools Reference Guide 210 ...
Page 292: ...Pro Tools Reference Guide 274 ...
Page 343: ...325 Part IV Playback and Recording ...
Page 344: ...326 ...
Page 386: ...Pro Tools Reference Guide 368 ...
Page 442: ...Pro Tools Reference Guide 424 ...
Page 443: ...425 Part V Editing ...
Page 444: ...426 ...
Page 490: ...Pro Tools Reference Guide 472 ...
Page 528: ...Pro Tools Reference Guide 510 ...
Page 566: ...Pro Tools Reference Guide 548 ...
Page 590: ...Pro Tools Reference Guide 572 ...
Page 591: ...573 Part VI MIDI ...
Page 592: ...574 ...
Page 648: ...Pro Tools Reference Guide 630 ...
Page 670: ...Pro Tools Reference Guide 652 ...
Page 679: ...661 Part VII Arranging ...
Page 680: ...662 ...
Page 756: ...Pro Tools Reference Guide 738 ...
Page 769: ...751 Part VIII Processing ...
Page 770: ...752 ...
Page 780: ...Pro Tools Reference Guide 762 ...
Page 786: ...Pro Tools Reference Guide 768 Figure 3 Quantized audio events Warp markers in Warp view ...
Page 814: ...Pro Tools Reference Guide 796 ...
Page 842: ...Pro Tools Reference Guide 824 ...
Page 843: ...825 Part IX Mixing ...
Page 844: ...826 ...
Page 976: ...Pro Tools Reference Guide 958 ...
Page 991: ...973 Part X Surround ...
Page 992: ...974 ...
Page 1000: ...Pro Tools Reference Guide 982 ...
Page 1025: ...1007 Part XI Sync and Video ...
Page 1026: ...1008 ...
Page 1080: ...Pro Tools Reference Guide 1062 ...
Page 1111: ......


