345
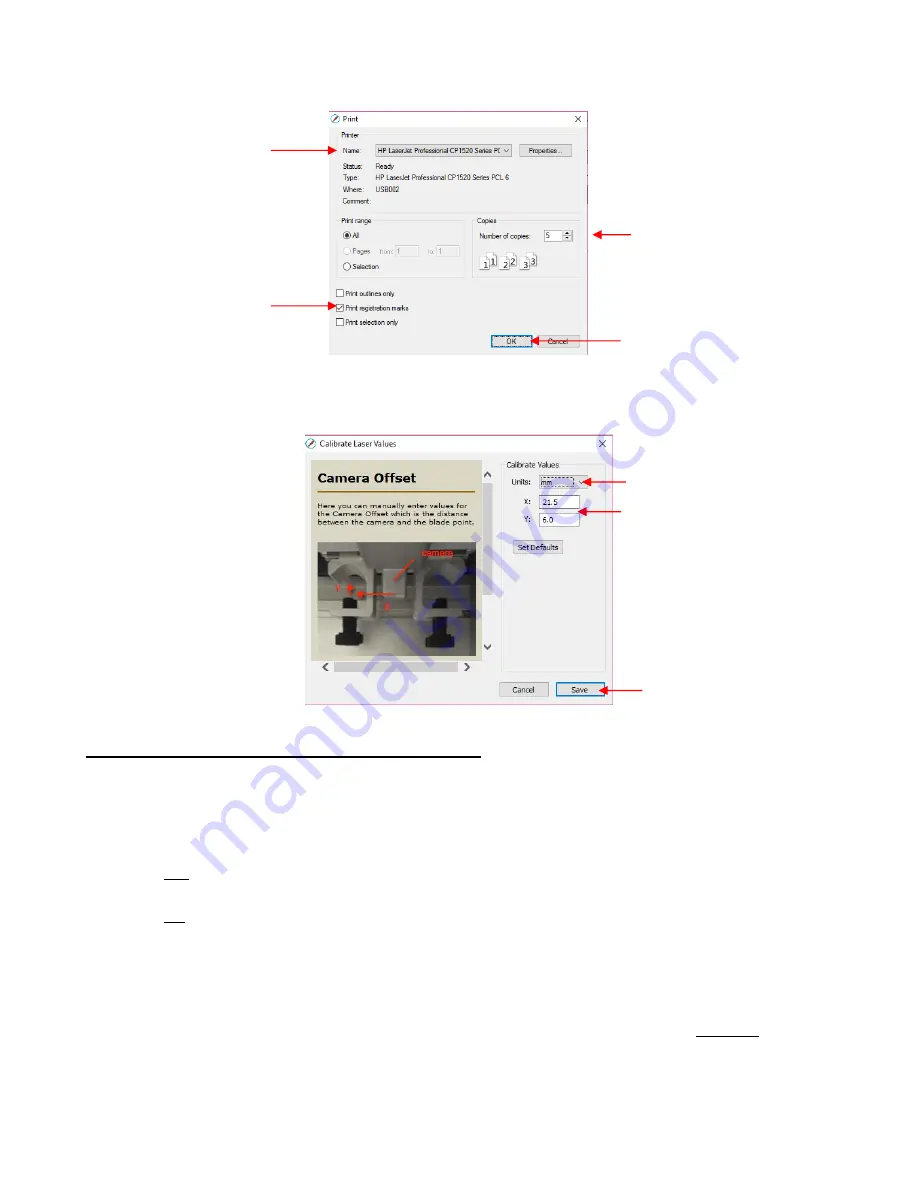
(7) To print the arrows with the registration marks, click on
Print:
(8) After printing, click on the
Calibrate Camera
button. It is highly recommended that the calibration numbers
be entered and adjusted in mm. So, change the
Units
and then enter the
X
and
Y
shown:
11.03.4 Setting the Registration Marks and Cutting
•
The PNC process is to move the blade holder near each mark and then the camera sends a photo to the
screen for tweaking the alignment. If you make the effort, at the start, to have the blade holder centered
over the corner of the upper left printed registration mark, it makes the rest of the process go much faster.
Also:
Do not have a bright light shining onto the printout as it can wash out the printed registration marks and
make it more difficult to do the alignment.
Do not set an
XY origin
using the
Set origin
button in the
Cut Settings
window. There is a software
bug that will cause the final cut to be located at the origin instead of based on the setting of the
registration marks.
•
Follow each step closely and you will find, after a few tests, that the procedure is quite easy to remember:
(1) Place the printout onto the mat and align with the grid. As you are facing the Force, the printout should be
on the mat in a portrait orientation with the arrow pointing towards the right end ca
p. It’s important to have
the printout fairly straight so that the camera will be able to move within a set distance of the target. The
same goes for inserting the mat into the Force- align as straight as possible, using the horizontal grooves on
the Force itself.
Select your printer
Make sure this box
is checked.
Print 4 or 5 copies
Click on
OK
to print the
calibration sheets
Change to
mm
Enter these
X
and
Y
values
Click on
Save
Summary of Contents for KNK Force
Page 306: ...306...


