114
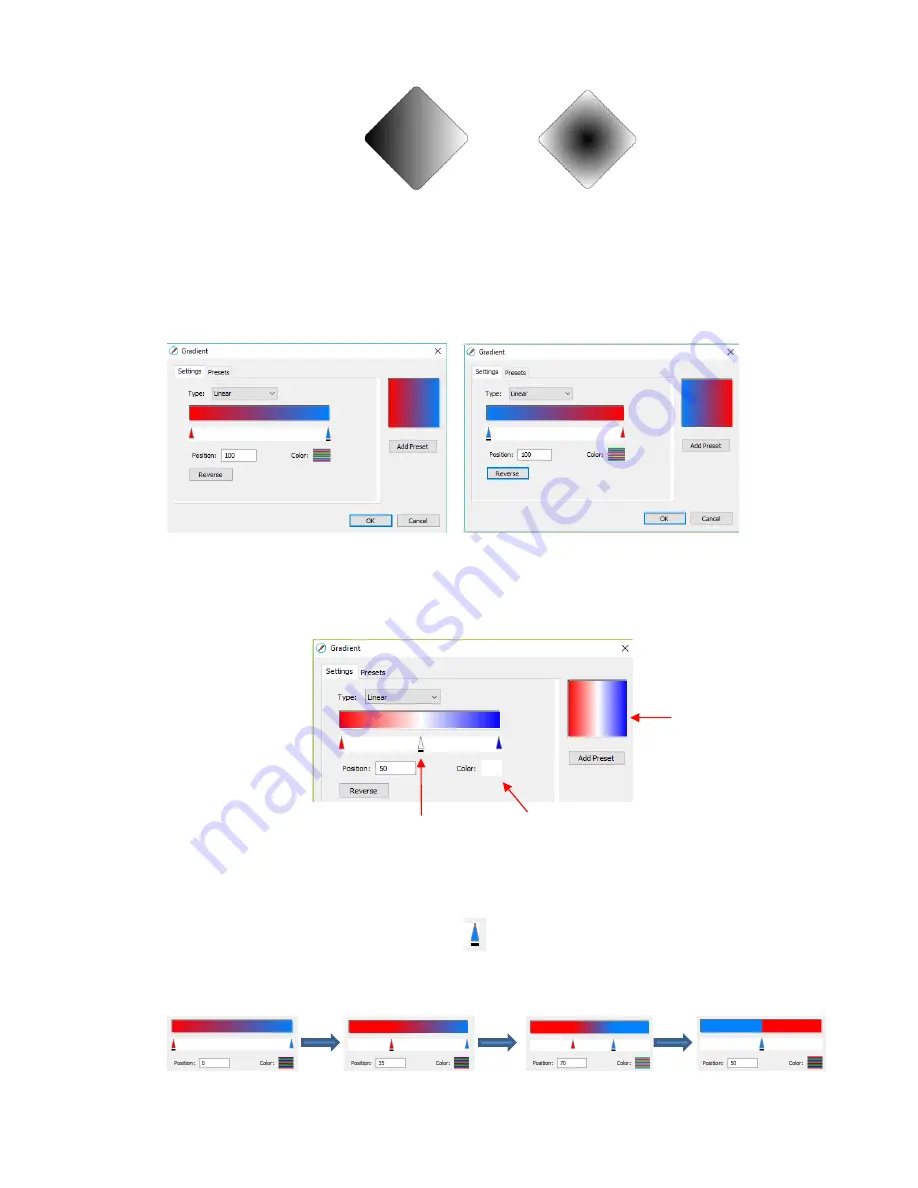
To change colors, click on one of the markers, then click on the color selector box and choose a color
from the
Color
Picker
window. Repeat for the other marker. As with other color selections, you can
choose a base color or create a custom color. Refer to
Section 5.14.2
for details on using the
Color
Picker
window.
After selecting new colors, the thumbnail image will update. Note that clicking on
Reverse
will switch the
two chosen colors:
More markers can be added by clicking on the
Position Bar
and then clicking on the
Color
selector.
For example, white could have been added to the middle:
If you inadv
ertently add a marker or decide you don’t want one or more of the new ones, drag the
marker downward and it will be removed.
Position:
The
Position
value is a location from 0 to 100 and applies to whichever marker is selected.
Note the little black line under a selected marker
.
Changing the
Position
moves the marker and resets where the gradient begins on that side. You can
also manually slide the markers to change the
Position
, as well. Returning to the two-color example:
Linear
Radial
After applying
Reverse
After selecting new colors
Left marker at 0;
Right marker at 100
Left marker at 35:
More red along left side
Right marker at 70
More blue along right side
Both markers at 50
No gradient
Click once to add a marker
Then click here to select color
Shape with a
Fill
color set to white
Summary of Contents for KNK Force
Page 306: ...306...


