115
The
Position
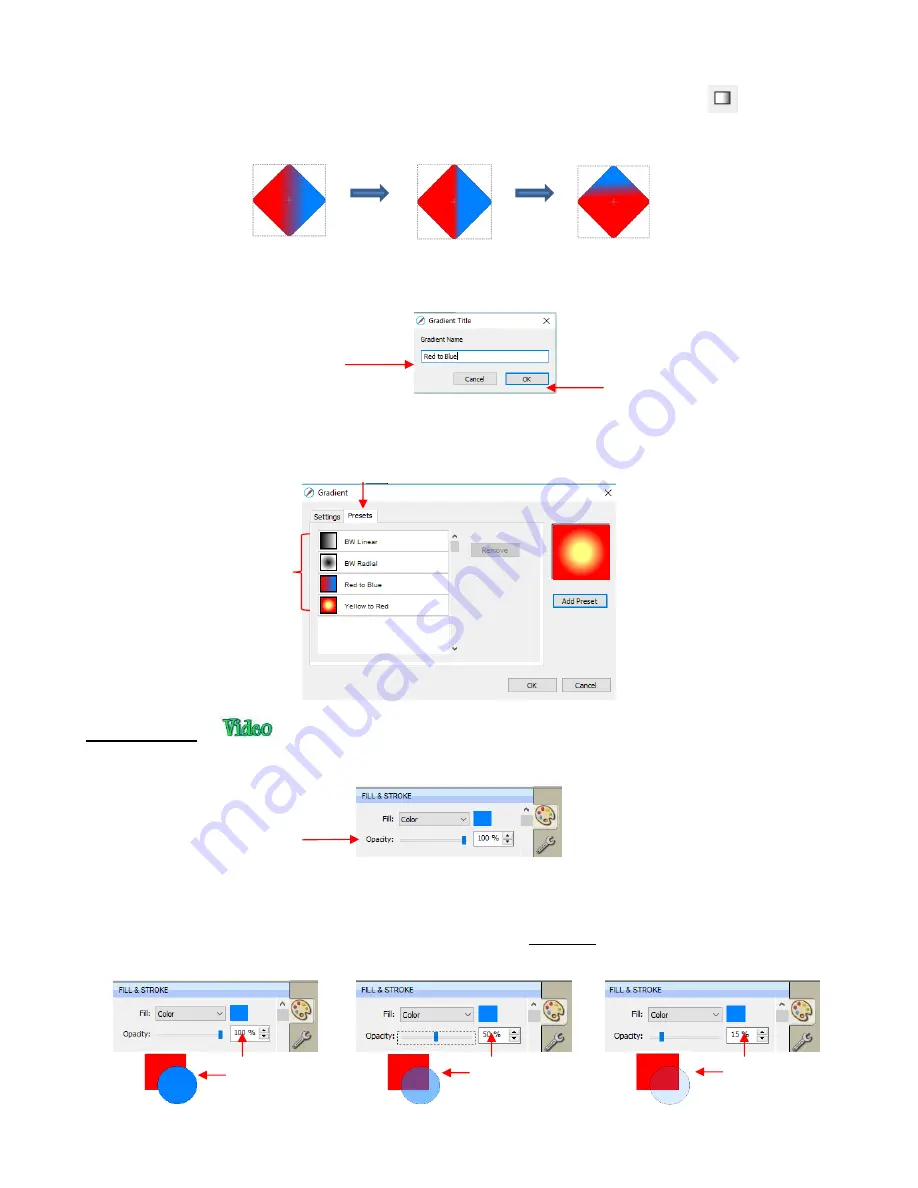
can also be changed after the shape is filled and the
Gradient
window is closed. On the
Tools Panel
is a
Gradient
tool. After selecting the shape, click on the
Gradient
icon
and then
drag the mouse across the shape to change the
Positions
and even rotate the gradient:
If you want to save a particular gradient for future applications, click on
Add Preset
and a window will
open where you can name this
Preset
:
To access your saved
Gradient Presets
, click on the
Presets
tab and the menu will appear:
5.14.5 Opacity
•
Just below the
Fill
setting is
Opacity
:
•
Decreasing the
Opacity
setting will make a shape more transparent. This can be used for changing the
appearance for printing or for revealing shapes that are completely or just partially hidden by other shapes.
In the following example, the
Opacity
is decreased on the blue circle, allowing the blocked portion of
the red square to be seen:
Name the
Gradient Preset
Click on
OK
Click on the
Presets
tab
Saved
Presets
Opacity:
100
Opacity:
50
Opacity:
15
Summary of Contents for KNK Force
Page 306: ...306...


