31
•
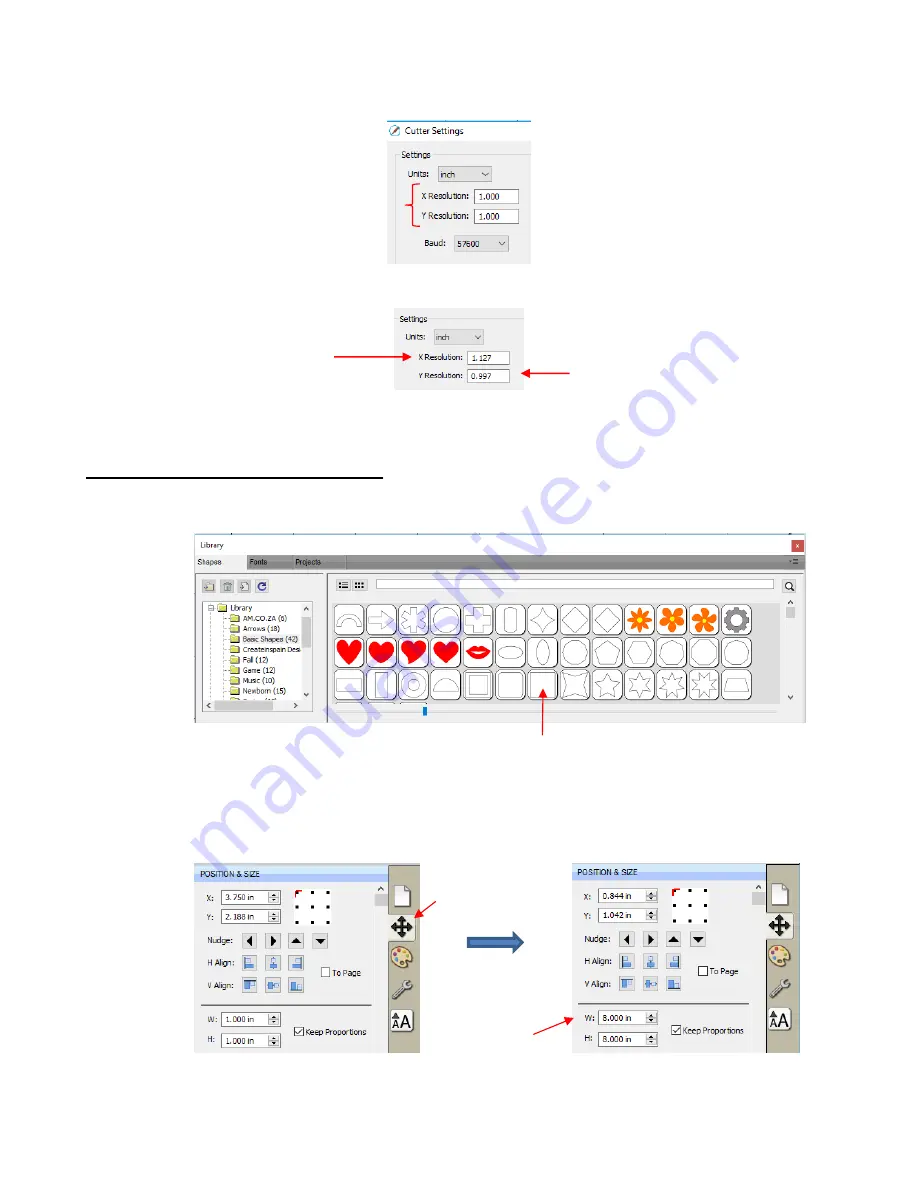
To replace the defaults with the calibrations from C3:
•
After making changes, click on
Save
in the lower right corner of the
Cutter Settings
window.
2.07.2 Performing a Sizing Calibration
•
Go to the
Library
and select the square shape:
•
Make sure you have selected the square and not the rounded square to the left of it because you will be
measuring this square with a ruler after drawing it.
•
To resize the square, select it and then click on the
Position & Size
icon to display that panel. The square
will be 1
” x 1” (or 25.4 mm x 25.4 mm). Change the size (
W
and
H
) to the largest size that will fit on the
paper you have available. It is recommended that at least 10” x10” (or ~ 250 mm x 250 mm) be used:
•
Draw the square on your paper using the test pen or some other thin line pen. Then carefully measure the
Width
(the left-to-right length that drew) and the
Height
(the top-to-bottom length that drew:
Change sizing
here
Display
Position &
Size Panel
Enter the
Belt
resolution
here.
Enter the
Wheel
resolution
here.
Calibration
settings
Summary of Contents for KNK Force
Page 306: ...306...


