154
7.03 Trace Function
•
To begin the tracing process, open the
Trace Image
window using one of the following ways:
Click on the
Trace
icon on the
Toolbar
Go to
File>Trace Image
Press
Ctrl+Shift+T
•
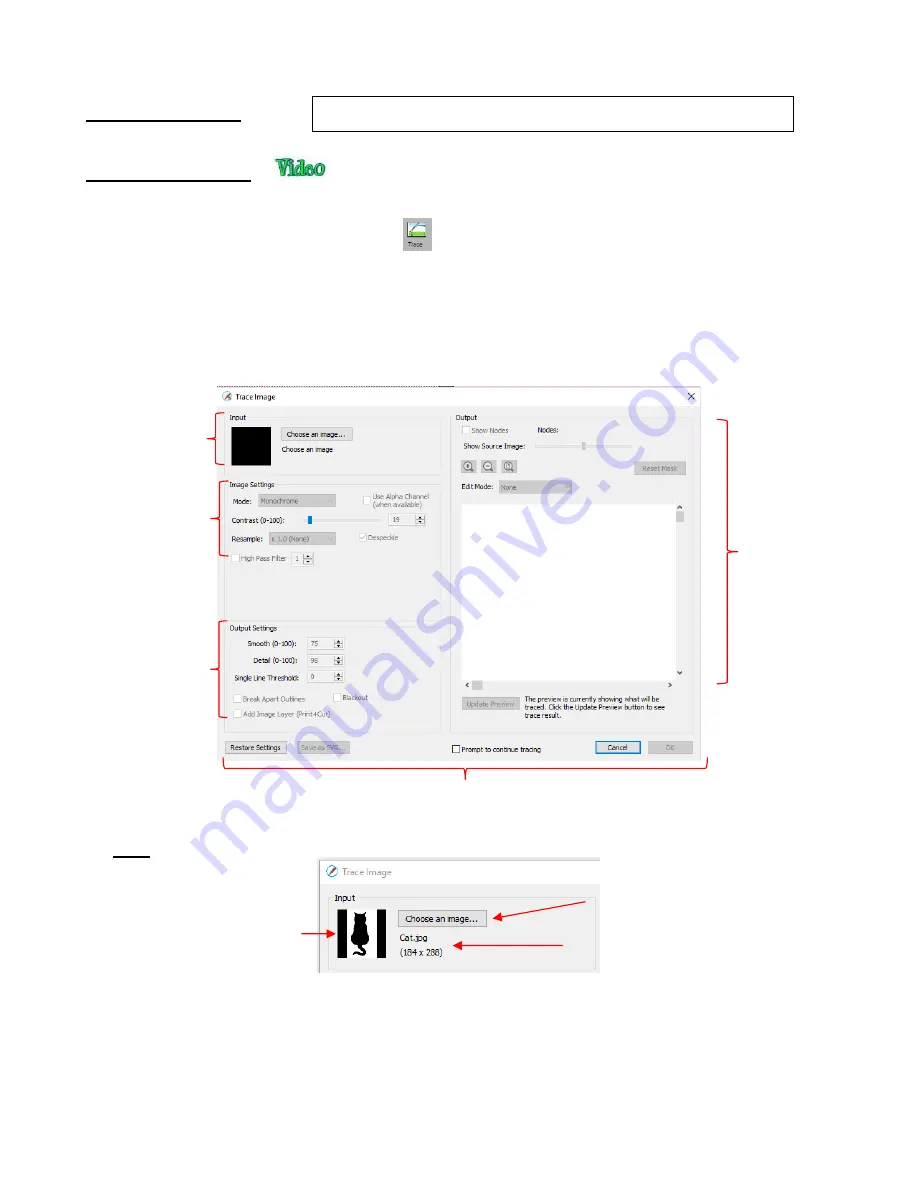
There are five sections to the
Trace Image
window:
Input
,
Image Settings
,
Output Settings
,
Output,
and
then the bottom bar. Note the location of each section and its main purpose. More details about each
section follows:
•
Input
Click on
Choose an image
and browse to locate the raster file (BMP, GIF, JPG, or PNG). Upon
opening, a thumbnail appears, along with the name of the file and the size in pixels.
Alternatively, before opening the
Trace Image
window, you can import the raster file using
File>Place
Image.
Then, with the image selected, open the
Trace Image
window and this image will be loaded
and ready for changes to trace settings.
Input:
import the
raster and see
details
Output:
control
how the image
appears in this
window and
preview the trace
lines
Image Settings:
select the type of
trace and how
much to include
Output Settings:
control the type
of trace lines
Additional
“bottom of the screen” settings
Thumbnail of imported file
File name and size in pixels
Click here to import a new raster file
Images used in this tutorial can be downloaded at:
HYPERLINK
"http://iloveknk.com/Images/" http://iloveknk.com/Images/
Summary of Contents for KNK Force
Page 306: ...306...


