273
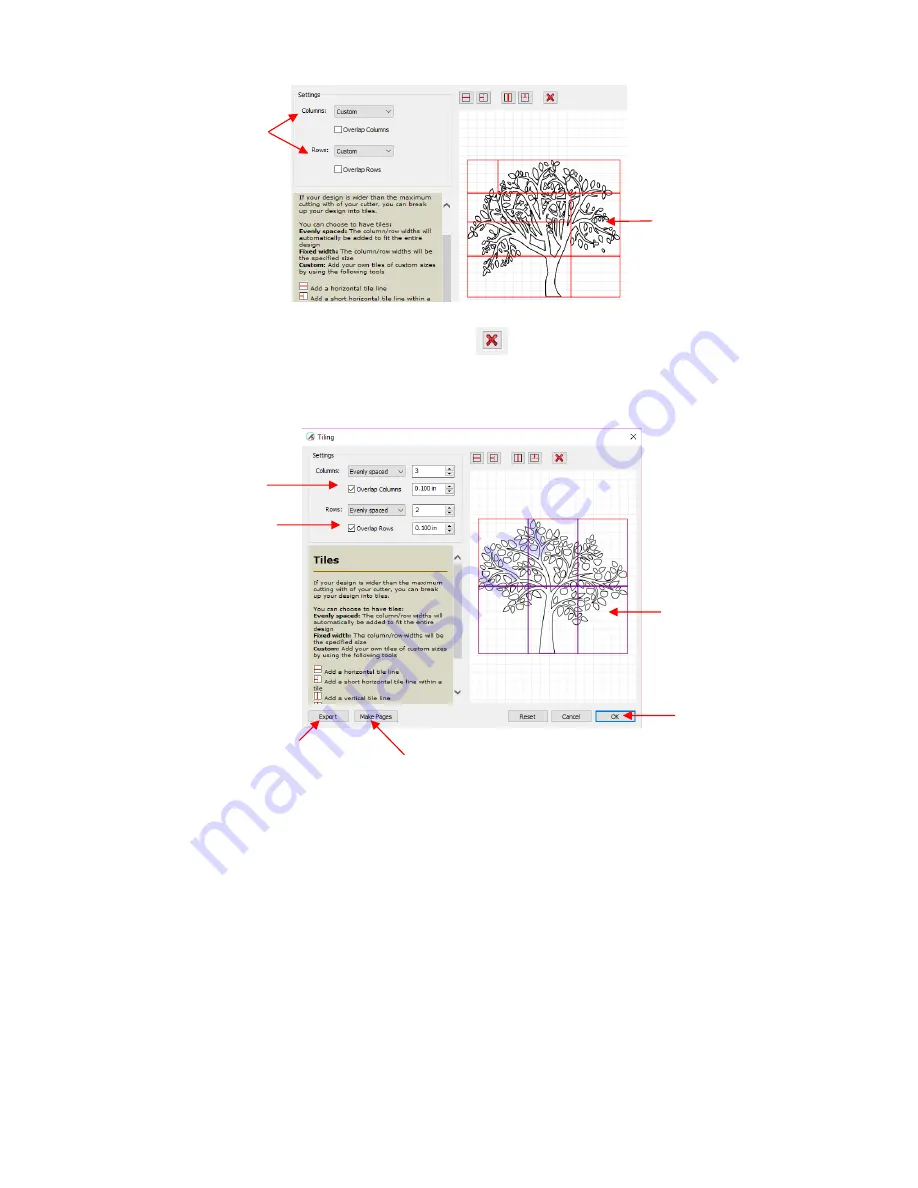
To delete any of the lines, click on the
Delete
icon
and then click on the line inside the
Preview
window.
Overlap Columns
and
Overlap Rows
: If you want an overlap created so that each tile slightly overlaps
with an adjacent one, check the box and then enter the desired overlap:
•
Once you are satisfied with the settings, you have three options:
(1) Click on
OK
. You won’t observe any changes on the
Cutting Mat
or on the
Layers Panel.
However,
the results of the
Tiling
process will appear once you enter the
Cut Settings
window and click on the
Tiles
tab. Refer to
Section 10.06.4
.
(2) Click on
Make Pages
and each tile will be placed on its own page in the file. The first page will retain
the original image with no tiling.
Thus, it’s not necessary to use the
Tiles
tab in the
Cut Settings
window.
(3) Click on
Export
and the
SVG Export
window will open. After you name the file, select the export
settings, and click on
OK
, wait while the export files (one for each tile) are saved as separate SVG files,
numbered with the file name you chose. Once the
Tiling
window closes, you are back to the same
situation as in option (1).
Custom lines are
added.
Select
Custom
Purple lines
indicate an
overlap is applied
Check
Overlap
Columns
and/or
Overlap Rows
and
enter the desired
overlap size
Click
OK
when
done or click on
Make Pages
or
select
Export
Click
Make Pages
to
place each on its own
page in the project
Export each tile as a
separate SVG file
Summary of Contents for KNK Force
Page 306: ...306...


