124
•
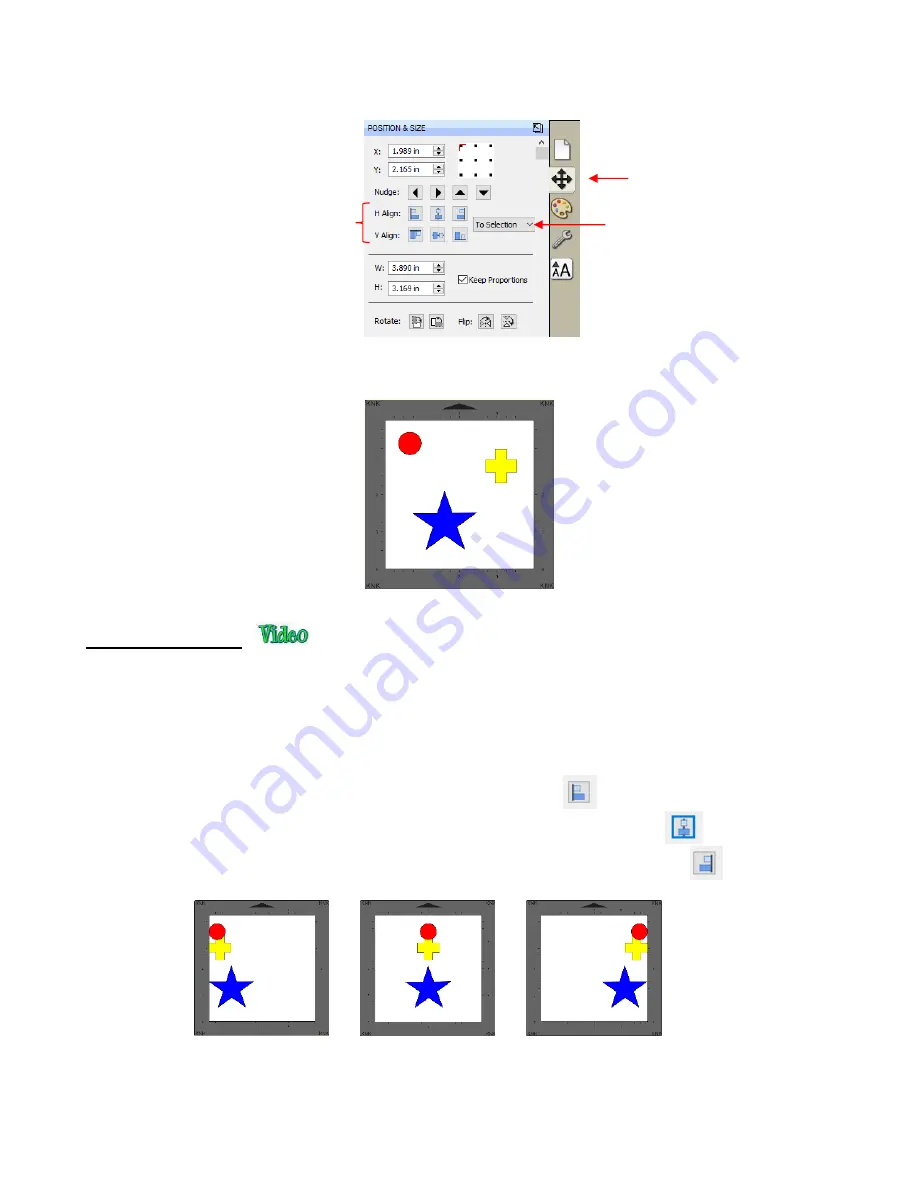
The following three shapes, in their current relative positions, will be used to illustrate what happens when
each alignment function is applied. Note that a small custom mat was created to facilitate screenshots:
5.18.1 Align to Page
•
Make sure the alignment mode is set to
Align to Page
. To do this, either:
Go to
Object>Alignment
and make sure
Align to Page
is checked
Select
To Page
on the
Position & Size
panel
•
With the shapes selected, the horizontal alignment options are:
Align Left
aligns shapes along the left side of the
Cutting Mat
.
Align Horizontal Center
aligns shapes through the center of the
Cutting Mat
.
Align Right
aligns shapes along the right side of the right side of the
Cutting Mat
.
•
With the shapes selected, the vertical alignment options are:
Align Left
Align Horizontal
Center
Align Right
Alignment
icons
Click on
Position & Size
Choose between
To
Selection
and
To Page
Summary of Contents for KNK Force
Page 306: ...306...


