241
9.12.4 Editing Rhinestone Designs
•
Before editing, make a backup of the design created by the
Rhinestone
function. As was mentioned earlier
you can resize rhinestone designs but if certain editing has occurred, you might or might not get the results
you want after editing.
•
Rhine
stone designs will sometimes need “tweaking” which involves adding, deleting, moving, or re-spacing
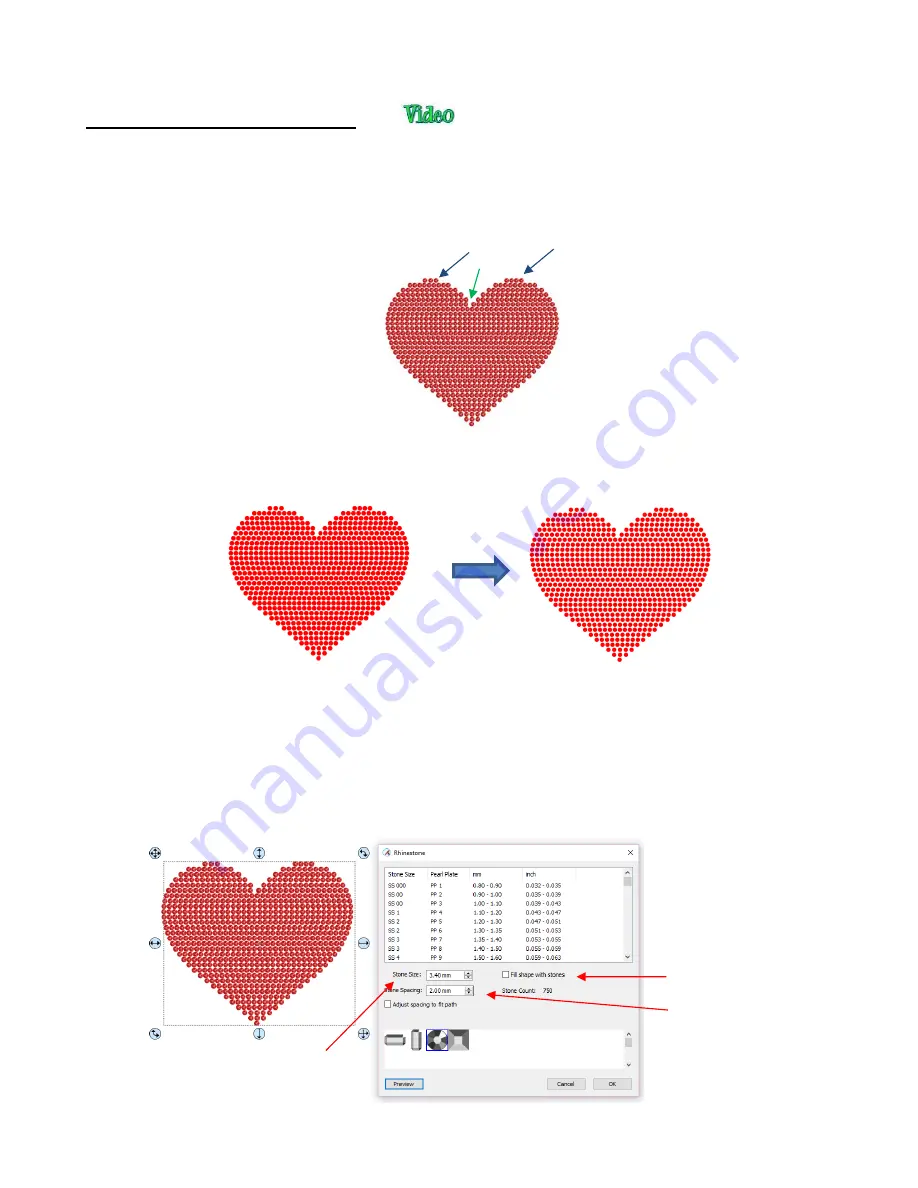
circles. In the following example, there are two corrections required:
•
The first step is to break the design so that a row of circles or even individual circles can be moved. Select
the pattern and apply
Object>Break Apart
or
Ctrl-B
. You may wish to turn off
Stroke
to have a better
sense of the actual spacing:
•
The simulation can be restored now or after editing or not at all. The circles will still remain as individual
shapes. Again, this does not affect how the design cuts; the simulation is only for displaying or printing. If
the design is extremely large or you have a slow computer, you may find that the simulation causes more
lagging as you are editing the design. In that case, save the following step until after editing is completed.
•
To restore the simulation, select the design and reopen the
Rhinestone
window. Enter the same
Stone
Size
setting used to create the design. Note that the
Spacing
doesn’t matter any longer, nor is it necessary
to select the
Fill
option:
1. The blue arrows indicate the
top row on each side does not
contain the same number of
circles.
2. The green arrow indicates a
gap in that row that can easily
be corrected.
Leave
unchecked
Any spacing will
suffice
Important:
Enter
same stone size
Stroke
set to
None
Simulation is removed
Summary of Contents for KNK Force
Page 306: ...306...


