554
Chapter 50:
Designing and Building Your Own Fonts
keycodes. Save each character to its own PLT file according to “Saving the characters.”
Follow this sequence until all of the characters of the font have been saved.
6
Follow the directions in “Building the font,” for details on using Font Designer to
build the font.
Tips for digitizing connecting characters
♦
When digitizing, start with the left side of the character, then digitize the right side.
♦
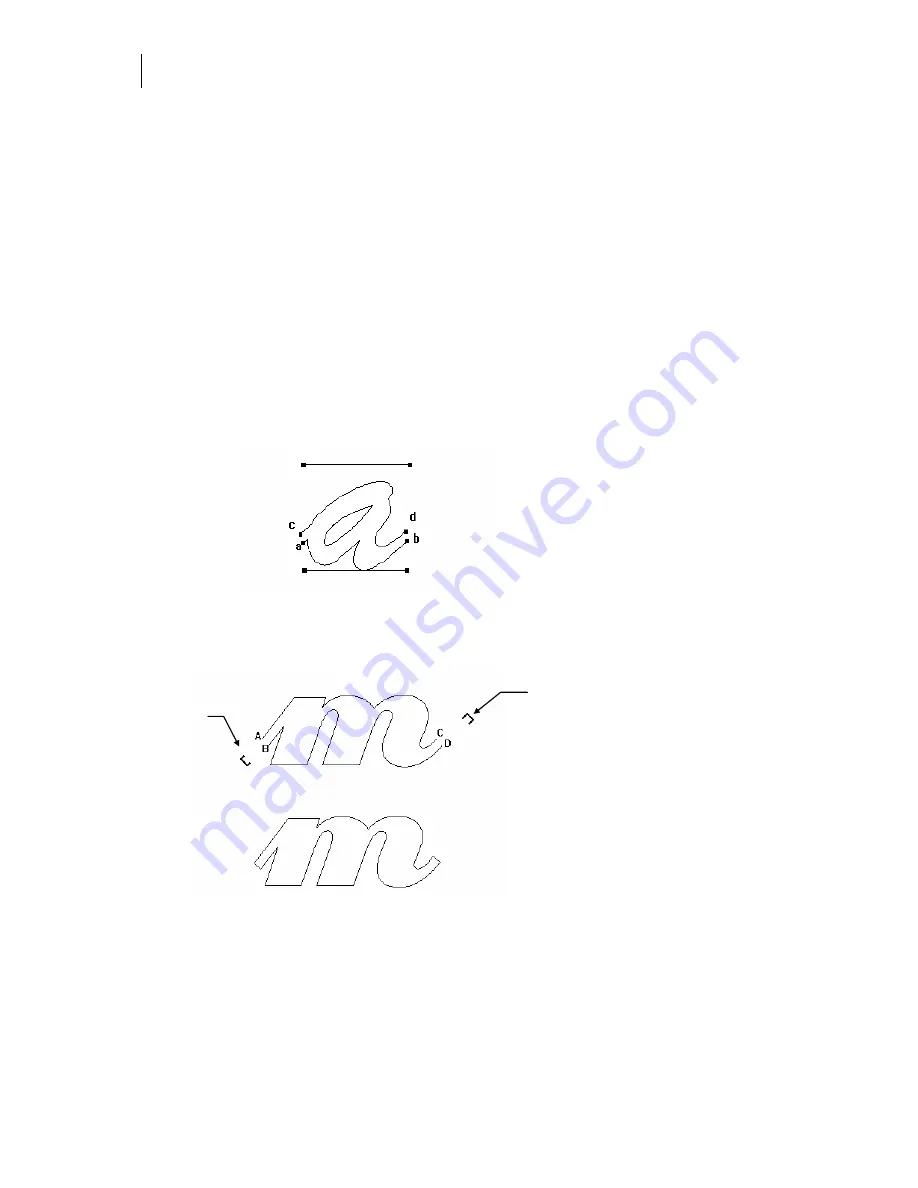
If the character connects to other characters, be sure to leave open points at the
connection points. The connection points are where the character joins other
characters. In the example below, the points labeled a, b, c, and d are the connection
points.
♦
When digitizing the character, points
a
and
b
should be the same distance apart as the
length of the baseline, as shown. See “Editing the Baseline” for more information on
changing the size of the baseline.
Heightline
Baseline
Width of character
♦
End caps are used when a character
does not
connect to the character that comes
before or after it. In the example below, the open points (a, b, c, and d) are where the
end caps are inserted.
End cap
End cap
Character before adding end caps
Character after adding end caps
♦
Digitize left and right end caps for each font built. Save the end caps using the
keycodes that correspond to the open and closed parenthesis for information see the
section "Saving the characters." The open (or left) parenthesis, which is for the left side
end cap, equals
KEY40
. The closed (or right) parenthesis, which is for the right side end
cap, equals
KEY41
.
Summary of Contents for OMEGA CP
Page 16: ......
Page 20: ......
Page 36: ......
Page 42: ...28 Chapter 4 Saving Files...
Page 44: ......
Page 68: ......
Page 92: ......
Page 96: ...82 Chapter 7 Selecting Elements of the Design...
Page 98: ......
Page 132: ......
Page 146: ......
Page 154: ......
Page 162: ......
Page 182: ......
Page 188: ......
Page 204: ......
Page 234: ......
Page 238: ......
Page 244: ......
Page 254: ...240 Chapter 22 Strokes Adding Print Thickness to the Outline of Objects...
Page 256: ......
Page 282: ......
Page 320: ......
Page 346: ......
Page 358: ......
Page 380: ......
Page 386: ......
Page 418: ......
Page 422: ......
Page 452: ......
Page 462: ......
Page 476: ......
Page 512: ...498 Chapter 44 Creating Special Effects...
Page 514: ......
Page 520: ......
Page 530: ......
Page 540: ......
Page 552: ......
Page 564: ......
Page 606: ......
Page 614: ...600 Chapter 51 Sending the Job to a Plotter or Printer...
Page 694: ......
Page 700: ......
Page 734: ......
Page 748: ......
Page 760: ...746...
Page 776: ......
Page 786: ......
Page 790: ......


