380
Chapter 35:
Scanning Artwork
Full color raster artwork such as a photo
♦
Set the color information to 24-bit color.
♦
Set the resolution (or dpi) to 125 dpi to output at the same size as the
original. To output at larger sizes, multiply 125 dpi times the scale factor of
the output. For example, to output at 4 times the size of the original, set the
scanner resolution to 500 dpi (125 x 4).
3
Preview scan, crop as needed, and final scan the image or photograph in your scanner
program. Save as a BMP, TIF, JPG, or other common raster format.
4
Import the image into Composer (File > Import). If it asks for a Source Color Space
Profile, click OK to use the default.
5
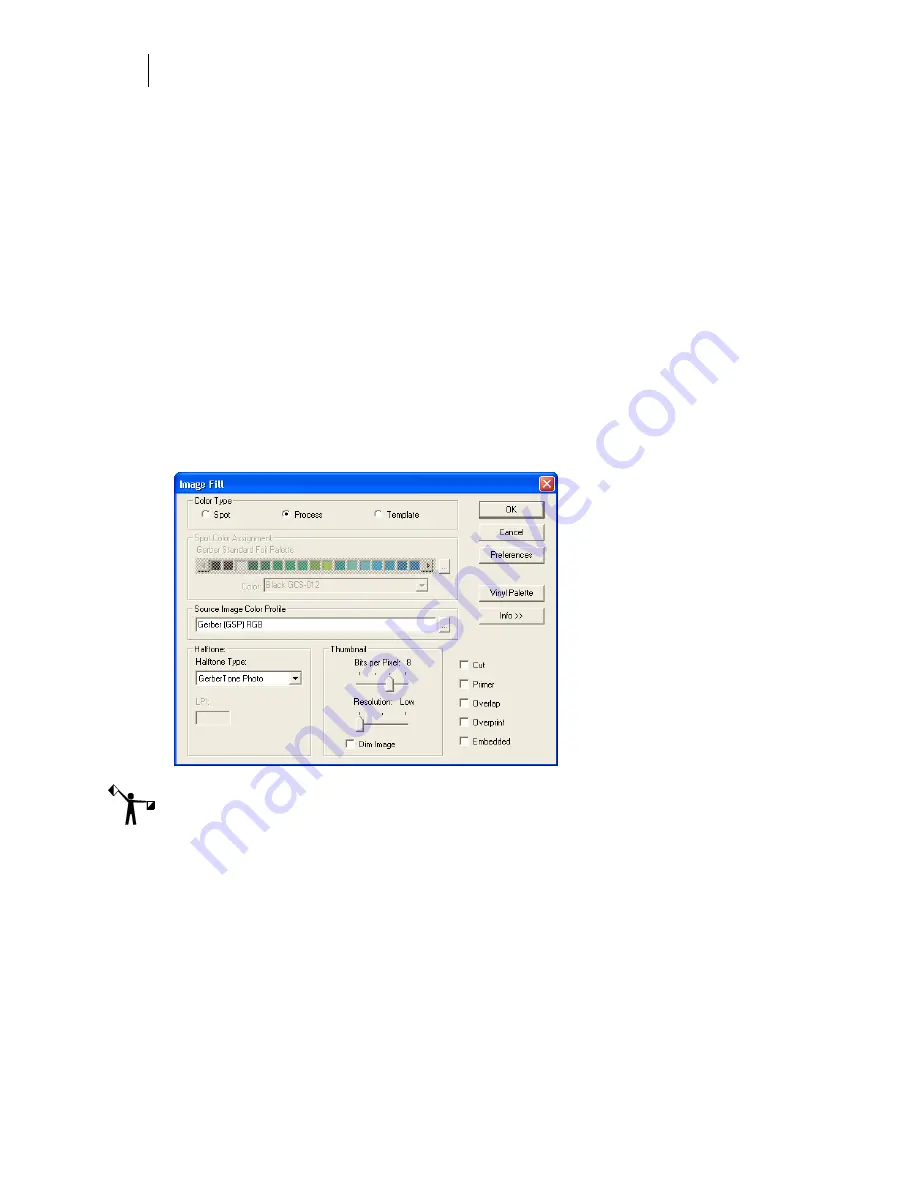
Be sure the image is selected and click the Image Fill tool to open the Image Fill dialog
box.
♦
If printing black and white artwork, click Spot color as the Color Type and
choose a spot color for the output color.
♦
If printing as a full color photo, click Process as the Color Type and choose
GerberTone Photo STC as the Halftone type. Enter an LPI value of 70.
Note: You can also assign and print a full color image as a single Spot color. Simply click Spot
color instead of Process color in the Image Fill dialog box and choose the desired spot color.
6
Set the Thumbnail Bits per Pixel to 24 and the Resolution to Low. These thumbnail
settings do not affect how images print to the EDGE. They only affect how images look
on screen. To view more detail in images in Composer, you can set the Bits per Pixel to
24 and the Resolution to High, but your PLT file size may be very large.
7
Add other design elements or add a cut line around the image.
8
Click File > Output All to open the GSPPlot program to output to the GERBER EDGE.
9
Once in the GSPPlot program, click the File > Print to Device (F10).
10
Follow the prompts on the GERBER EDGE LCD for loading vinyl and foil colors.
Summary of Contents for OMEGA CP
Page 16: ......
Page 20: ......
Page 36: ......
Page 42: ...28 Chapter 4 Saving Files...
Page 44: ......
Page 68: ......
Page 92: ......
Page 96: ...82 Chapter 7 Selecting Elements of the Design...
Page 98: ......
Page 132: ......
Page 146: ......
Page 154: ......
Page 162: ......
Page 182: ......
Page 188: ......
Page 204: ......
Page 234: ......
Page 238: ......
Page 244: ......
Page 254: ...240 Chapter 22 Strokes Adding Print Thickness to the Outline of Objects...
Page 256: ......
Page 282: ......
Page 320: ......
Page 346: ......
Page 358: ......
Page 380: ......
Page 386: ......
Page 418: ......
Page 422: ......
Page 452: ......
Page 462: ......
Page 476: ......
Page 512: ...498 Chapter 44 Creating Special Effects...
Page 514: ......
Page 520: ......
Page 530: ......
Page 540: ......
Page 552: ......
Page 564: ......
Page 606: ......
Page 614: ...600 Chapter 51 Sending the Job to a Plotter or Printer...
Page 694: ......
Page 700: ......
Page 734: ......
Page 748: ......
Page 760: ...746...
Page 776: ......
Page 786: ......
Page 790: ......


