


206
Chapter 17:
Filling Objects with Color for Printing
Applying multiple process colors to a gradient fill
When creating either a linear or radial fill you can use multiple colors when filling an object. For
an example of a job with more than one color go to C:\jobs\learning\multicolors.
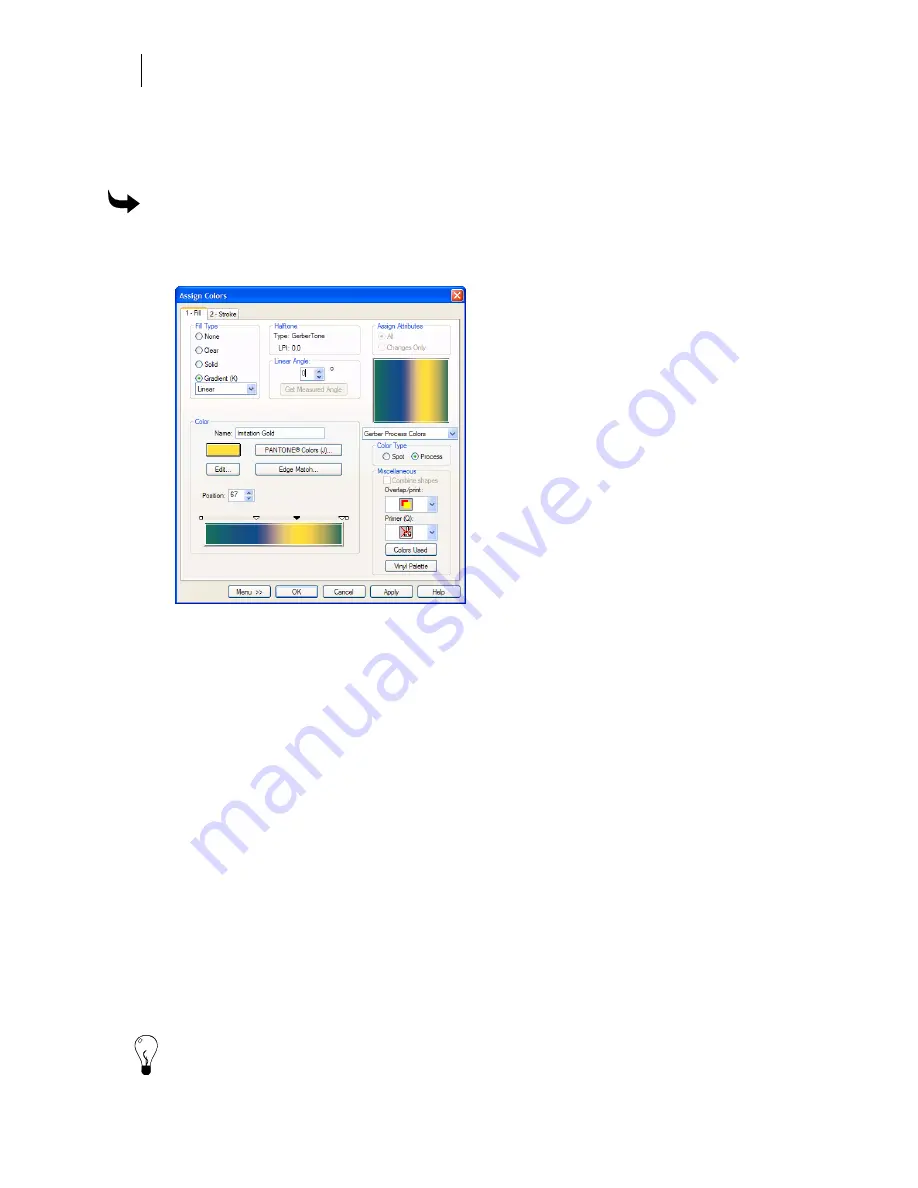
To apply multiple process colors to a gradient fill
1
Select the object.
2
Click Fill to open the Fill tab of the Assign Colors dialog box.
3
Choose Radial or Linear in the Fill Type group box.
4
Choose Process in the Color Type group box.
5
Enter a Position % or double-click the right or left box of the position slider. A black
arrow appears on the position slider.
6
Click the Color Selection box in the Color group box. A color palette drops down.
7
Choose a color in the color menu and click Select.
8
Enter a Position % or double-click the right or left box of the position slider. A black
arrow appears on the position slider.
9
Repeat steps 6 and 7 to add new process colors to the fill.
10
To edit a color within the fill, select the color position arrow and change the location
and color.
11
If using Linear Fill, enter the angle in the Linear Angle group box. If using Radial Fill,
enter the X and Y% offsets in the Radial Center Offset group box. For either fill, click
inside the sample fill box and visually adjust the position of the fill. The sample fill box
displays a preview of the fill.
12
Click OK to return to the Composer work surface.
Tip: To remove a color, double-click that color arrow in the position slider or drag the arrow off
the end of the slider.
Summary of Contents for OMEGA CP
Page 16: ......
Page 20: ......
Page 36: ......
Page 42: ...28 Chapter 4 Saving Files...
Page 44: ......
Page 68: ......
Page 92: ......
Page 96: ...82 Chapter 7 Selecting Elements of the Design...
Page 98: ......
Page 132: ......
Page 146: ......
Page 154: ......
Page 162: ......
Page 182: ......
Page 188: ......
Page 204: ......
Page 234: ......
Page 238: ......
Page 244: ......
Page 254: ...240 Chapter 22 Strokes Adding Print Thickness to the Outline of Objects...
Page 256: ......
Page 282: ......
Page 320: ......
Page 346: ......
Page 358: ......
Page 380: ......
Page 386: ......
Page 418: ......
Page 422: ......
Page 452: ......
Page 462: ......
Page 476: ......
Page 512: ...498 Chapter 44 Creating Special Effects...
Page 514: ......
Page 520: ......
Page 530: ......
Page 540: ......
Page 552: ......
Page 564: ......
Page 606: ......
Page 614: ...600 Chapter 51 Sending the Job to a Plotter or Printer...
Page 694: ......
Page 700: ......
Page 734: ......
Page 748: ......
Page 760: ...746...
Page 776: ......
Page 786: ......
Page 790: ......


