


237
Tip: You can update stroke colors using the click and drag method and the on-screen palettes.
When you touch the edge of the stroked object with a foil swatch the color is assigned to the
stroke. It may be helpful to zoom in on the object so that you do not inadvertently change the
fill color.
Updating strokes with Changes Only
When the Changes Only option is turned on in the Assign Attributes group box, the selected
shapes take on the attribute that was just changed. For example, if the Stroke Type is changed
from clear to solid, then all selected shapes have solid strokes. For example, if you select a red
box and then a blue box, the Assign Colors dialog box shows a blue fill (because blue was the
last shape selected). If you turn on a solid stroke and choose the Changes Only option, when
you return to the work surface, the fills do not change, but all selected objects will have a solid
stroke.
If the All option is turned on, the selected shapes take on all the attributes that currently display
in the Assign Colors dialog box. For example, if you select a red box and then a blue box, the
Assign Colors dialog box shows a blue fill (because blue was the last shape selected). If you turn
on a solid stroke and choose the All option, when you return to the work surface the red box
will have a blue fill and the strokes will be the same.
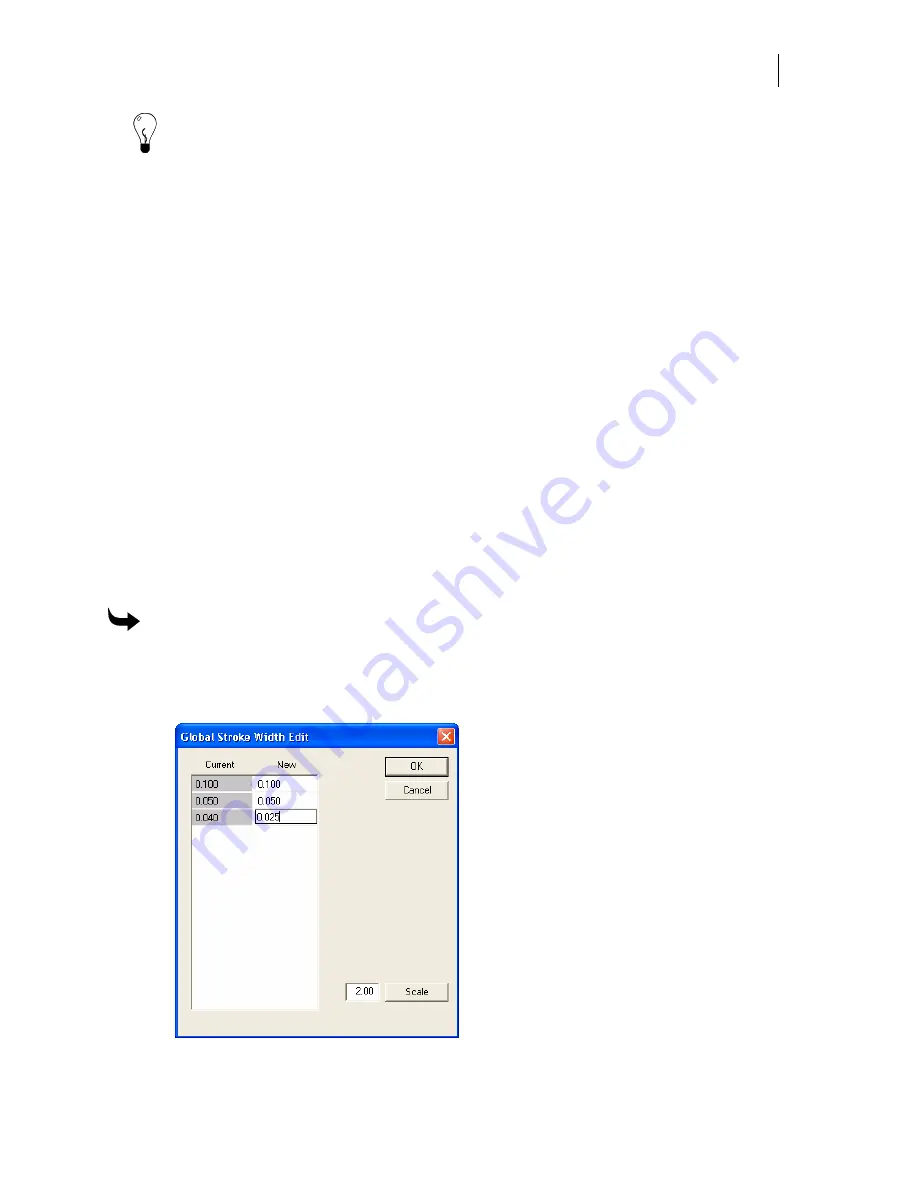
Global stroke width editing
The Stroke Width Edit command in the Tools menu opens the Global Stroke Width Edit dialog
box where you can edit all stroke widths of selected objects. Strokes can be edited individually
or you can scale all selected strokes.
To globally edit strokes
1
Select the objects with strokes that you wish to edit.
2
Click Tools > Stroke Width Edit to open the Global Stroke Width Edit dialog box. The
existing stroke widths display in the Current column.
3
Click in any of the New column boxes to edit individual stroke widths.
Summary of Contents for OMEGA CP
Page 16: ......
Page 20: ......
Page 36: ......
Page 42: ...28 Chapter 4 Saving Files...
Page 44: ......
Page 68: ......
Page 92: ......
Page 96: ...82 Chapter 7 Selecting Elements of the Design...
Page 98: ......
Page 132: ......
Page 146: ......
Page 154: ......
Page 162: ......
Page 182: ......
Page 188: ......
Page 204: ......
Page 234: ......
Page 238: ......
Page 244: ......
Page 254: ...240 Chapter 22 Strokes Adding Print Thickness to the Outline of Objects...
Page 256: ......
Page 282: ......
Page 320: ......
Page 346: ......
Page 358: ......
Page 380: ......
Page 386: ......
Page 418: ......
Page 422: ......
Page 452: ......
Page 462: ......
Page 476: ......
Page 512: ...498 Chapter 44 Creating Special Effects...
Page 514: ......
Page 520: ......
Page 530: ......
Page 540: ......
Page 552: ......
Page 564: ......
Page 606: ......
Page 614: ...600 Chapter 51 Sending the Job to a Plotter or Printer...
Page 694: ......
Page 700: ......
Page 734: ......
Page 748: ......
Page 760: ...746...
Page 776: ......
Page 786: ......
Page 790: ......


