


216
Chapter 18:
Choosing and Assigning Halftones
print in the Panels Setup dialog box and send it to the MAXX 2. After printing the sample you
can analyze the results and determine if the halftone is acceptable.
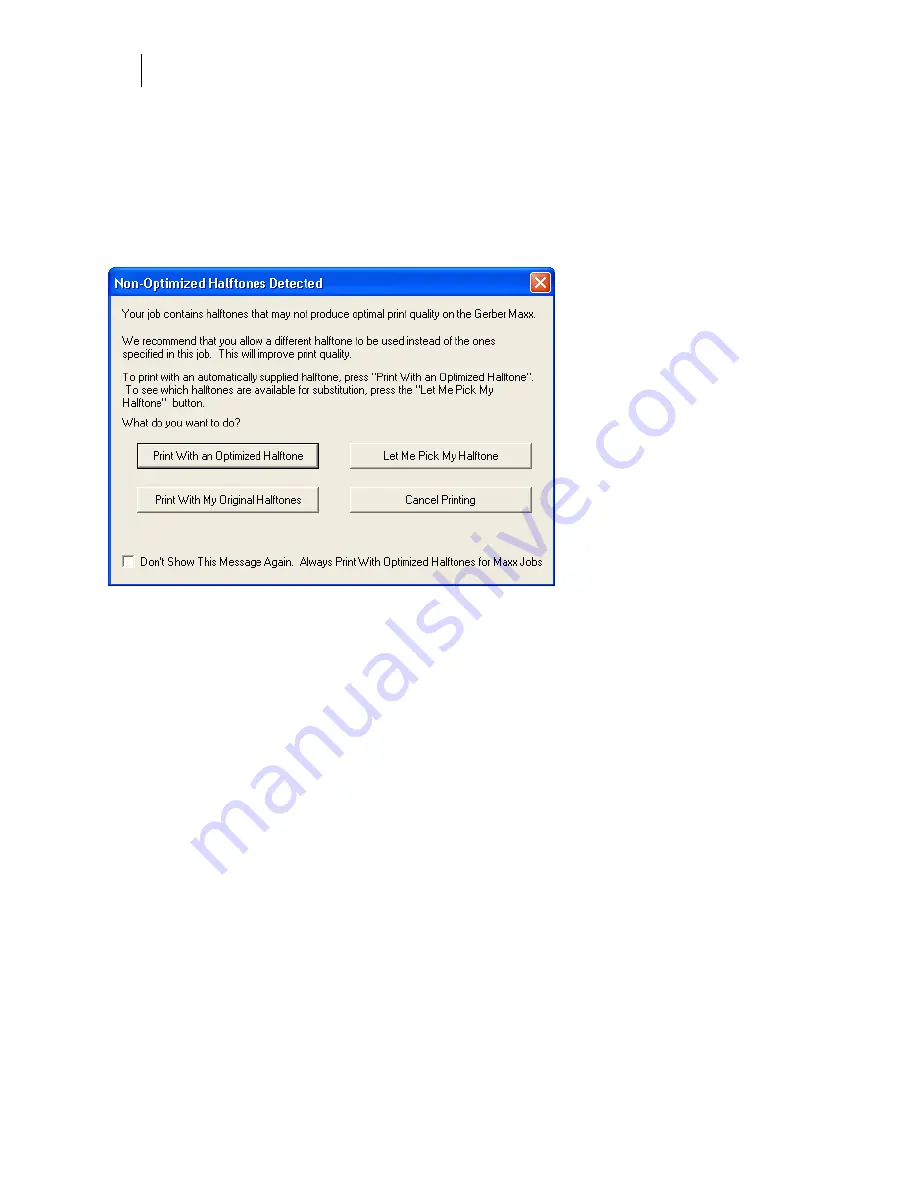
Non-Optimized Halftones Detected
When printing a job to the GERBER MAXX 2, GSPPlot automatically evaluates the halftones in
the job and determines if they are optimal. If the halftone dot is smaller than 35 LPI, the Non-
Optimized Halftones Detected dialog box displays. The dialog box provides several choices:
Print With an Optimized Halftone
directs GSPPlot to automatically substitute the existing
halftones with optimized GerberTone at 26 LPI for vector objects and special MAXX optimized
GerberTone at 25 LPI for images larger than 19 inches. Images that are smaller than 19 inches
are printed with optimized GerberTone with a variable LPI dependent on the size of the job and
the colors. Select this button if you are unsure of which halftone to use.
Print With My Original Halftones
directs GSPPlot to send the job to the MAXX 2 without
modification to the original halftone settings. Choose this option to print with halftones that are
smaller than 35 LPI.
Let Me Pick My Halftone
automatically opens the Substitute Halftone dialog box where you
can choose a different halftone and LPI setting.
Cancel Printing
stops printing. To print the job, you must send it to the GERBER MAXX 2
again.
Don’t Show This Message Again. Always Print With Optimized Halftones for MAXX Jobs
directs GSPPlot to automatically substitute existing halftones with optimized halftones. If the
option is turned on, the Non-Optimized Halftones Detected dialog box will not display when
the substitution occurs. Vector shapes will print using GerberTone at 26 LPI and images larger
than 19 inches will print using special MAXX GerberTone at 25 LPI.
Follow the instructions in the dialog box to continue printing. Depending on your work and the
appearance you are looking for, testing various halftone types and LPI may be the best way for
you to reach optimal print quality. Select the Print With an Optimized Halftone button if you
are unsure which halftone to use.
Summary of Contents for OMEGA CP
Page 16: ......
Page 20: ......
Page 36: ......
Page 42: ...28 Chapter 4 Saving Files...
Page 44: ......
Page 68: ......
Page 92: ......
Page 96: ...82 Chapter 7 Selecting Elements of the Design...
Page 98: ......
Page 132: ......
Page 146: ......
Page 154: ......
Page 162: ......
Page 182: ......
Page 188: ......
Page 204: ......
Page 234: ......
Page 238: ......
Page 244: ......
Page 254: ...240 Chapter 22 Strokes Adding Print Thickness to the Outline of Objects...
Page 256: ......
Page 282: ......
Page 320: ......
Page 346: ......
Page 358: ......
Page 380: ......
Page 386: ......
Page 418: ......
Page 422: ......
Page 452: ......
Page 462: ......
Page 476: ......
Page 512: ...498 Chapter 44 Creating Special Effects...
Page 514: ......
Page 520: ......
Page 530: ......
Page 540: ......
Page 552: ......
Page 564: ......
Page 606: ......
Page 614: ...600 Chapter 51 Sending the Job to a Plotter or Printer...
Page 694: ......
Page 700: ......
Page 734: ......
Page 748: ......
Page 760: ...746...
Page 776: ......
Page 786: ......
Page 790: ......


